Lightning Laxus (talk | contribs) No edit summary |
m (Updated details of trivia.) Tag: Visual edit |
||
| (37 intermediate revisions by 8 users not shown) | |||
| Line 8: | Line 8: | ||
| occupation = Professional gamer (formerly)<br/>Mech Pilot<br>Actress |
| occupation = Professional gamer (formerly)<br/>Mech Pilot<br>Actress |
||
| baseofoperations = [[Busan]], [[South Korea]] |
| baseofoperations = [[Busan]], [[South Korea]] |
||
| − | | affiliation = [[Mobile Exo-Force]] (South Korean Army) |
+ | | affiliation = [[Mobile Exo-Force|Mobile Exo-Force of the Korean Army (MEKA)]] (South Korean Army) |
| voice ={{VA stack |
| voice ={{VA stack |
||
|english= [[Charlet Chung]]<ref>2015-11-24, [https://www.facebook.com/charletchungofficial/posts/1658339417771691 "I AM D.VA"]. 'Facebook''. Accessed on 2016-05-18</ref> |
|english= [[Charlet Chung]]<ref>2015-11-24, [https://www.facebook.com/charletchungofficial/posts/1658339417771691 "I AM D.VA"]. 'Facebook''. Accessed on 2016-05-18</ref> |
||
| − | | other = Genevieve Doang (French)<br>Julia Meynen (German)<br>Martina Felli (Italian)<br/>Risa Taneda (Japanese)<br>Kim Hyeon-ji (Korean)<br>Juliana Vasconcelos (Brazilian Portuguese)<br>Melissa Gedeón (American Spanish)<br>Tania Ugía (European Spanish)<br>Tao Dian (Mandarin (China))}} |
+ | | other = Genevieve Doang (French)<br>Julia Meynen (German)<br>Martina Felli (Italian)<br/>Risa Taneda (Japanese)<br>Kim Hyeon-ji (Korean)<br>Juliana Vasconcelos (Brazilian Portuguese)<br>Melissa Gedeón (American Spanish)<br>Tania Ugía (European Spanish)<br>Tao Dian (Mandarin (China))<br>Mu Syuan-ming(Mandarin (Taiwan))}} |
| cosmetics = 1 |
| cosmetics = 1 |
||
| quotes = 1 |
| quotes = 1 |
||
| Line 23: | Line 23: | ||
==Overview== |
==Overview== |
||
| − | D.Va’s mech, Tokki is nimble and powerful — its twin Fusion Cannons blast away with autofire at short range, and she can use its Boosters to barrel over enemies and obstacles, or absorb attacks with her projectile- |
+ | D.Va’s mech, Tokki is nimble and powerful — its twin {{al|Fusion Cannons}} blast away with autofire at short range, and she can use its {{al|Boosters}} to barrel over enemies and obstacles, or absorb attacks with her projectile-destroying {{al|Defense Matrix}}. |
==Abilities== |
==Abilities== |
||
| ⚫ | |||
| − | {{Ability_details |
||
| + | * D.Va is invulnerable while ejecting.|ability_image=Passive-D.Va.png|ability_name=Eject!|ability_type=Passive Ability|cast_time=1.5 seconds|health=150 health|hero_info_description=D.Va's mech will automatically eject her when it reaches 1 Health. This forces D.Va into Pilot Form.|official_description=Eject out of your mech when it's destroyed.<!-- Likely remove this when hero_info_description is displayed more prominently-->}}{{Ability details|ability_details=* Damage per second: {{tt|44.00|0.6 * 11 / 0.15}} - {{tt|146.67|2 * 11 / 0.15}}|ability_image=Ability-dva1.png|ability_name=Fusion Cannons|ability_type=Weapon (Mech)|ability_video=jF4HHqnNgAY|ammo=∞|damage=0.6 - 2|damage_falloff_range=10 - 20 m|fire_rate=0.15 second recovery<br>{{tt|~6.67|1 / 0.15}} shots per second|headshot=✓|hero_info_description=Automatic short-range spread weapons.|mspeed={{tt|-40%|3.3 meters per second}} [[movement speed|penalty]], except when using {{al|Boosters}}|official_description=D.Va's mech is equipped with twin short-range rotating cannons. They lay down continuous, high-damage fire without needing to reload, but slow D.Va’s movement while they’re active.|pellets=11 per shot|shot_type={{proj|shotgun}} (hitscan)|spread=Constant: 4.15 degrees}}{{Ability details|ability_details=* Damage per second: {{tt|98.00|14 * 7}} while firing (this can also be considered as a '''burst''' DPS rate), {{tt|65.01|(14 * 20) / ((20 / 7) + 1.45)}} overall|ability_image=Ability-dva5.png|ability_name=Light Gun|ability_type=Weapon (Pilot)|ability_video=4pAUI5g_W08|ammo=20|damage=14|fire_rate=7 rounds per second|headshot=✓|hero_info_description=While outside of her mech, D.Va can continue the fight with a mid-range automatic blaster.|pspeed=50 meters per second|reload_time=1.45 seconds|shot_type={{proj|proj}}}}{{Ability details|ability_details=* D.Va cannot use {{al|Fusion Cannons}} while the ability is active. |
||
| − | | ability_name = Eject! |
||
| − | | ability_image = Passive-D.Va.png |
||
| − | | official_description = Eject out of your mech when it's destroyed.<!-- Likely remove this when hero_info_description is displayed more prominently--> |
||
| − | | hero_info_description = Eject out of your mech when it's destroyed. |
||
| − | | ability_type = Passive Ability |
||
| − | | cast_time = 1.5 seconds |
||
| − | | health = 150 health |
||
| − | | ability_details = |
||
| ⚫ | |||
| − | * D.Va is invulnerable while ejecting. |
||
| ⚫ | |||
| − | |||
| − | {{Ability_details |
||
| − | | ability_name = Fusion Cannons |
||
| − | | ability_image = Ability-dva1.png |
||
| − | | official_description = D.Va's mech is equipped with twin short-range rotating cannons. They lay down continuous, high-damage fire without needing to reload, but slow D.Va’s movement while they’re active. |
||
| − | | hero_info_description = Automatic short-range spread weapons. |
||
| − | | ability_type = Weapon (Mech) |
||
| − | | shot_type = {{proj|shotgun}} (hitscan) |
||
| − | | damage = 0.6–2 |
||
| − | | mspeed = {{tt|-40%|3.3 meters per second}} [[movement speed|penalty]], except when using Boosters |
||
| − | | damage_falloff_range = 10 to 20 meters |
||
| − | | pellets = 11 per shot |
||
| − | | fire_rate = 0.15 second recovery<br>~6.67 shots per second |
||
| − | | ammo = ∞ |
||
| − | | headshot = ✓ |
||
| − | | spread = Constant: 4.15 degrees |
||
| − | | ability_video = jF4HHqnNgAY |
||
| − | }} |
||
| − | |||
| − | {{Ability_details |
||
| − | | ability_name = Light Gun |
||
| − | | ability_image = Ability-dva5.png |
||
| − | | official_description = While outside of her mech, D.Va can continue the fight with a mid-range automatic blaster. |
||
| − | | ability_type = Weapon (Pilot) |
||
| − | | shot_type = {{proj|proj}} |
||
| − | | damage = 14 |
||
| − | | pspeed = 50 meters per second |
||
| − | | fire_rate = 7 rounds per second |
||
| − | | ammo = 20 |
||
| − | | reload_time = 1.45 seconds |
||
| − | | headshot = ✓ |
||
| − | | ability_video = 4pAUI5g_W08 |
||
| − | }} |
||
| − | |||
| − | {{Ability_details |
||
| − | | ability_name = Defense Matrix |
||
| − | | ability_image = Ability-dva3.png |
||
| − | | official_description = D.Va can activate this forward-facing targeting array to shoot incoming [[Projectile|projectiles]] out of the air. |
||
| − | | hero_info_description = Block projectiles in an area in front of you. |
||
| − | | ability_type = Ability (Mech) |
||
| − | | key = secondary fire |
||
| − | | range = 10 meters |
||
| − | | cooldown = 1 second |
||
| − | | duration = Up to 2 seconds<br>(when fully charged) |
||
| − | | ability_video = ZRBKIsTlTJw |
||
| − | | ability_details = |
||
| − | * D.Va cannot use {{al|Fusion Cannons}} while the ability is active. |
||
* Uses a resource meter that, after a 0.75 second delay, recharges at a rate of 16% per second. |
* Uses a resource meter that, after a 0.75 second delay, recharges at a rate of 16% per second. |
||
| + | * Takes 7 seconds to fully recharge.|ability_image=Ability-dva3.png|ability_name=Defense Matrix|ability_type=Ability (Mech)|ability_video=ZRBKIsTlTJw|cooldown=1 second|duration=Up to 2 seconds|hero_info_description=Block projectiles in an area in front of you.|key=secondary fire|official_description=D.Va can activate this forward-facing targeting array to shoot incoming [[Projectile|projectiles]] out of the air.|range=10 meters}}{{Ability details|ability_details=* The cooldown triggers after the {{al|Boosters}} ability ends. |
||
| − | * Takes 7 seconds to fully recharge. |
||
| − | }} |
||
| − | |||
| − | {{Ability_details |
||
| − | | ability_name = Boosters |
||
| − | | ability_image = Ability-dva2.png |
||
| − | | official_description = D.Va’s mech launches into the air, her momentum carrying her forward. She can turn and change directions or barrel through her enemies, knocking them back. |
||
| − | | hero_info_description = Fly in the direction you are facing. |
||
| − | | ability_type = Ability (Mech) |
||
| − | | shot_type = {{proj|melee}} |
||
| − | | key = ability 1 |
||
| − | | damage = 10 |
||
| − | | mspeed = {{tt|+118%|11.99 meters per second}} [[movement speed|buff]] |
||
| − | | range = Up to 23.98 meters |
||
| − | | cooldown = 4 seconds |
||
| − | | duration = Up to 2 seconds |
||
| − | | headshot = ✕ |
||
| − | | ability_video = tAyN2C_r1mI |
||
| − | | ability_details = |
||
* Cancelled upon using [[Melee|quick melee]]. |
* Cancelled upon using [[Melee|quick melee]]. |
||
| − | * {{tt|Does not affect {{al|Fusion Cannons}} or {{al|Micro Missiles}}' accuracy.|Although reticles with the 'show accuracy' option enabled suggest a spread increase when using the Boosters, it is a purely cosmetic change}} |
+ | * {{tt|Does not affect {{al|Fusion Cannons}} or {{al|Micro Missiles}}' accuracy.|Although reticles with the 'show accuracy' option enabled suggest a spread increase when using the {{al|Boosters}}, it is a purely cosmetic change}}|ability_image=Ability-dva2.png|ability_name=Boosters|ability_type=Ability (Mech)|ability_video=tAyN2C_r1mI|cooldown=4 seconds|damage=10|duration=Up to 2 seconds|headshot=✕|hero_info_description=Fly in the direction you are facing.|key=ability 1|mspeed={{tt|+118%|11.99 meters per second}} [[movement speed|buff]]|official_description=D.Va’s mech launches into the air, her momentum carrying her forward. She can turn and change directions or barrel through her enemies, knocking them back.|range=Up to {{tt|23.98 meters|11.99 meters per second * 2 second maximum duration}}|shot_type={{proj|melee}}}}{{Ability details|ability_details=* Deals up to 126 total damage. (8.18% ultimate charge) |
| − | }} |
||
| − | |||
| − | {{Ability_details |
||
| − | | ability_name = Micro Missiles |
||
| − | | ability_image = Ability-dva7.png |
||
| − | | official_description = D.Va launches a volley of explosive rockets. |
||
| − | | hero_info_description = Launch a volley of explosive rockets. |
||
| − | | ability_type = Ability (Mech) |
||
| − | | shot_type = {{proj|proj}} |
||
| − | | key = ability 2 |
||
| − | | damage = Direct hit: 7 per missile<br>Splash: 1 - 4 per missile<br>Self: 1 - 4 per missile |
||
| − | | radius = 1.5 meter radius |
||
| − | | pspeed = 40 meters per second |
||
| − | | fire_rate = 11 missiles per second |
||
| − | | ammo = 18 |
||
| − | | cast_time = 0.25 seconds |
||
| − | | cooldown = 8 seconds |
||
| − | | headshot = ✕ |
||
| − | | ability_details = |
||
| − | * Deals up to 126 total damage. |
||
* Can be used alongside {{Al|Fusion Cannons}}. |
* Can be used alongside {{Al|Fusion Cannons}}. |
||
| + | * Cannot be manually cancelled.|ability_image=Ability-dva7.png|ability_name=Micro Missiles|ability_type=Ability (Mech)|ammo=18|cast_time=0.25 seconds|cooldown=8 seconds|damage=Direct hit: 7 per missile<br>Splash: 1 - 4 per missile<br>Self: 1 - 4 per missile|fire_rate=11 missiles per second|headshot=✕|hero_info_description=Launch a volley of explosive rockets.|key=ability 2|official_description=D.Va launches a volley of explosive rockets.|pspeed=40 meters per second|radius=1.5 meter radius|shot_type={{proj|proj}}}}{{Ability details|ability_details= |
||
| − | * Cannot be manually cancelled. |
||
| + | * The detonating mech retains the momentum from {{al|Boosters}}.|ability_image=Ability-dva4.png|ability_name=Self-Destruct|ability_type=Ultimate Ability (Mech)|ability_video=lkeeAn7uitE|cast_time=3-second fuse|damage=100 - 1000|headshot=✕|hero_info_description=Eject and overload your mech, causing it to explode after a short time.|official_description=D.Va ejects from her mech and sets its reactor to explode, dealing massive damage to nearby opponents.|radius=20 meter radius|shot_type={{proj|aoe}}|ult_req=1540 points}}{{Ability details|ability_details= |
||
| − | }} |
||
| − | |||
| − | {{Ability_details |
||
| − | | ability_name = Self-Destruct |
||
| − | | ability_image = Ability-dva4.png |
||
| − | | official_description = D.Va ejects from her mech and sets its reactor to explode, dealing massive damage to nearby opponents. |
||
| − | | hero_info_description = Eject and overload your mech, causing it to explode after a short time. |
||
| − | | ability_type = Ultimate Ability (Mech) |
||
| − | | shot_type = {{proj|aoe}} |
||
| − | | damage = 100-1000 |
||
| − | | radius = 20 meter radius |
||
| − | | headshot = ✕ |
||
| − | | ult_req = 1540 points |
||
| − | | cast_time = 3 seconds fuse |
||
| − | | ability_video = lkeeAn7uitE |
||
| − | | ability_details = |
||
| − | * The detonating mech retains the momentum from {{al|Boosters}}. |
||
| − | }} |
||
| − | |||
| − | {{Ability_details |
||
| − | | ability_name = Call Mech |
||
| − | | ability_image = Ability-dva6.png |
||
| − | | official_description = If her armored battle suit is destroyed, D.Va can call down a fresh mech and return to the fray. |
||
| − | | hero_info_description = Call down a new mech. |
||
| − | | ability_type = Ultimate Ability (Pilot) |
||
| − | | health = 400 health<br>200 armor |
||
| − | | damage = 250 |
||
| − | | headshot = ✕ |
||
| − | | cast_time = 2 seconds |
||
| − | | ult_req = 319.2 points <!---Yes, it is really 319.2. Do not change to 320.---> |
||
| − | | ability_video = ADjl9-8uCoQ |
||
| − | | ability_details = |
||
* Becomes completely charged after {{al|Self-Destruct}} detonates, or if D.Va is {{al|Resurrect|Resurrected}}. |
* Becomes completely charged after {{al|Self-Destruct}} detonates, or if D.Va is {{al|Resurrect|Resurrected}}. |
||
| + | * Automatically reloads the {{al|Light Gun}}.|ability_image=Ability-dva6.png|ability_name=Call Mech|ability_type=Ultimate Ability (Pilot)|ability_video=ADjl9-8uCoQ|cast_time=2 seconds|damage=250|range=2.5 meters|headshot=✕|health=300 health<br>300 armor|hero_info_description=Call down a new mech.|official_description=If her armored battle suit is destroyed, D.Va can call down a fresh mech and return to the fray.|ult_req=319.2 points <!---Yes, it is really 319.2. Do not change to 320.--->}} |
||
| − | * Automatically reloads the {{al|Light Gun}}. |
||
| − | }} |
||
==Strategy== |
==Strategy== |
||
| − | D.Va is a unique tank with some mobility. With very high health and Boosters, she can close a gap to the enemy with ease. She has high damage output at close-range, making her a strong fighter in a 1-on-1 match. Her Defense Matrix is useful against all incoming projectiles, protecting her teammates from enemy fire. The Micro Missiles deal high amount of damage when used in close range. She is a dangerous |
+ | D.Va is a unique tank with some mobility. With very high health and {{al|Boosters}}, she can close a gap to the enemy with ease. She has high damage output at close-range, making her a strong fighter in a 1-on-1 match. Her {{al|Defense Matrix}} is useful against all incoming projectiles, protecting her teammates from enemy fire. The {{al|Micro Missiles}} deal high amount of damage when used in close range. She is a dangerous flanker in the [[Roles#Tank|Tank]] class, dealing consistent damage to the enemy. {{al|Self-Destruct}} will wipe all opponents within the blast area. However, she doesn't have an extended barrier to properly protect her team like [[Reinhardt]]. She is also slow while firing, allowing the enemy to outrun her to disengage or move around her to distract her aiming. Both {{al|Fusion Cannons}} and {{al|Micro Missiles}} are ineffective against anything further than medium-range, meaning she can be outranged by the enemy before she even has a chance to close a gap with {{al|Boosters}}. |
===Weapons & Abilities=== |
===Weapons & Abilities=== |
||
| − | *''' |
+ | *'''{{al|Fusion Cannons}}:''' D.Va's main weapons on the mech. Her mech can fire consistent shotgun-like bullets onto the targeted point. She can rapidly fire her bullets without needing to reload, but suffers from slow movement while firing. |
| − | **While firing her Fusion Cannons, D.Va's movement speed is reduced by 40%. |
+ | **While firing her {{al|Fusion Cannons}}, D.Va's movement speed is reduced by 40%, down to 3.3 m/s. |
| − | **Fusion Cannons have 11 bullets per shot and large spreading; position yourself to the closest of the targets so that they won't be able to escape from you while firing. |
+ | **{{al|Fusion Cannons}} have 11 bullets per shot and large spreading; position yourself to the closest of the targets so that they won't be able to escape from you while firing. |
**Aiming for the upper-body is recommended due to the nature of spread in combination with infinite ammo. |
**Aiming for the upper-body is recommended due to the nature of spread in combination with infinite ammo. |
||
| − | **Spraying the bullets at mid-to-long range has little to no effect, but it can pressure the enemy and sometimes interrupt some certain abilities when hit, like [[Mercy]]'s self-healing and [[Sombra]]'s Stealth. |
+ | **Spraying the bullets at mid-to-long range has little to no effect, but it can pressure the enemy and sometimes interrupt some certain abilities when hit, like [[Mercy]]'s [[Mercy#Regeneration|self-healing]] and [[Sombra]]'s {{al|Stealth}}. |
| + | **The {{al|Light Gun}} does not have damage falloff, and is actually more effective than the {{al|Fusion Cannons}} at long range. |
||
| − | *''' |
+ | *'''{{al|Defense Matrix}}:''' D.Va's primary defensive ability. When activated, the targeting-array will pop up from the front of her mech. All incoming projectiles will be shot down mid-air when they come into range of this ability. D.Va cannot attack with her {{al|Fusion Cannons}} while using it. |
| − | **While Defense Matrix has infinite "health" and can block any number of projectiles, it only lasts for 2 seconds when used continuously, and requires 1 second before beginning a recharge. Try to use it as a quick-burst protection instead of as a main blocking tool like the barriers of Reinhardt or Sigma. |
+ | **While {{al|Defense Matrix}} has infinite "health" and can block any number of projectiles, it only lasts for 2 seconds when used continuously, and requires 1 second before beginning a recharge. Try to use it as a quick-burst protection instead of as a main blocking tool like the barriers of [[Reinhardt]] or [[Sigma]]. |
| − | **If some hero rushes into a group of enemies, use Defense Matrix to cover your allies when needed. For example, cover Winston when he jumps in or cover Pharah when she is using her ultimate. You can protect your teammates with Defense Matrix without needing to be right next to them thanks to its long range. Keep its short duration in mind; try not to spend all of its charge and leaving yourself as the enemy's main target. |
+ | **If some hero rushes into a group of enemies, use {{al|Defense Matrix}} to cover your allies when needed. For example, cover [[Winston]] when he jumps in or cover [[Pharah]] when she is using [[Pharah#Barrage|her ultimate]]. You can protect your teammates with {{al|Defense Matrix}} without needing to be right next to them thanks to its long range. Keep its short duration in mind; try not to spend all of its charge and leaving yourself as the enemy's main target. |
| − | **Defense Matrix only blocks fire from the front, and cannot prevent incoming projectiles from other directions, making it ineffective against flankers and less viable when used as a barrier to protect her team or herself. |
+ | **{{al|Defense Matrix}} only blocks fire from the front, and cannot prevent incoming projectiles from other directions, making it ineffective against flankers and less viable when used as a barrier to protect her team or herself. |
| − | **Keep playing a mind game; try to lure some heroes like Zarya or Mei into thinking that you have run out of Defense Matrix so that you can use it to block their Ultimate. D.Va's Defense Matrix is very useful to erase a powerful ultimate if timed properly. |
+ | **Keep playing a mind game; try to lure some heroes like [[Zarya]] or [[Mei]] into thinking that you have run out of {{al|Defense Matrix}} so that you can use it to block their [[Ultimate ability|Ultimate]]. D.Va's {{al|Defense Matrix}} is very useful to erase a powerful ultimate if timed properly. |
| − | **When retreating from a group of enemies, activating Defense Matrix while moving backward will greatly help D.Va to survive a strong attack. |
+ | **When retreating from a group of enemies, activating {{al|Defense Matrix}} while moving backward will greatly help D.Va to survive a strong attack. |
| − | *''' |
+ | *'''{{al|Boosters}}:''' When activated, D.Va's mech will launch into the air. She will move forward with faster movement speed and be able to adjust her momentum for 2 seconds. Deals damage and knockback to enemies when collided with. {{al|Fusion Cannons}} are available to use during [[D.Va#Boosters|Boosters]]. |
| − | **The cooldown triggers after Boosters ends. |
+ | **The cooldown triggers after the {{al|Boosters}} ability ends. |
**Despite its small damage, it can still be used with a melee combo to guarantee a strong knockback and decent damage dealt. |
**Despite its small damage, it can still be used with a melee combo to guarantee a strong knockback and decent damage dealt. |
||
| − | **Using Boosters in combination with Fusion Cannons can guarantee a kill on injured enemies who are trying to retreat. |
+ | **Using {{al|Boosters}} in combination with {{al|Fusion Cannons}} can guarantee a kill on injured enemies who are trying to retreat. |
| − | **D.Va can activate Defense Matrix during the flight to protect herself from enemy fire. |
+ | **D.Va can activate {{al|Defense Matrix}} during the flight to protect herself from enemy fire. |
| − | **Boosters can be stopped mid-use by a melee attack or Boosters' key again. |
+ | **{{al|Boosters}} can be stopped mid-use by a [[Melee|melee attack]] or {{al|Boosters}}' key again. |
| − | *''' |
+ | *'''{{al|Micro Missiles}}:''' When activated, D.Va's mech will launch a volley of missiles after a short cast time. The missiles will travel in a straight line and hit the first solid target. The ability can be activated in all actions and can't be stopped until D.Va is stunned or the mech is destroyed. The missiles ''can'' damage the D.Va who fired them. |
**Combining the ability with primary fire can ensure a kill on an isolated enemy. It is less effective when used on a group of enemies, but still provides a strong pressure and enough damage to gain a great amount of [[Ultimate Meter|ultimate charge]]. |
**Combining the ability with primary fire can ensure a kill on an isolated enemy. It is less effective when used on a group of enemies, but still provides a strong pressure and enough damage to gain a great amount of [[Ultimate Meter|ultimate charge]]. |
||
| − | **Since it can be activated at any time, consider using it when Defense Matrix is activated. This will render the enemy's attack useless and hurt them with a bunch of missiles. |
+ | **Since it can be activated at any time, consider using it when {{al|Defense Matrix}} is activated. This will render the enemy's attack useless and hurt them with a bunch of missiles. |
**Try not to waste the ability on a hero with a stun attack, since a stun effect can interrupt the missiles immediately. |
**Try not to waste the ability on a hero with a stun attack, since a stun effect can interrupt the missiles immediately. |
||
**It's better not to use missiles apart from close range. The missiles travel at a slow speed and only deal small damage upon impact. Additionally, the enemy team can easily see it coming from afar and walk a step back to dodge it. |
**It's better not to use missiles apart from close range. The missiles travel at a slow speed and only deal small damage upon impact. Additionally, the enemy team can easily see it coming from afar and walk a step back to dodge it. |
||
| + | |||
| − | *''' |
+ | *'''{{al|Self-Destruct}}: (Ultimate):''' The ultimate of D.Va's mech. D.Va will eject from her mech, which will detonate after 3 seconds. It deals massive damage upon explosion in a very large area around it. |
| − | **The mech will receive any momentum from |
+ | **The mech will receive any momentum from {{al|Boosters}} if they were used prior to activating {{al|Self-Destruct}}. Use this to launch it in the right direction, and even to stall its travel around corners and catch enemies by surprise. |
**The blast creates a strong knockback effect on any opponents that survive, sometimes launching them into a pit or off a cliff. |
**The blast creates a strong knockback effect on any opponents that survive, sometimes launching them into a pit or off a cliff. |
||
| − | **Any cover will block the damage from Self-Destruct entirely; even a light post that is large enough to cover the hero's size will allow them to survive the blast. |
+ | **Any cover will block the damage from {{al|Self-Destruct}} entirely; even a light post that is large enough to cover the hero's size will allow them to survive the blast. |
| − | **Succeeding in using Self-Destruct's explosion will fully charge D.Va's Call Mech ability. However, if your mech is blown off a cliff while the countdown is still going, you will '''not''' gain any ultimate charge. |
+ | **Succeeding in using {{al|Self-Destruct}}'s explosion will fully charge D.Va's {{al|Call Mech}} ability. However, if your mech is blown off a cliff while the countdown is still going, you will '''not''' gain any ultimate charge. |
| − | **After her mech takes critical damage, there is a brief window between the damage being taken and her ejecting from the cockpit where an ultimate can be used to cause the mech to detonate rather than simply being destroyed. This will also give her a full |
+ | **After her mech takes critical damage, there is a brief window between the damage being taken and her ejecting from the cockpit where an ultimate can be used to cause the mech to detonate rather than simply being destroyed. This will also give her a full {{al|Call Mech}} ultimate charge. |
| − | *''' |
+ | *'''{{al|Light Gun}}:''' D.Va's main weapon after her mech is destroyed. The {{al|Light Gun}} deals considerable damage with fast (but not hitscan) projectile bullets. |
| − | **The weapon is very accurate at most ranges. D.Va can use |
+ | **The weapon is very accurate at most ranges. D.Va can use while kiteing enemies and charge her ultimate meter to call a new mech. |
**With her small hitbox, D.Va can dance around and kite the enemy, using the weapon's projectile nature to cut off the enemy's escape routes. Keep in mind that you have low survivability and lack movement options in pilot form, though. |
**With her small hitbox, D.Va can dance around and kite the enemy, using the weapon's projectile nature to cut off the enemy's escape routes. Keep in mind that you have low survivability and lack movement options in pilot form, though. |
||
| − | **The Light Gun does not have damage falloff, and is actually more effective than the Fusion |
+ | **The {{al|Light Gun}} does not have damage falloff, and is actually more effective than the {{al|Fusion Cannons}} at long range. |
| − | *''' |
+ | *'''{{al|Call Mech}}: (Ultimate):''' D.Va can call a new mech after her previous one is destroyed. |
| − | **The mech will deal |
+ | **The mech will deal considerable damage around it upon impact, killing any low health character. However, you must make sure that you can safely return to the mech. |
**The ability creates a strong knockback upon cast. It can launch the enemy to an environmental kill. |
**The ability creates a strong knockback upon cast. It can launch the enemy to an environmental kill. |
||
**Both D.Va and her mech can be damaged or killed while she is entering the mech. |
**Both D.Va and her mech can be damaged or killed while she is entering the mech. |
||
**When not fully operating the mech, any damage being dealt to you will not transfer to ultimate charge for your enemies. |
**When not fully operating the mech, any damage being dealt to you will not transfer to ultimate charge for your enemies. |
||
| + | |||
===General Strategies=== |
===General Strategies=== |
||
| − | *While D.Va is considered a Tank, a lot of successful D.Va players use her like [[Reaper]]. |
+ | *While D.Va is considered a [[Roles#Tank|Tank]], a lot of successful D.Va players use her like [[Reaper]]. Flanking and harassing are some of D.Va's strong suits. Her high damage output at close range coupled with her {{al|Boosters}} movement ability makes it easy for her to get "shotgun-like" damage in and escape with ease. |
| − | *Defense Matrix is especially strong against most damage dealers. It can even negate a dangerous bullet from McCree's Deadeye or even Pharah's Barrage. |
+ | *{{al|Defense Matrix}} is especially strong against most damage dealers. It can even negate a dangerous bullet from [[McCree]]'s {{al|Deadeye}} or even [[Pharah]]'s {{al|Barrage}}. |
| − | *You can close the gap on most heroes with Boosters, but you will be susceptible to enemy fire while airborne. Defense Matrix can be used during Boosters, so activate it while flying towards a target that's shooting at you. |
+ | *You can close the gap on most heroes with {{al|Boosters}}, but you will be susceptible to enemy fire while airborne. {{al|Defense Matrix}} can be used during {{al|Boosters}}, so activate it while flying towards a target that's shooting at you. |
*You need to prioritize protecting the team from flankers and snipers, potentially by rushing them down at close range. Snipers are your first target since they are vulnerable at close range followed by other damage dealers depending on the situation and their position. |
*You need to prioritize protecting the team from flankers and snipers, potentially by rushing them down at close range. Snipers are your first target since they are vulnerable at close range followed by other damage dealers depending on the situation and their position. |
||
| − | *It is not recommended to play D.Va |
+ | *It is not recommended to play D.Va without a shield tank on your team due to her own lack of shield and the short duration of {{al|Defense Matrix}}. She can't offensively eliminate an entire enemy team by herself like a Damage hero, and she can't provide extended cover like a shield tank such as [[Reinhardt]] or [[Orisa]], but she can alternate between the two roles in short, well-timed bursts. |
| − | *Strategize where and when to place a Self-Destructing |
+ | *Strategize where and when to place a {{al|Self-Destruct|Self-Destructing}} mech. The 3 seconds countdown of {{al|Self-Destruct}} is long enough for your enemies to find cover or get behind a friendly Barrier. One effective tool is to use {{al|Boosters}} before {{al|Self-Destruct}} to send the [[Ultimate]] out from a blind spot towards a place where there is less cover. |
| − | *D.Va's high damage in her |
+ | *D.Va's high damage in her mech is useful against Tanks. Due to their large size and slow speed, the burst damage of {{al|Micro Missiles}} and {{al|Fusion Cannons}} can chew through a lot of health. |
| − | *Even though Defense Matrix will destroy all projectiles, it will not absorb beams such as Zarya's Particle Cannon, Mei's Endothermic Blaster, Moira's Biotic Grasp, or Symmetra's Photon Projector. |
+ | *Even though {{al|Defense Matrix}} will destroy all projectiles, it will not absorb beams such as [[Zarya]]'s {{al|Particle Cannon}}, [[Mei]]'s {{al|Endothermic Blaster}}, [[Moira]]'s {{al|Biotic Grasp}}, or [[Symmetra]]'s {{al|Photon Projector}}. |
| − | *D.Va has a large critbox in front of her |
+ | *D.Va has a large critbox in front of her mech (the cockpit). You will receive critical damage easier than most heroes, so avoid turning your mech to face oncoming fire without {{al|Defense Matrix}} active. |
| − | *Ramming an enemy with Boosters deals damage in addition to mild knockback, which may be enough to finish off a low-health opponent. |
+ | *Ramming an enemy with {{al|Boosters}} deals damage in addition to mild knockback, which may be enough to finish off a low-health opponent. |
| − | **If you melee attack an enemy player while D.Va's Boosters are active, you will deal greatly increased damage and knockback to the target, allowing easy environmental kills. |
+ | **If you [[Melee|melee]] attack an enemy player while D.Va's {{al|Boosters}} are active, you will deal greatly increased damage and knockback to the target, allowing easy environmental kills. |
| − | *When out of the suit, D.Va's primary goal is to score as many headshots as possible, as fast as possible, to call her next |
+ | *When out of the suit, D.Va's primary goal is to score as many headshots as possible, as fast as possible, to call her next mech. You may want to target a distant, large enemy such as [[Roadhog]] or an enemy D.Va to regain your ultimate charge. |
== Match-Ups and Team Synergy == |
== Match-Ups and Team Synergy == |
||
| Line 237: | Line 113: | ||
|- |
|- |
||
|<center>[[Image:icon-dva.png|75px|link=http://overwatch.gamepedia.com/D.Va]]<br />[[D.Va]]</center> |
|<center>[[Image:icon-dva.png|75px|link=http://overwatch.gamepedia.com/D.Va]]<br />[[D.Va]]</center> |
||
| + | |<small>D.Va mirror matches are extremely bizarre. Both of you are going to try to act smart and fight around each others' {{al|Defense Matrix}}. |
||
| − | | |
+ | Don't use more than {{tt|0.364 seconds|2 - (18 / 11) seconds}}, or {{tt|18.2%|(100 * (2 - (18 / 11)) / 2)%}}, of your {{al|Defense Matrix}} at any point. This is so that you are always able to counter the opponent's {{al|Micro Missiles}} should they use them. Don't fire your {{al|Micro Missiles}} until you're sure your opponent has crossed this threshold, and remember that {{al|Micro Missiles}} deal 126 damage in total, so use them when most of their matrix is gone if possible. If your opponent is blocking your attacks, do ''not'' stop firing. Your ammo is infinite; her {{al|Defense Matrix}} is not. Eventually her {{al|Defense Matrix}} will drop, and she will be completely out of luck, especially if your teammates show up to join the fight. While they matrix your shots, get in close and use [[Melee|melee attacks]] to put in damage. Generally speaking, though, it's a bad idea to fight with another D.Va unless you're certain she has low health. She might not kill you, but she'll waste a ''lot'' of your time that should be spent helping your team, so it's better to retreat and have her either disengage or chase you back to meet your team and a gruesome end. If the other D.Va loses her mech, just activate {{al|Defense Matrix}} while she fires [[D.Va#Light Gun|her gun]], because now she has to reload while you don't. As soon as she starts reloading, start shooting. Some good unblocked shots will make you lose your mech if you're not careful - a baby D.Va can take you out with {{tt|25 headshots|ceil(300 / ((14 * 2) - 5)) + ceil(300 / (14 * 2)) (head)shots}}, or in {{tt|5.02 seconds|(25 / 7) + 1.45 seconds}}, but play it right and you can take her out. If you lose your mech first, try to disengage. Backpedal and continue firing, trying to regroup with your team. If she activates {{al|Defense Matrix}}, stop firing and reload; this will make her drop her {{al|Defense Matrix}}, but by then you'll have reloaded and you can fire again. |
|<small>D.Va has no notable team synergy with another D.Va.</small> |
|<small>D.Va has no notable team synergy with another D.Va.</small> |
||
|- |
|- |
||
|<center>[[Image:icon-orisa.png|75px|link=http://overwatch.gamepedia.com/Orisa]]<br />[[Orisa]]</center> |
|<center>[[Image:icon-orisa.png|75px|link=http://overwatch.gamepedia.com/Orisa]]<br />[[Orisa]]</center> |
||
| − | |<small>Orisa's |
+ | |<small>[[Orisa|Orisa's]] {{al|Protective Barrier|Protective Barriers}} are capable of consistently keeping her team safe from you, and thanks to {{al|Fortify}}, quickly gunning [[Orisa]] down can prove to be difficult. However, your {{al|Defense Matrix}} can absorb her primary fire, making most fights with her come down to a standstill. While she can produce barriers rather frequently, they're somewhat flimsy, which means that if you and your team apply enough pressure you can shatter it and move in on [[Orisa]] and her team. If fighting in an area with pits, don't use your {{al|Boosters}} too frequently; if [[Orisa]] tries to use {{al|Halt!}} to pull you into one, you'll want to be able to quickly fly out. When [[Orisa]] deploys her {{al|Supercharger}}, you can often fly right past any defenses set up around it to quickly gun it down; just be careful, since the enemy team may take the opportunity to attack you if you charge right into them only to not focus on them. Be careful when deploying {{al|Self-Destruct}}; wait until after an enemy [[Orisa]] is dead or until right when she deploys her barrier, because if she can quickly drop a barrier to block its blast, she will. |
| − | |<small>A sturdy Orisa as your teammate frees you up to play as a more aggressive Tank. With that in mind, don't leave her to fend for herself; once you've picked off any flankers or lone enemies, try to stay by your Orisa to make sure she isn't ambushed, since she's not as handy as you are in a close range fight.</small> |
+ | |<small>A sturdy [[Orisa]] as your teammate frees you up to play as a more aggressive [[Roles#Tank|Tank]]. With that in mind, don't leave her to fend for herself; once you've picked off any flankers or lone enemies, try to stay by your [[Orisa]] to make sure she isn't ambushed, since she's not as handy as you are in a close range fight.</small> |
|- |
|- |
||
|<center>[[Image:icon-reinhardt.png|75px|link=http://overwatch.gamepedia.com/Reinhardt]]<br />[[Reinhardt]]</center> |
|<center>[[Image:icon-reinhardt.png|75px|link=http://overwatch.gamepedia.com/Reinhardt]]<br />[[Reinhardt]]</center> |
||
| − | |<small>Your quick mobility, ramming potential, and burst-fire capabilities may allow you to chase down a lone Reinhardt and quickly finish him off. Conversely, if Reinhardt is chasing after you, fly away and he will be incapable of catching up. Using Boosters to fly into Reinhardt can also distract him just enough for your team to advance and attack his teammates, whom he is no longer protecting. However, be wary that Reinhardt can block your Self-Destruct with his barrier. It is therefore best to save Self-Destruct until the opposing Reinhardt is dead, his barrier is shattered, or an ally is able to disrupt him and force him to drop his barrier. |
+ | |<small>Your quick mobility, ramming potential, and burst-fire capabilities may allow you to chase down a lone [[Reinhardt]] and quickly finish him off. Conversely, if [[Reinhardt]] is chasing after you, fly away and he will be incapable of catching up. Using {{al|Boosters}} to fly into [[Reinhardt]] can also distract him just enough for your team to advance and attack his teammates, whom he is no longer protecting. However, be wary that [[Reinhardt]] can block your {{al|Self-Destruct}} with his barrier. It is therefore best to save {{al|Self-Destruct}} until the opposing [[Reinhardt]] is dead, his barrier is shattered, or an ally is able to disrupt him and force him to drop his barrier. |
| − | |<small>As D.Va lacks any capability to produce shields, a friendly Reinhardt can cover your role as a primary Tank while you block large-impact attacks and chase after enemies Reinhardt is incapable of pursuing. The stun of Earthshatter is an excellent setup to safely perform a team-wipe with Self-Destruct.</small> |
+ | |<small>As D.Va lacks any capability to produce shields, a friendly [[Reinhardt]] can cover your role as a primary [[Roles#Tank|Tank]] while you block large-impact attacks and chase after enemies [[Reinhardt]] is incapable of pursuing. The stun of {{al|Earthshatter}} is an excellent setup to safely perform a team-wipe with {{al|Self-Destruct}}.</small> |
|- |
|- |
||
|<center>[[Image:icon-roadhog.png|75px|link=http://overwatch.gamepedia.com/Roadhog]]<br />[[Roadhog]]</center> |
|<center>[[Image:icon-roadhog.png|75px|link=http://overwatch.gamepedia.com/Roadhog]]<br />[[Roadhog]]</center> |
||
| − | |<small>Roadhog fights are extremely unfortunate, because your Defense Matrix does ''not'' stop his |
+ | |<small>[[Roadhog]] fights are extremely unfortunate, because your {{al|Defense Matrix}} does ''not'' stop his {{al|Chain Hook}}. If you get hooked, do not start fighting back. Instead, ''immediately'' hit your {{al|Boosters}}, turn around, and fly back to your team. Chances are you'll survive the encounter, but if you play by his game and fight him after being hooked, he can potentially destroy your mech in two shots if he gets a headshot. Even if he misses the hook and you're in a 1 on 1 situation, his self-heal from {{al|Take a Breather}} will allow him to outlast you, and eventually you'll lose your mech, at which point you're easy pickings. While you aren't much help against [[Roadhog]] in a 1 on 1 fight, you're much more helpful in a group fight. {{al|Defense Matrix}}'s strong point comes when your allies are hooked by [[Roadhog]]; quickly boosting in and activating {{al|Defense Matrix}} can save a hooked ally from a grizzly end. This will require quick reaction time, so when the opponent has a [[Roadhog]] and you're entering a group-fight, you should always have {{al|Boosters}} and {{al|Defense Matrix}} at the ready. When out of your mech, only fight [[Roadhog]] at ''extremely'' safe range. If you get in his hook's range, he will grab you and end you, but if you keep your distance, he can't do anything but soak up damage while you quickly build back up your {{al|Call Mech}} Ultimate. |
| − | |<small>Teaming up a D.Va and Roadhog will result in your team lacking heavily in protection. However, among the Tanks, D.Va and Roadhog are also arguably the most offensively powerful. With the right team comp that focuses more on barreling through an enemy line rather than slowly pushing and protecting your team, you can pick off key targets while your Damage allies finish off any stragglers.</small> |
+ | |<small>Teaming up a D.Va and [[Roadhog]] will result in your team lacking heavily in protection. However, among the [[Roles#Tanks]], D.Va and [[Roadhog]] are also arguably the most offensively powerful. With the right team comp that focuses more on barreling through an enemy line rather than slowly pushing and protecting your team, you can pick off key targets while your [[Roles#Damage|Damage]] allies finish off any stragglers.</small> |
|- |
|- |
||
|<center>[[Image:icon-sigma.png|75px|link=http://overwatch.gamepedia.com/Sigma]]<br />[[Sigma]]</center> |
|<center>[[Image:icon-sigma.png|75px|link=http://overwatch.gamepedia.com/Sigma]]<br />[[Sigma]]</center> |
||
| − | |<small>Sigma's Kinetic Grasp is very similar to your own Defense Matrix; the main differences between the two is that Kinetic Grasp has a lengthy cooldown compared to your rechargeable meter, and that projectiles absorbed by Kinetic Grasp are converted to shields for the enemy Sigma. When Sigma has Kinetic Grasp active, be careful not to fire at him; instead, charge him with your Boosters, or stick with your team and prepare to attack once the ability concludes. While it's best to try to fight around Sigma's Experimental Barrier, if the barrier is active but his team isn't nearby, you can take a second to attack and shatter the barrier while it's out in the open. If you do this and run into Sigma shortly after, he'll be down a barrier and therefore be less capable of protecting his team and himself. When Sigma activates Gravitic Flux, it may be wise to fly up and away from your team, rather than backpedaling together with them and making yourselves easy targets; the high speed of your Boosters may also help you escape the rim of the ability just before it attempts to lift you. |
+ | |<small>[[Sigma]]'s {{al|Kinetic Grasp}} is very similar to your own {{al|Defense Matrix}}; the main differences between the two is that {{al|Kinetic Grasp}} has a lengthy cooldown compared to your rechargeable meter, and that projectiles absorbed by {{al|Kinetic Grasp}} are converted to shields for the enemy [[Sigma]]. When [[Sigma]] has {{al|Kinetic Grasp}} active, be careful not to fire at him; instead, charge him with your {{al|Boosters}}, or stick with your team and prepare to attack once the ability concludes. While it's best to try to fight around [[Sigma]]'s {{al|Experimental Barrier}}, if the barrier is active but his team isn't nearby, you can take a second to attack and shatter the barrier while it's out in the open. If you do this and run into [[Sigma]] shortly after, he'll be down a barrier and therefore be less capable of protecting his team and himself. When [[Sigma]] activates {{al|Gravitic Flux}}, it may be wise to fly up and away from your team, rather than backpedaling together with them and making yourselves easy targets; the high speed of your {{al|Boosters}} may also help you escape the rim of the ability just before it attempts to lift you. |
| − | |<small>With a friendly Sigma on your team, you'll have an incredibly easy time negating incoming projectiles and covering each other's bases. That being said, you'll have a much greater difficulty against beam weapons such as |
+ | |<small>With a friendly [[Sigma]] on your team, you'll have an incredibly easy time negating incoming projectiles and covering each other's bases. That being said, you'll have a much greater difficulty against beam weapons such as those of [[Zarya]] and [[Symmetra]]. Try to do your fair share of absorbing projectiles and don't put the burden of protection on your friendly [[Sigma]]; if his {{al|Experimental Barrier}} goes down, both he and your team will be far more fragile. </small> |
|- |
|- |
||
|<center>[[Image:icon-wrecking_ball.png|75px|link=http://overwatch.gamepedia.com/Wrecking Ball]]<br />[[Wrecking Ball]]</center> |
|<center>[[Image:icon-wrecking_ball.png|75px|link=http://overwatch.gamepedia.com/Wrecking Ball]]<br />[[Wrecking Ball]]</center> |
||
| − | |<small>If you and Wrecking Ball both stay put and fire away at one another, you're almost certain to come out on top. Unfortunately, due to his high mobility, this will rarely be the case. While it's unlikely that Wrecking Ball will ever land a kill on you unless he's supported by his allies, his primary asset against you is being a nuisance who will refuse to die. Ramming him with your Boosters can temporarily disrupt him if he's swinging around, but even then he can simply roll away from a fight he doesn't wish to continue. As much as he may try to attract your attention, try to focus on killing Wrecking Ball's teammates in a group fight before turning your focus to him. |
+ | |<small>If you and [[Wrecking Ball]] both stay put and fire away at one another, you're almost certain to come out on top. Unfortunately, due to his high mobility, this will rarely be the case. While it's unlikely that [[Wrecking Ball]] will ever land a kill on you unless he's supported by his allies, his primary asset against you is being a nuisance who will refuse to die. Ramming him with your {{al|Boosters}} can temporarily disrupt him if he's swinging around, but even then he can simply roll away from a fight he doesn't wish to continue. As much as he may try to attract your attention, try to focus on killing [[Wrecking Ball]]'s teammates in a group fight before turning your focus to him. |
| − | |<small>If your team decides to run both D.Va and Wrecking Ball as your tanks, you're offering your team extremely minimal protection. That being said, if your team is filled with heroes who prefer to stay mobile and fend for themselves, such as Genji, Tracer and Lucio, this may be an acceptable, aggressive team composition.</small> |
+ | |<small>If your team decides to run both D.Va and [[Wrecking Ball]] as your tanks, you're offering your team extremely minimal protection. That being said, if your team is filled with heroes who prefer to stay mobile and fend for themselves, such as [[Genji]], [[Tracer]] and [[Lucio]], this may be an acceptable, aggressive team composition.</small> |
|- |
|- |
||
|<center>[[Image:icon-winston.png|75px|link=http://overwatch.gamepedia.com/Winston]]<br />[[Winston]]</center> |
|<center>[[Image:icon-winston.png|75px|link=http://overwatch.gamepedia.com/Winston]]<br />[[Winston]]</center> |
||
| − | |<small>Out of your |
+ | |<small>Out of your mech, [[Winston]] is a nightmare, because he'll just {{al|Jump Pack}} towards you and taser you before you can whittle through his massive health. In your mech, though, his gun will only deal insignificant damage to your larger health pool while you quickly gun him down. A well-aimed {{al|Booster}} ram can knock him out of his {{al|Barrier Projector}}'s protection, making him easier to kill. If he jumps away, chase him down with your {{al|Boosters}} and finish him off. |
| − | |<small>The classic "dive comp" combo, D.Va and Winston both have the ability to quickly move towards, or "dive", an enemy. This is especially helpful to ambush foes that wish to remain on the backline, such as [[Widowmaker]] or Support heroes. Try to coordinate with a friendly Winston so you both ambush the same target simultaneously.</small> |
+ | |<small>The classic "dive comp" combo, D.Va and [[Winston]] both have the ability to quickly move towards, or "dive", an enemy. This is especially helpful to ambush foes that wish to remain on the backline, such as [[Widowmaker]] or [[Roles#Support|Support]] heroes. Try to coordinate with a friendly [[Winston]] so you both ambush the same target simultaneously.</small> |
|- |
|- |
||
|<center>[[Image:icon-zarya.png|75px|link=http://overwatch.gamepedia.com/Zarya]]<br />[[Zarya]]</center> |
|<center>[[Image:icon-zarya.png|75px|link=http://overwatch.gamepedia.com/Zarya]]<br />[[Zarya]]</center> |
||
| − | |<small>Zarya is among D.Va's greatest enemies, as she can build lots of charge from the fire of D.Va's Fusion Cannons, and her beam is not blocked by |
+ | |<small>[[Zarya]] is among D.Va's greatest enemies, as she can build lots of charge from the fire of D.Va's {{al|Fusion Cannons}}, and her beam is not blocked by {{al|Defense Matrix}}. She also has more than enough health to go up against D.Va's damage output, unlike other characters with beam weapons such as [[Symmetra]] and [[Mei]]. If an enemy [[Zarya]]'s {{al|Particle Cannon}} is supercharged, she will mow you down without mercy. Just always keep calm and think things through. If her {{al|Particle Barrier}}'s up, you can't fight her. Either pause and wait until the bubble drops or flee if you feel you must. When the barrier's down and you think you stand a chance, close the gap as much as you can (you can {{al|Boosters|Boost}} up/around her while the barrier's up) and try to fight at point blank range. She can easily overpower you at mid range, but you might be able to quickly take her out if you nail her face quick enough. Just always remember to take extreme caution with her, and if her laser is supercharged, get out before she kills you. |
| − | |<small>While having a Zarya as a second tank will cost your team traditional barriers, you each have unique ways to negate incoming fire. As long as you keep constant awareness of your teammates, you can both keep them safe from enemy fire. Zarya's Ultimate, Graviton Surge, can combo well with Self-Destruct; just make sure that if an enemy with a barrier (such as Reinhardt) is caught in the mix, you either kill him or take out his barrier, because otherwise the combo will be for naught. |
+ | |<small>While having a [[Zarya]] as a second tank will cost your team traditional barriers, you each have unique ways to negate incoming fire. As long as you keep constant awareness of your teammates, you can both keep them safe from enemy fire. [[Zarya]]'s [[Ultimate]], {{al|Graviton Surge}}, can combo well with {{al|Self-Destruct}}; just make sure that if an enemy with a barrier (such as [[Reinhardt]]) is caught in the mix, you either kill him or take out his barrier, because otherwise the combo will be for naught. |
|} |
|} |
||
| Line 279: | Line 156: | ||
|- |
|- |
||
|<center>[[Image:icon-ashe.png|75px|link=http://overwatch.gamepedia.com/Ashe]]<br />[[Ashe]]</center> |
|<center>[[Image:icon-ashe.png|75px|link=http://overwatch.gamepedia.com/Ashe]]<br />[[Ashe]]</center> |
||
| − | |<small>You excel at taking down snipers, and Ashe is no exception. Defense Matrix can negate most of Ashe's abilities; if you fly towards Ashe point blank while she's isolated, you can take her out and retreat before her teammates show up to avenge her. |
+ | |<small>You excel at taking down snipers, and [[Ashe]] is no exception. {{al|Defense Matrix}} can negate most of [[Ashe]]'s abilities; if you fly towards [[Ashe]] point blank while she's isolated, you can take her out and retreat before her teammates show up to avenge her. |
| − | |<small>D.Va has no notable team synergy with Ashe.</small> |
+ | |<small>D.Va has no notable team synergy with [[Ashe]].</small> |
|- |
|- |
||
|<center>[[Image:icon-bastion.png|75px|link=http://overwatch.gamepedia.com/Bastion]]<br />[[Bastion]]</center> |
|<center>[[Image:icon-bastion.png|75px|link=http://overwatch.gamepedia.com/Bastion]]<br />[[Bastion]]</center> |
||
| − | |<small>You can negate an enemy Bastion's gunfire with your Defense Matrix, but that's only useful if your teammates are there to help fight him as well. At both close and long range, he has you beat damage-wise. Unless you're protecting your team, try to avoid him if you can, or in the very least try to catch him from behind by surprise. If you're desperate, you can fly around him at point-blank range and confuse him, potentially killing him before he can run you down, and when in Pilot |
+ | |<small>You can negate an enemy [[Bastion]]'s {{al|Configuration: Sentry}} gunfire with your {{al|Defense Matrix}}, but that's only useful if your teammates are there to help fight him as well. At both close and long range, he has you beat damage-wise. Unless you're protecting your team, try to avoid him if you can, or in the very least try to catch him from behind by surprise. If you're desperate, you can fly around him at point-blank range and confuse him, potentially killing him before he can run you down, and when in Pilot Form you can use your small hitbox to wildly jump and duck to avoid his attacks. If [[Bastion]] is in {{al|Configuration: Recon|Recon configuration}} instead of {{al|Configuration: Sentry|Sentry}}, he's going to be much easier to finish off. If you catch a [[Bastion]] running around, try to eliminate him before he can transform or reach his team. If he does transform, consider his health, and decide whether you think you can kill him quickly enough or if you need to flee. |
| − | |<small>While D.Va isn't as well-suited to protect a friendly Bastion as [[Reinhardt]] or [[Orisa]], her Defense Matrix can save him from a sudden large-impact attack, such as Pharah's Barrage. If Bastion has no one nearby to protect him, it can be helpful to stay by his side to protect him from these attacks.</small> |
+ | |<small>While D.Va isn't as well-suited to protect a friendly [[Bastion]] as [[Reinhardt]] or [[Orisa]], her {{al|Defense Matrix}} can save him from a sudden large-impact attack, such as [[Pharah]]'s {{al|Barrage}}. If [[Bastion]] has no one nearby to protect him, it can be helpful to stay by his side to protect him from these attacks.</small> |
|- |
|- |
||
|<center>[[Image:icon-doomfist.png|75px|link=http://overwatch.gamepedia.com/Doomfist]]<br />[[Doomfist]]</center> |
|<center>[[Image:icon-doomfist.png|75px|link=http://overwatch.gamepedia.com/Doomfist]]<br />[[Doomfist]]</center> |
||
| − | |<small>Defense Matrix negates very few of Doomfist's abilities, and his consistent stunning moves can make escaping him excessively difficult. Choosing to fight him head-on alone will also end badly, as his ability to generate shields means he'll always be able to outlast you until your |
+ | |<small>{{al|Defense Matrix}} negates very few of [[Doomfist]]'s abilities, and his consistent stunning moves can make escaping him excessively difficult. Choosing to fight him head-on alone will also end badly, as his ability to generate shields means he'll always be able to outlast you until your mech is destroyed, at which point you're as good as gone. Keep your distance, and only engage when you have teammates to help you. |
| − | |<small>D.Va has no notable team synergy with Doomfist.</small> |
+ | |<small>D.Va has no notable team synergy with [[Doomfist]].</small> |
| + | |- |
||
| + | |<center>[[Image:icon-echo.png|75px|link=http://overwatch.gamepedia.com/Echo]]<br />[[Echo]]</center> |
||
| + | |<small>{{Al|name=Defense Matrix}} can negate her {{Al|name=Tri-Shot}} and {{Al|name=Sticky Bombs}}. With your {{Al|name=Boosters}}, you can pursue her in the air. Without {{Al|name=Defense Matrix}}, Echo can freely land shots on you to charge up her ultimate.</small> <small>The one thing you should worry about is Echo's {{Al|name=Focusing Beam}}. As a beam, you {{al|Defense Matrix}} does not block it and, if you're weak, it means you'll lose your mech in 2 seconds or less (since the damage multiplies against half-health targets). Without your mech, you don't stand a chance against her. In short, avoid fighting Echo if you're weak.</small> |
||
| + | |||
| + | <small>Echo can use {{Al|Duplicate}} on you, copying your abilities and can charge up {{Al|Self-Destruct}} quicker than you can.</small> |
||
| + | |<small>D.Va is a very complimentary tank for [[Echo]]. You're both capable of large amounts of burst damage, so you should have no trouble securing a kill or two when you go diving. Follow her call and keep close to her so she can shield you with {{Al|name=Defense Matrix}}.</small> |
||
|- |
|- |
||
|<center>[[Image:icon-genji.png|75px|link=http://overwatch.gamepedia.com/Genji]]<br />[[Genji]]</center> |
|<center>[[Image:icon-genji.png|75px|link=http://overwatch.gamepedia.com/Genji]]<br />[[Genji]]</center> |
||
| − | |<small>Due to Genji's constant mobility, he can be extremely difficult to pin down as D.Va, and his Swift Strike ignores your Defense Matrix. You'll need to rely on teammates such as [[Winston]] or [[McCree]] to get Genji off your back. |
+ | |<small>Due to [[Genji]]'s constant mobility, he can be extremely difficult to pin down as D.Va, and his {{al|Swift Strike}} ignores your {{al|Defense Matrix}}. You'll need to rely on teammates such as [[Winston]] or [[McCree]] to get [[Genji]] off your back. |
| − | |At higher skill levels, the classic "dive" composition almost always includes both D.Va and Genji, along with Winston and Tracer. |
+ | | At higher skill levels, the classic "dive" composition almost always includes both D.Va and [[Genji]], along with [[Winston]] and [[Tracer]]. |
|- |
|- |
||
|<center>[[Image:icon-hanzo.png|75px|link=http://overwatch.gamepedia.com/Hanzo]]<br />[[Hanzo]]</center> |
|<center>[[Image:icon-hanzo.png|75px|link=http://overwatch.gamepedia.com/Hanzo]]<br />[[Hanzo]]</center> |
||
| − | |<small>Your Defense Matrix will let you block the burst damage of Hanzo's Storm Arrows, while your Boosters can help you chase down and finish Hanzo if he tries to flee. Do keep an eye on your cooldowns; because he is a sniper, one or two arrows from a skilled Hanzo can take you out of your |
+ | |<small>Your {{al|Defense Matrix}} will let you block the burst damage of [[Hanzo]]'s {{al|Storm Arrows}}, while your {{al|Boosters}} can help you chase down and finish [[Hanzo]] if he tries to flee. Do keep an eye on your cooldowns; because he is a sniper, one or two arrows from a skilled [[Hanzo]] can take you out of your mech, at which point the match will drastically turn in his team's favor. |
| − | |<small>D.Va has no notable team synergy with Hanzo.</small> |
+ | |<small>D.Va has no notable team synergy with [[Hanzo]].</small> |
|- |
|- |
||
|<center>[[Image:icon-junkrat.png|75px|link=http://overwatch.gamepedia.com/Junkrat]]<br />[[Junkrat]]</center> |
|<center>[[Image:icon-junkrat.png|75px|link=http://overwatch.gamepedia.com/Junkrat]]<br />[[Junkrat]]</center> |
||
| − | |<small>Defense Matrix can negate Junkrat's primary fire and Concussion Mine, but not his Steel Trap. If you get trapped, just face Junkrat and activate Defense Matrix to protect yourself, then either engage if you're healthy enough or fly out if you're not. If you hear Junkrat's RIP-Tire nearby, it should be easy for you to fly up to his defenseless body and gun him down while he's unaware. Conversely, you can try to quickly gun the RIP-Tire down with a burst of Micro |
+ | |<small>{{al|Defense Matrix}} can negate [[Junkrat]]'s primary fire and {{al|Concussion Mine}}, but not his {{al|Steel Trap}}. If you get trapped, just face [[Junkrat]] and activate {{al|Defense Matrix}} to protect yourself, then either engage if you're healthy enough or fly out if you're not. If you hear [[Junkrat]]'s {{al|RIP-Tire}} nearby, it should be easy for you to fly up to his defenseless body and gun him down while he's unaware. Conversely, you can try to quickly gun the {{al|RIP-Tire}} down with a burst of {{al|Micro Missiles}}. |
| + | |<small>D.Va is able to combo her {{al|Defense Matrix}} well with [[Junkrat]]'s [[Ultimate ability]]. In a combo known as "Walk The Dog", D.Va can guard an allied [[Junkrat]]'s {{al|RIP-Tire}} on its path to the enemy by flying behind it using {{al|Boosters}} while absorbing damage directed at the {{al|RIP-Tire}} with {{al|Defense Matrix}} as well as by bodyblocking.</small> |
||
| − | |<small>D.Va has no notable team synergy with Junkrat.</small> |
||
|- |
|- |
||
|<center>[[Image:icon-mccree.png|75px|link=http://overwatch.gamepedia.com/McCree]]<br />[[McCree]]</center> |
|<center>[[Image:icon-mccree.png|75px|link=http://overwatch.gamepedia.com/McCree]]<br />[[McCree]]</center> |
||
| − | |<small>Defense Matrix can absorb McCree's gunfire as well as his Flashbang; time Defense Matrix well, and you can easily take McCree out of the picture. Defense Matrix can also completely negate McCree's |
+ | |<small>{{al|Defense Matrix}} can absorb [[McCree]]'s gunfire as well as his {{al|Flashbang}}, which is the most important projectile to absorb in this matchup; time {{al|Defense Matrix}} well, and you can easily take [[McCree]] out of the picture. {{al|Defense Matrix}} can also completely negate [[McCree]]'s [[Ultimate]], {{al|Deadeye}}. If need be, you can even use your {{al|Boosters}} to fly closer to ensure that your {{al|Defense Matrix}} completely blocks his shots, or, as a last resort, bodyblock his shots at the cost of your mech. |
| − | |<small>D.Va has no notable team synergy with McCree.</small> |
+ | |<small>D.Va has no notable team synergy with [[McCree]].</small> |
|- |
|- |
||
|<center>[[Image:icon-mei.png|75px|link=http://overwatch.gamepedia.com/Mei]]<br />[[Mei]]</center> |
|<center>[[Image:icon-mei.png|75px|link=http://overwatch.gamepedia.com/Mei]]<br />[[Mei]]</center> |
||
| − | |<small>At close range, Mei will almost always freeze you before your Fusion Cannons can kill her. Defense Matrix does nothing to stop her from freezing you, and because your cockpit is such a huge target, Mei should have no trouble following up with secondary-fire headshots. Depending on how much health you and Mei have, you may be able to finish her off after the initial freeze has thawed, but if Mei notices this, she could instantly enter Cryo-Freeze. If she doesn't, you still have a chance; judge accordingly and decide whether it's wiser to fight or flee. At long range, Mei's icicles will out-damage D.Va's Fusion Cannons; while Defense Matrix can block these, D.Va can do very little more than play defensive when fighting Mei at a distance. Overall, D.Va has very few options when fighting Mei other than ganging up on her with teammates, finishing her off at low health, or fleeing. D.Va sometimes has an easier time fighting Mei outside of her |
+ | |<small>At close range, [[Mei]] will almost always freeze you before your {{al|Fusion Cannons}} can kill her. {{al|Defense Matrix}} does nothing to stop her from freezing you, and because your cockpit is such a huge target, [[Mei]] should have no trouble following up with secondary-fire headshots. Depending on how much health you and [[Mei]] have, you may be able to finish her off after the initial freeze has thawed, but if [[Mei]] notices this, she could instantly enter {{al|Cryo-Freeze}}. If she doesn't, you still have a chance; judge accordingly and decide whether it's wiser to fight or flee. At long range, [[Mei]]'s icicles will out-damage D.Va's {{al|Fusion Cannons}}; while {{al|Defense Matrix}} can block these, D.Va can do very little more than play defensive when fighting [[Mei]] at a distance. Overall, D.Va has very few options when fighting [[Mei]] other than ganging up on her with teammates, finishing her off at low health, or fleeing. D.Va sometimes has an easier time fighting [[Mei]] outside of her mech; your pistol has respectable damage at a distance, but even in this case, [[Mei]] can kill you with an {{al|Endothermic Blaster}} Icicle headshot or two. Also, if [[Mei]] wants to keep distance between you, she can use her {{al|Ice Wall}} to briefly allow her to escape harm. Those abilities can also be used to help [[Mei]] and her team survive a {{al|Self-Destruct}}, so you have to be careful when activating it or risk having it be completely negated. |
| − | |<small>Mei's Blizzard Ultimate is an excellent setup to perform a massive Self-Destruct on your immobile enemies. Her ability to freeze quick-moving flankers can also help fend off enemies such as [[Genji]] and [[Tracer]] who would normally give you trouble.</small> |
+ | |<small>[[Mei]]'s {{al|Blizzard}} [[Ultimate]] is an excellent setup to perform a massive {{al|Self-Destruct}} on your immobile enemies. Her ability to freeze quick-moving flankers can also help fend off enemies such as [[Genji]] and [[Tracer]] who would normally give you trouble.</small> |
|- |
|- |
||
|<center>[[Image:icon-pharah.png|75px|link=http://overwatch.gamepedia.com/Pharah]]<br />[[Pharah]]</center> |
|<center>[[Image:icon-pharah.png|75px|link=http://overwatch.gamepedia.com/Pharah]]<br />[[Pharah]]</center> |
||
| − | |<small>Your Boosters and Defense Matrix make you one of the hardest counters to Pharah. A melee strike can disrupt Pharah's hovering, sending her plummeting to the ground where your teammates can finish her off. Your ability to block all of her attacks, especially her Barrage, is invaluable. |
+ | |<small>Your {{al|Boosters}} and {{al|Defense Matrix}} make you one of the hardest counters to [[Pharah]]. A [[Melee|melee]] strike can disrupt [[Pharah]]'s hovering, sending her plummeting to the ground where your teammates can finish her off. Your ability to block all of her attacks, especially her {{al|Barrage}}, is invaluable. |
| − | |<small>You and Pharah tend to be the most airborne heroes. You can take advantage of this by both taking control of the skies, especially if you have a friendly Mercy on your team. Pharah's primary counters are hitscan and sniper |
+ | |<small>You and [[Pharah]] tend to be the most airborne heroes. You can take advantage of this by both taking control of the skies, especially if you have a friendly [[Mercy]] on your team. [[Pharah]]'s primary counters are hitscan and sniper heroes, which happen to be some of your easiest targets; you can cover her counters, while her powerful rockets can help keep flankers off your back.</small> |
|- |
|- |
||
|<center>[[Image:icon-reaper.png|75px|link=http://overwatch.gamepedia.com/Reaper]]<br />[[Reaper]]</center> |
|<center>[[Image:icon-reaper.png|75px|link=http://overwatch.gamepedia.com/Reaper]]<br />[[Reaper]]</center> |
||
| − | |<small>Both you and Reaper need close range to effectively deal damage, and at close range Reaper will rip through you in seconds. While negating his Death Blossom Ultimate is very helpful for your team, in most other situations your only real options when fighting Reaper are to negate his attacks or flee, but even then Shadow Step and Wraith Form can help him chase you down and finish you off. |
+ | |<small>Both you and [[Reaper]] need close range to effectively deal damage, and at close range [[Reaper]] will rip through you in seconds. While negating his {{al|Death Blossom}} [[Ultimate]] is very helpful for your team, in most other situations your only real options when fighting [[Reaper]] are to negate his attacks or flee, but even then {{al|Shadow Step}} and {{al|Wraith Form}} can help him chase you down and finish you off. |
| − | |<small>D.Va has no notable team synergy with Reaper.</small> |
+ | |<small>D.Va has no notable team synergy with [[Reaper]].</small> |
|- |
|- |
||
|<center>[[Image:icon-Soldier 76.png|75px|link=http://overwatch.gamepedia.com/Soldier:_76]]<br />[[Soldier: 76]]</center> |
|<center>[[Image:icon-Soldier 76.png|75px|link=http://overwatch.gamepedia.com/Soldier:_76]]<br />[[Soldier: 76]]</center> |
||
| − | |<small>Defense Matrix shuts down Soldier: 76's Ultimate, Tactical Visor. Remember that he doesn't have to be looking at you when firing for you to negate his shots with your |
+ | |<small>{{al|Defense Matrix}} shuts down [[Soldier: 76]]'s [[Ultimate]], {{al|Tactical Visor}}. Remember that he doesn't have to be looking at you when firing for you to negate his shots with your matrix; you actually project the matrix forward, so as long as he's firing around that vicinity, you'll negate his fire. Other than countering his [[ultimate]], you'll generally want to close the distance on him. Thanks to {{al|Biotic Field}} and {{al|Sprint}}, he has options to both outlast you in a fight and to flee if he feels the need to, and if your {{al|Boosters}} are in cooldown it will be difficult to keep up with him. Your best bet is to catch him by surprise with a burst of {{al|Micro Missiles}}; he'll most likely use {{al|Biotic Field}} to recover, but if you keep accurately firing at him, you may be able to finish him off before he can heal. |
| − | |<small>D.Va has no notable team synergy with Soldier: 76.</small> |
+ | |<small>D.Va has no notable team synergy with [[Soldier: 76]].</small> |
|- |
|- |
||
|<center>[[Image:icon-sombra.png|75px|link=http://overwatch.gamepedia.com/Sombra]]<br />[[Sombra]]</center> |
|<center>[[Image:icon-sombra.png|75px|link=http://overwatch.gamepedia.com/Sombra]]<br />[[Sombra]]</center> |
||
| − | |<small>With a well-timed Hack or EMP, Sombra can shut down your Ultimate and abilities, forcing you to stay grounded and making you an easy target with a large hitbox, no defensive tools and no mobility for 6 seconds. Worse, once you've lost your |
+ | |<small>With a well-timed {{al|Hack}} or {{al|EMP}}, [[Sombra]] can shut down your [[Ultimate]] and abilities, forcing you to stay grounded and making you an easy target with a large hitbox, no defensive tools and no mobility for 6 seconds. Worse, once you've lost your mech, [[Sombra]]'s great mobility and ability to [[Sombra#Opportunist|see wounded enemies through walls]] can let her hunt down and kill you while you're attempting to flee, and she can even stop you from regaining your mech with a well-timed {{al|Hack}}. This is especially painful after activating {{al|Self-Destruct}}, as you'll be forced to remain in Pilot Form and potentially be killed. On the positive side, [[Sombra]]'s weapon deals low damage against D.Va's armor when she's in her mech. In a one-on-one fight, even if you're hacked, you can usually outdamage the [[Sombra]], or at least keep her at bay long enough for your abilities to return so you can flee. Just remember that if [[Sombra]] tries to run, you can pursue. Keep an eye on her [[Sombra#Translocator|teleport]] location (a beam of light will shoot in the direction she's going); try to hunt her down and finish her off if she's wounded. |
| − | |<small>A well-timed EMP can shatter the barriers of a clustered enemy team, which can pave the way for a massive Self-Destruct. When planning this combo, it is best for the D.Va to initiate her Ultimate first. When doing this, the enemy team may instinctively gather behind a friendly player, at which point the EMP will leave them vulnerable, whereas leading with EMP may cause the enemy team to split apart and flee, making it more difficult to hit everyone with Self-Destruct.</small> |
+ | |<small>A well-timed {{al|EMP}} can shatter the barriers of a clustered enemy team, which can pave the way for a massive {{al|Self-Destruct}}. When planning this combo, it is best for the D.Va to initiate her [[Ultimate]] first. When doing this, the enemy team may instinctively gather behind a friendly player, at which point the {{al|EMP}} will leave them vulnerable, whereas leading with {{al|EMP}} may cause the enemy team to split apart and flee, making it more difficult to hit everyone with {{al|Self-Destruct}}.</small> |
|- |
|- |
||
|<center>[[Image:icon-symmetra.png|75px|link=http://overwatch.gamepedia.com/Symmetra]]<br />[[Symmetra]]</center> |
|<center>[[Image:icon-symmetra.png|75px|link=http://overwatch.gamepedia.com/Symmetra]]<br />[[Symmetra]]</center> |
||
| − | |<small>Your large health pool and close-range fire are both great assets in quickly taking out Symmetra's turrets as well as Symmetra herself. If you are out of your |
+ | |<small>Your large health pool and close-range fire are both great assets in quickly taking out [[Symmetra]]'s turrets as well as [[Symmetra]] herself. Since your {{al|Boosters}} deal damage to any enemy you impact, it is recommended that you use them to take out turrets. If you are out of your mech and the enemy team has a [[Symmetra]], be extremely cautious; even one turret can finish you off in your fragile state before you can react. |
| − | |<small> |
+ | |<small>[[Symmetra]] can create a teleporter through which D.Va can send her mech during {{al|Self-Destruct}}. When done right, this can catch an enemy team completely off guard and potentially wipe them out.</small> |
|- |
|- |
||
|<center>[[Image:icon-torbjörn.png|75px|link=http://overwatch.gamepedia.com/Torbjörn]]<br />[[Torbjörn]]</center> |
|<center>[[Image:icon-torbjörn.png|75px|link=http://overwatch.gamepedia.com/Torbjörn]]<br />[[Torbjörn]]</center> |
||
| − | |<small>In addition to blocking an enemy Torbjörn's turret's incoming fire with Defense Matrix, you can also rush towards a turret and quickly take it out at close range, robbing Torbjörn of a large amount of his power. If timed right, you can block Torbjörn's Molten Core with Defense Matrix. |
+ | |<small>In addition to blocking an enemy [[Torbjörn]]'s {{al|Deploy Turret|turret}}'s incoming fire with {{al|Defense Matrix}}, you can also rush towards a turret and quickly take it out at close range, robbing [[Torbjörn]] of a large amount of his power. If timed right, you can even block [[Torbjörn]]'s [[Ultimate ability]], {{al|Molten Core}}, with {{al|Defense Matrix}}. |
| − | |<small>D.Va's Defense Matrix can help protect Torbjörn's turret from oncoming fire by the likes of [[Widowmaker]], [[Pharah]] or [[Soldier: 76]].</small> |
+ | |<small>D.Va's {{al|Defense Matrix}} can help protect [[Torbjörn]]'s {{al|Deploy Turret|turret}} from oncoming fire by the likes of [[Widowmaker]], [[Pharah]] or [[Soldier: 76]].</small> |
|- |
|- |
||
|<center>[[Image:icon-tracer.png|75px|link=http://overwatch.gamepedia.com/Tracer]]<br />[[Tracer]]</center> |
|<center>[[Image:icon-tracer.png|75px|link=http://overwatch.gamepedia.com/Tracer]]<br />[[Tracer]]</center> |
||
| − | |<small>Like Reaper, you and Tracer both excel when fighting at close range. Also like Reaper, Tracer will outdamage you in most circumstances. While Reaper has The Reaping to help him outlast your damage, Tracer's Blink and Recall will make it extremely difficult to finish her off before she strips you of your |
+ | |<small>Like [[Reaper]], you and [[Tracer]] both excel when fighting at close range. Also like [[Reaper]], [[Tracer]] will outdamage you in most circumstances. While [[Reaper]] has {{al|The Reaping}} to help him outlast your damage, [[Tracer]]'s {{al|Blink}} and {{al|Recall}} will make it extremely difficult to finish her off before she strips you of your mech, at which point you're easy pickings for her. Fleeing [[Tracer]] is difficult due to her ability to catch up with you with {{al|Blink}}, but if you escape to a higher altitude, it will be harder for her to catch up. |
| − | |Tracer is absolutely essential to the classic "dive" composition that includes D.Va and Winston. Your team's lack of a |
+ | |[[Tracer]] is absolutely essential to the classic "dive" composition that includes D.Va and [[Winston]]. Your team's lack of a shield tank (such as [[Reinhardt]], [[Orisa]], or [[Sigma]]) can potentially be made up for if an accurate [[Tracer]] dances around your enemies with well-used {{al|Blink|Blinks}} and {{al|Recall|Recalls}}. |
|- |
|- |
||
|<center>[[Image:icon-widowmaker.png|75px|link=http://overwatch.gamepedia.com/Widowmaker]]<br />[[Widowmaker]]</center> |
|<center>[[Image:icon-widowmaker.png|75px|link=http://overwatch.gamepedia.com/Widowmaker]]<br />[[Widowmaker]]</center> |
||
| − | |<small>With her high mobility and ability to negate incoming fire, D.Va is an incredibly strong counter for Widowmaker. A common Widowmaker tactic is for her to fall to a lower altitude, wait for you to chase her, then use Grappling Hook to ascend again. Don't fall for this bait unless you have your Boosters ready to go; maintain the high ground for as long as you can, and eventually she'll be forced to ascend back to you or be gunned down by your teammates when she's out in the open. |
+ | |<small>With her high mobility and ability to negate incoming fire, D.Va is an incredibly strong counter for [[Widowmaker]]. A common [[Widowmaker]] tactic is for her to fall to a lower altitude, wait for you to chase her, then use {{al|Grappling Hook}} to ascend again. Don't fall for this bait unless you have your {{al|Boosters}} ready to go; maintain the high ground for as long as you can, and eventually she'll be forced to ascend back to you or be gunned down by your teammates when she's out in the open. |
| − | |<small>D.Va |
+ | |<small>D.Va is able to distract potential targets, leaving them open to easier shots from an allied [[Widowmaker]]. |
|} |
|} |
||
| − | === Support |
+ | === Support=== |
{| class="wikitable mw-collapsible mw-collapsed" |
{| class="wikitable mw-collapsible mw-collapsed" |
||
| Line 350: | Line 233: | ||
! |Match-Up |
! |Match-Up |
||
! |Team Synergy |
! |Team Synergy |
||
| + | |||
| − | </small> |
||
|- |
|- |
||
|<center>[[Image:icon-ana.png|75px|link=http://overwatch.gamepedia.com/Ana]]<br />[[Ana]]</center> |
|<center>[[Image:icon-ana.png|75px|link=http://overwatch.gamepedia.com/Ana]]<br />[[Ana]]</center> |
||
| − | |<small>Ana is both a Support |
+ | |<small>[[Ana]] is both a [[Roles#Support|Support]] hero and a sniper, making her one of your highest-priority targets. With {{al|Defense Matrix}}, you can negate her {{al|Biotic Grenade|Biotic Grenades}}, {{al|Sleep Dart|Sleep Darts}}, and {{al|Biotic Rifle}} shots. Once her abilities are on cooldown, the fight is yours. Just keep in mind that if [[Ana]] aims her grenade at the ground and not you, you'll take damage from the grenade's splash. Also be careful not to be caught off guard, as her {{al|Sleep Dart}} is capable of hitting D.Va's sizeable hitbox, taking her out of the fight for a potentially significant amount of time.</small> |
| − | |<small>You may be a large target for your friendly Ana to heal, but you're also a mobile one. Make sure you're always in your Ana's line of sight to stay at full health. While a Nano |
+ | |<small>You may be a large target for your friendly [[Ana]] to heal, but you're also a mobile one. Make sure you're always in your [[Ana]]'s line of sight to stay at full health. While a {{al|Nano Boost|Nano Boosted}} D.Va isn't as threatening as the likes of a {{al|Nano Boost|Nano Boosted}} [[Reinhardt]] or [[Genji]], with correct maneuvering and close-range hits you can take down a decent chunk of the enemy team during your powered-up state. Do not use {{al|Self-Destruct}}, as you'll immediately lose your {{al|Nano Boost}} in the process.</small> |
|- |
|- |
||
|<center>[[Image:icon-baptiste.png|75px|link=http://overwatch.gamepedia.com/Baptiste]]<br />[[Baptiste]]</center> |
|<center>[[Image:icon-baptiste.png|75px|link=http://overwatch.gamepedia.com/Baptiste]]<br />[[Baptiste]]</center> |
||
| − | |<small>Fighting a Baptiste one-on-one isn't too difficult for D.Va. However, his Immortality Field can buy him enough time to survive your attacks, especially if his teammates are in it as well. In addition, Immortality Field can completely negate Self-Destruct's massive burst damage. As such, it's critical to take out either Baptiste or his Immortality Field before initiating Self-Destruct.</small> |
+ | |<small>Fighting a [[Baptiste]] one-on-one isn't too difficult for D.Va. However, his {{al|Immortality Field}} can buy him enough time to survive your attacks, especially if his teammates are in it as well. In addition, {{al|Immortality Field}} can completely negate {{al|Self-Destruct}}'s massive burst damage. As such, it's critical to take out either [[Baptiste]] or his {{al|Immortality Field}} before initiating {{al|Self-Destruct}}.</small> |
| − | |<small>When Baptiste activates Amplification Matrix, your Fusion Cannons and Micro Missiles won't be too handy due to damage falloff. However, if you happen to be in Pilot |
+ | |<small>When [[Baptiste]] activates {{al|Amplification Matrix}}, your {{al|Fusion Cannons}} and {{al|Micro Missiles}} won't be too handy due to damage falloff. However, if you happen to be in Pilot Form, your {{al|Light Gun}} can deal tremendous damage at range when shot through the {{al|Amplification Matrix}}. If done from a safe location, this can be in easy way to get some long-range kills while also building your [[Ultimate]] meter up to perform {{al|Call Mech}}.</small> |
|- |
|- |
||
|<center>[[Image:icon-brigitte.png|75px|link=http://overwatch.gamepedia.com/Brigitte]]<br />[[Brigitte]]</center> |
|<center>[[Image:icon-brigitte.png|75px|link=http://overwatch.gamepedia.com/Brigitte]]<br />[[Brigitte]]</center> |
||
| − | |<small>Due to her |
+ | |<small>Due to her {{al|Barrier Shield}} and {{al|Inspire}} self-heal, it can be incredibly difficult to kill a [[Brigitte]], and it can be very difficult to kill teammates who are being healed by her passive {{al|Inspire}} ability. While you are unlikely to be killed by a [[Brigitte]] in a 1 on 1 fight, the time it will take you to kill her is so long that it isn't worth the effort, especially if you're deep in enemy territory where her teammates might arrive to provide her backup. Keep your distance from [[Brigitte]] where she can't hit you with her {{al|Rocket Flail}}, and focus on breaking her shield with long-range gunfire. If caught by surprise by [[Brigitte]] and you have no teammates nearby, better to use your {{al|Boosters}} to flee and regroup than attempt to take her down after she's already wounded you.</small> |
| − | |<small>D.Va has no notable team synergy with Brigitte.</small> |
+ | |<small>D.Va has no notable team synergy with [[Brigitte]].</small> |
|- |
|- |
||
|<center>[[Image:icon-lúcio.png|75px|link=http://overwatch.gamepedia.com/Lúcio]]<br />[[Lúcio]]</center> |
|<center>[[Image:icon-lúcio.png|75px|link=http://overwatch.gamepedia.com/Lúcio]]<br />[[Lúcio]]</center> |
||
| − | |<small>Due to Lúcio's high mobility and self-heal, it can be very difficult to definitively finish him off, even with your Micro |
+ | |<small>Due to [[Lúcio]]'s high mobility and self-heal, it can be very difficult to definitively finish him off, even with your {{al|Micro Missiles}}. If you are being harassed by a [[Lúcio]], it's often best to regroup with your team so one of your allies can deal with him. |
| − | |<small>D.Va has no notable team synergy with |
+ | |<small>D.Va has no notable team synergy with [[Lúcio]].</small> |
|- |
|- |
||
|<small><center>[[Image:icon-mercy.png|75px|link=http://overwatch.gamepedia.com/Mercy]]<br />[[Mercy]]</center> |
|<small><center>[[Image:icon-mercy.png|75px|link=http://overwatch.gamepedia.com/Mercy]]<br />[[Mercy]]</center> |
||
| − | |<small>When an enemy Mercy is in sight, you need to be decisive on whether or not you're going to focus on her. If you damage her somewhat but let her fly away, she'll simply heal back to full health. In particular, while Pharah is one of your greatest targets, she becomes far more difficult to deal with if she has a Mercy attached at the hip. If she's well-protected in the rear of the enemy team, don't barrel in after her unless you have other teammates who are coming with you, otherwise she'll fly from teammate to teammate to avoid your attacks while her teammates promptly rip you to shreds. That being said, if you do have the likes of a [[Winston]] or [[Doomfist]] on your side, you can safely dive in and focus her down. If you catch Mercy alone, her lack of mobility and puny firepower makes her an easy target; just kill her quickly, because if one teammate shows up, she can fly to them and use them as a shield. |
+ | |<small>When an enemy [[Mercy]] is in sight, you need to be decisive on whether or not you're going to focus on her. If you damage her somewhat but let her fly away, she'll simply heal back to full health due to her [[Mercy#Regeneration|self-healing abilities]]. In particular, while [[Pharah]] is one of your greatest targets, she becomes far more difficult to deal with if she has a [[Mercy]] attached at the hip. If she's well-protected in the rear of the enemy team, don't barrel in after her unless you have other teammates who are coming with you, otherwise she'll fly from teammate to teammate to avoid your attacks while her teammates promptly rip you to shreds. That being said, if you do have the likes of a [[Winston]] or [[Doomfist]] on your side, you can safely dive in and focus her down. If you catch [[Mercy]] alone, her lack of mobility and puny firepower makes her an easy target; just kill her quickly, because if one teammate shows up, she can fly to them and use them as a shield. |
| − | |<small>Like Pharah, D.Va's flight provides a massive boon to a friendly Mercy's aerial mobility. If a friendly Mercy is willing to pocket you, you can withstand most fights thanks to your impressive health and close-range damage output. If the situation is dire, though, be willing to flee from the fight; you might survive a group fight, but if your Mercy is killed because you weren't protecting her, she'll be much less inclined to pocket you in the future. By flying away from a fight, you're giving your friendly Mercy the out she needs.</small> |
+ | |<small>Like [[Pharah]], D.Va's flight provides a massive boon to a friendly [[Mercy]]'s aerial mobility. If a friendly [[Mercy]] is willing to pocket you, you can withstand most fights thanks to your impressive health and close-range damage output. If the situation is dire, though, be willing to flee from the fight; you might survive a group fight, but if your [[Mercy]] is killed because you weren't protecting her, she'll be much less inclined to pocket you in the future. By flying away from a fight, you're giving your friendly Mercy the out she needs.</small> |
|- |
|- |
||
|<center>[[Image:icon-moira.png|75px|link=http://overwatch.gamepedia.com/Moira]]<br />[[Moira]]</center> |
|<center>[[Image:icon-moira.png|75px|link=http://overwatch.gamepedia.com/Moira]]<br />[[Moira]]</center> |
||
| − | |<small>Moira's only real tool |
+ | |<small>[[Moira]]'s only real tool to escape D.Va is {{al|Fade}}, but if you keep a good eye out for where she travels, you can use your {{al|Boosters}} to chase after her. Her {{al|Biotic Orb}} could pose a threat to you or sustain her in a prolonged fight, but {{al|Defense Matrix}} can negate both healing and damage orbs, leaving {{al|Biotic Grasp}} as [[Moira]]'s only offensive option of attack, which is extremely ineffective when you are above your armor health threshold. So long as you can keep aim on her if she's jumping around to avoid your fire, you should easily be able to finish her off before you run out of health. That being said, do ''not'' attempt to engage with a [[Moira]] when you are out of your mech, as her {{al|Biotic Orb}} and {{al|Biotic Grasp}} will eliminate you in seconds. |
| − | |<small>D.Va has no notable team synergy with Moira.</small> |
+ | |<small>D.Va has no notable team synergy with [[Moira]].</small> |
|- |
|- |
||
|<center>[[Image:icon-zenyatta.png|75px|link=http://overwatch.gamepedia.com/Zenyatta]]<br />[[Zenyatta]]</center> |
|<center>[[Image:icon-zenyatta.png|75px|link=http://overwatch.gamepedia.com/Zenyatta]]<br />[[Zenyatta]]</center> |
||
| − | |<small>Zenyatta can shut you down in a number of ways. His |
+ | |<small>[[Zenyatta]] can shut you down in a number of ways. His {{al|Orb of Discord}} can help dissolve your massive health in no time, and you are a such a large target that he can usually hit you with every shot of his {{al|Orb of Destruction}} orb volley for massive damage. However, most of these tactics rely on you not seeing [[Zenyatta]] until it's too late, and that he has some sort of escape plan. If you catch [[Zenyatta]] alone and by surprise, your high burst damage should annihilate him before he can return the attack. [[Zenyatta]]'s lack of mobility makes him an easy target if left alone by his team; always try to jump on the opportunity to ambush him if he's on his own, even if this requires taking alternate routes to get behind him and sneak up on him. |
| − | |<small>Because she has high damage output at close range (as well as medium to long range with her Light |
+ | |<small>Because she has high damage output at close range (as well as medium to long range with her {{al|Light Gun}}), D.Va should always attempt to focus on enemies affected by a friendly [[Zenyatta]]'s {{al|Orb of Discord}}. If played right, you and your [[Zenyatta]] can take down one enemy after another. Just remember that [[Zenyatta]] has very low mobility, so don't leave him alone or you'll be begging for an enemy to ambush him. |
|} |
|} |
||
| − | ==Story== |
+ | ==Story == |
[[Image:Icon-dva.png|100px|left]] |
[[Image:Icon-dva.png|100px|left]] |
||
| − | D.Va is a former professional gamer who now uses her skills to pilot a state-of-the-art [[mech]] in defense of her [[South Korea|homeland]].<ref name |
+ | D.Va is a former professional gamer who now uses her skills to pilot a state-of-the-art [[mech]] in defense of her [[South Korea|homeland]].<ref name="DVA">[https://playoverwatch.com/en-us/heroes/dva/ D.Va], ''Blizzard Entertainment''. Accessed on 2015-11-12</ref> She is a very competitive individual,<ref name="HotS">2017-16-05, [http://us.battle.net/heroes/en/blog/20720247/dva-enters-the-nexus-5-16-2017 D.VA ENTERS THE NEXUS!]. ''Blizzard Entertainment'', accessed on 2017-05-17</ref> and coupled with her pro-gamer skills, this makes her an extremely effective mech pilot. Never backing down, |
| − | D.Va always plays to win.<ref name |
+ | D.Va always plays to win.<ref name="DVAReveal" /> While she projects a carefree, irreverant attitude, D.Va is burdened by the emotional cost of defending her homeland, and the facade the South Korean media projects on her. |
| − | In addition to skills as a mech pilot, D.Va is also a competent mechanic.<ref name |
+ | In addition to skills as a mech pilot, D.Va is also a competent mechanic.<ref name="Shooting Star">''[[Shooting Star]]''</ref> |
===Early Life=== |
===Early Life=== |
||
| Line 393: | Line 276: | ||
[[File:Hana Wins.jpg|thumb|Song on the e-sports scene]] |
[[File:Hana Wins.jpg|thumb|Song on the e-sports scene]] |
||
| − | Hana Song grew up playing classic games with her father, himself a former professional gamer during his younger years.<ref name |
+ | Hana Song grew up playing classic games with her father, himself a former professional gamer during his younger years.<ref name="Interview">2018-08-28 [https://blog.us.playstation.com/2018/08/28/d-va-deconstructed-how-blizzard-created-one-of-overwatchs-most-iconic-heroes/ D.Va Deconstructed]</ref> He was the one that introduced her to ''[[StarCraft]]'', and her undeniable skill helped lay the foundation for her eventual e-sports victories in other games.<ref>[https://us.shop.battle.net/en-us/product/starcraft-ii-announcers-dva Announcer: D.Va], ''Blizzard Entertainment''. Accessed on 2018-12-28</ref> |
| − | Song has been friends with [[Dae-hyun]] since childhood. They would stay up late working on his [[hoverbike]]. Hana took part in a race with it and won, albiet at the cost of the bike and nearly her own life.<ref name |
+ | Song has been friends with [[Dae-hyun]] since childhood. They would stay up late working on his [[hoverbike]]. Hana took part in a race with it and won, albiet at the cost of the bike and nearly her own life.<ref name="Shooting Star" /> |
| − | Like her father before her, Song became a pro-gamer. <ref>2015-11-07, [http://overwatch.blizzplanet.com/blog/comments/overwatch-whats-new-summary Overwatch: What’s New | Summary]. ''Blizzplanet'', accessed on 2015-11-12</ref> She became a ''[[Mecha Guardian V]]'' player in high school, quickly ascending to the #1 rank, winning the world championship<ref name="Shooting Star" />, surpassing her teammate [[Yuna Lee]] <ref name="Interview" /><ref name="Busan">''[[Overwatch]]'', ''[[Busan]]''</ref> and rival [[Kyung-soo Hann]].<ref name="Interview" /> A fierce competitor, Song played to win at any cost, and gained a well-earned reputation for showing no mercy to her opponents.<ref name |
+ | Like her father before her, Song became a pro-gamer. <ref>2015-11-07, [http://overwatch.blizzplanet.com/blog/comments/overwatch-whats-new-summary Overwatch: What’s New | Summary]. ''Blizzplanet'', accessed on 2015-11-12</ref> She became a ''[[Mecha Guardian V]]'' player in high school, quickly ascending to the #1 rank, winning the world championship<ref name="Shooting Star" />, surpassing her teammate [[Yuna Lee]] <ref name="Interview" /><ref name="Busan">''[[Overwatch]]'', ''[[Busan]]''</ref> and rival [[Kyung-soo Hann]].<ref name="Interview" /> A fierce competitor, Song played to win at any cost, and gained a well-earned reputation for showing no mercy to her opponents.<ref name="DVA" /> |
===MEKA=== |
===MEKA=== |
||
[[File:Song-mech.jpg|thumb|left|Song pilots her mech]] |
[[File:Song-mech.jpg|thumb|left|Song pilots her mech]] |
||
| − | At home, however, not all was well, as [[MEKA]] struggled to maintain its defense against the [[Gwishin]] [[omnic]]s that repeatedly attacked the nation. As the omnics continued to adapt, they eventually disrupted MEKA's drone-control networks, forcing the military to place pilots in the mechs. Scrambling to find suitable candidates, the government turned to the country's professional gamers, who possessed the necessary reflexes and instincts to operate the mechs' advanced weapons systems,<ref name |
+ | At home, however, not all was well, as [[MEKA]] struggled to maintain its defense against the [[Gwishin]] [[omnic]]s that repeatedly attacked the nation. As the omnics continued to adapt, they eventually disrupted MEKA's drone-control networks, forcing the military to place pilots in the mechs. Scrambling to find suitable candidates, the government turned to the country's professional gamers, who possessed the necessary reflexes and instincts to operate the mechs' advanced weapons systems,<ref name="DVA" /> in addition to standouts from other fields that required similar talents. Top stars were drafted, including the 19-year-old Song,<ref name="HotS" /> along with Lee and Kyung-soo.<ref name="Busan" /><ref name="Interview" /> She saw the new mission as a game,<ref name="DVA" /> and an evolution of her own career. Without fear or hesitation, she abandoned the limelight of her pro-gamer career, and got an armored mech operator's licence. As a member of MEKA, she could put her reflexes to the ultimate test on a real battlefield, instead of a digital one.<ref name="HotS" /> Her skills and intense competitive spirit made her an extremely effective pilot.<ref name="DVAReveal">2017-05-08, [https://www.youtube.com/watch?v=HlrAD_fkZ74&t D.Va Spotlight – Heroes of the Storm]. ''YouTube'', accessed on 2017-05-18</ref> |
[[File:DVA poster.jpg|thumb|A MEKA poster of D.Va]] |
[[File:DVA poster.jpg|thumb|A MEKA poster of D.Va]] |
||
| − | Song now fearlessly charges into battle alongside the rest of her MEKA unit, ready to spring to her nation's defense at a moment's notice. Recently, she has begun to stream combat operations to her adoring fans, and her growing following has turned her into a global icon.<ref name |
+ | Song now fearlessly charges into battle alongside the rest of her MEKA unit, ready to spring to her nation's defense at a moment's notice. Recently, she has begun to stream combat operations to her adoring fans, and her growing following has turned her into a global icon.<ref name="DVA" /> Sponsorship deals and her fanbase provided her with the means to customize her mech,<ref>[http://us.battle.net/heroes/en/heroes/dva/#?skin=pro-dva Pro D.Va], ''Blizzard Entertainment''. Accessed on 2017-05-17</ref> such as [[Nano Cola]].<ref name="Shooting Star" /> |
At some point she also played one of the leading roles in the movie ''[[Hero of My Storm]]''.<ref>''[[Overwatch]]'', ''[[Oasis]]''</ref><ref>''[[Overwatch]]'', ''[[Hollywood]]''</ref> |
At some point she also played one of the leading roles in the movie ''[[Hero of My Storm]]''.<ref>''[[Overwatch]]'', ''[[Oasis]]''</ref><ref>''[[Overwatch]]'', ''[[Hollywood]]''</ref> |
||
| Line 410: | Line 293: | ||
As an active member of the military, Song was no longer able to freely travel as she could've as a civilian. She became an avid reader of Mei's Adventures, the publicly-posted travel journal of climatologist [[Mei-Ling Zhou]], fascinated with all the different places Mei has seen.<ref>''[[Overwatch]]'', ''[[D.Va/Quotes|D.Va Quotes]]''</ref> |
As an active member of the military, Song was no longer able to freely travel as she could've as a civilian. She became an avid reader of Mei's Adventures, the publicly-posted travel journal of climatologist [[Mei-Ling Zhou]], fascinated with all the different places Mei has seen.<ref>''[[Overwatch]]'', ''[[D.Va/Quotes|D.Va Quotes]]''</ref> |
||
| − | ===Shooting Star=== |
+ | === Shooting Star === |
{{Quote|Oh man. This time off is '''great''', isn't it?<br/>What's not to like? There's delicious food, and drinks...<br/>Yeah...<br/>And good friends. The kind that are always there for you-- when you need them most.|Dae-hyun and Song after the Gwishin attack}} |
{{Quote|Oh man. This time off is '''great''', isn't it?<br/>What's not to like? There's delicious food, and drinks...<br/>Yeah...<br/>And good friends. The kind that are always there for you-- when you need them most.|Dae-hyun and Song after the Gwishin attack}} |
||
[[File:Dva-Shooting Star.jpg|thumb|D.Va reflects on her burden]] |
[[File:Dva-Shooting Star.jpg|thumb|D.Va reflects on her burden]] |
||
| Line 421: | Line 304: | ||
[[File:Dva-Shooting Star3.jpg|250px|thumb|Enjoying 'time off']] |
[[File:Dva-Shooting Star3.jpg|250px|thumb|Enjoying 'time off']] |
||
| − | South Korean media later made an update on the attack, reporting that authorities had stated that she had emerged without a scratch. In reality, she came out of the ordeal with a broken leg and arm, along with other more minor injuries. That didn't stop her from using her time off by assisting Dae-hyun with assembling her new mech. She thanked him for being there for her when she'd needed him.<ref name |
+ | South Korean media later made an update on the attack, reporting that authorities had stated that she had emerged without a scratch. In reality, she came out of the ordeal with a broken leg and arm, along with other more minor injuries. That didn't stop her from using her time off by assisting Dae-hyun with assembling her new mech. She thanked him for being there for her when she'd needed him.<ref name="Shooting Star" /> |
== Achievements == |
== Achievements == |
||
| Line 430: | Line 313: | ||
==Trivia== |
==Trivia== |
||
| + | |||
| ⚫ | |||
| + | *{{al|Self-Destruct}}: In line with D.Va's [[Ultimate ability|ultimate]] voice line, [[D.Va/Quotes#Abilities#:~:text=Nerf%20this!%20(self%20and%20hostile)|"Nerf this!"]], which can be interpreted as a challenge to the developers to nerf her [[Ultimate ability|ultimate]], as of October 15, 2021, {{al|Self-Destruct}} has never been nerfed. |
||
| ⚫ | **The stylization of her name is reminiscent of Korean pop idols, who often adopt pseudonyms to stand out. In the Korean version of the game, D.Va's name is the only name not in Hangul, reflective of the romanization of these idols' names. This makes sense considering D.Va is a Korean idol through her fame as a pro-gamer. |
||
| ⚫ | |||
| ⚫ | **The stylization of her name is reminiscent of Korean pop idols, who often adopt pseudonyms to stand out. In the Korean version of the game, D.Va's name is the only name not in Hangul, reflective of the romanization of these idols' names. This makes sense considering D.Va is a Korean idol through her fame as a pro-gamer. |
||
**The way her name has a prefix "D." is reminiscent of the way esports players have an abbreviated team tag before their names. This is supported by how she and [[D.Mon]] played on the same team. |
**The way her name has a prefix "D." is reminiscent of the way esports players have an abbreviated team tag before their names. This is supported by how she and [[D.Mon]] played on the same team. |
||
| − | * |
+ | *D.Va's given name Hana (하나) is the same as the Korean number 1. This parallels her personality, as she is a world champion and self-proclaimed "Number One." |
** D.Va's jersey number when she was a pro player was also the number 1. <ref>[https://twitter.com/westofhouse/status/1032856992874778625 Michael Chu's Twitter,] Accessed on 2018-08-24</ref> |
** D.Va's jersey number when she was a pro player was also the number 1. <ref>[https://twitter.com/westofhouse/status/1032856992874778625 Michael Chu's Twitter,] Accessed on 2018-08-24</ref> |
||
| − | * |
+ | *D.Va's suit has sponsors all over it, which is a reference to the same advertising style of sponsors in Korean esports. |
| − | * |
+ | *D.Va's mech is named Tokki (토끼), which means rabbit.<ref>Michael Chu's [https://twitter.com/westofhouse/status/1032319043129171969 Twitter]</ref> |
| − | * |
+ | *Hana is a fan of [[Lúcio]]'s music, and has apparently bought his album. He in turn also knows enough of the pro-gaming scene to be a fan of hers. |
| − | * |
+ | *D.Va is the youngest launch hero, and was the youngest hero overall until [[Orisa]] was introduced. D.Va is sometimes teased by others because of her age, such as when [[Widowmaker]] mockingly says, "This is no place for children." |
*D.Va is the fifth playable ''Overwatch'' character in [[Heroes of the Storm|''Heroes'' ''of the Storm'']].<ref>Heroes of the Storm 2.0 – [https://www.youtube.com/watch?v=UgJLvtx5PzI Hanamura Showdown]</ref> |
*D.Va is the fifth playable ''Overwatch'' character in [[Heroes of the Storm|''Heroes'' ''of the Storm'']].<ref>Heroes of the Storm 2.0 – [https://www.youtube.com/watch?v=UgJLvtx5PzI Hanamura Showdown]</ref> |
||
*D.Va is a purchasable announcer in [[Heroes of the Storm|''Heroes of the Storm'']], along with [[Genji]]. |
*D.Va is a purchasable announcer in [[Heroes of the Storm|''Heroes of the Storm'']], along with [[Genji]]. |
||
| + | *{{al|Defense Matrix}} has D.Va manually shoot down incoming projectiles, counting towards her APM. In-game, D.Va is able to reach an APM of 84,480 in a best-case scenario by blocking the combined 1,408 pellets per second of {{tt|11|There can be up to 12 players in one Deathmatch lobby; one of those must be D.Va}} simultaneous {{al|Whole Hog}}s. |
||
| − | *D.Va is the first hero to use randomized "Quick Melee" attacks with both arms (in |
+ | *D.Va is the first hero to use randomized [[Melee|"Quick Melee"]] attacks with both arms (in mech mode). Outside of her mech, she uses her right hand for [[Melee|"Quick Melee"]] attacks. |
*D.Va is used as the symbol for the National D.Va Association, now called FAMERz, a progressive feminist movement composed of ''Overwatch'' fans. The group achieved international notability after a photograph of their flag—featuring D.Va's bunny-ears logo—was photographed in a news report for an international Women's March event in Seoul on January 21st, 2017. Based in South Korea, the group chose D.Va as its symbol owing to an earlier incident where professional teenage ''Overwatch'' player Geguri was accused of cheating owing to an eighty percent win rate; which some believed was "impossible" for girls to achieve. The group distributes stickers of D.Va's bunny logo, among other paraphernalia. It plans on finding new ways to use ''Overwatch'' as a tool for spreading its message.<ref>2017-1-26, [http://www.polygon.com/2017/1/26/14376436/overwatch-womens-march-dva Overwatch’s gamer girl hero inspires a feminist movement] ''Polygon.com'', accessed on 2017-1-27</ref> |
*D.Va is used as the symbol for the National D.Va Association, now called FAMERz, a progressive feminist movement composed of ''Overwatch'' fans. The group achieved international notability after a photograph of their flag—featuring D.Va's bunny-ears logo—was photographed in a news report for an international Women's March event in Seoul on January 21st, 2017. Based in South Korea, the group chose D.Va as its symbol owing to an earlier incident where professional teenage ''Overwatch'' player Geguri was accused of cheating owing to an eighty percent win rate; which some believed was "impossible" for girls to achieve. The group distributes stickers of D.Va's bunny logo, among other paraphernalia. It plans on finding new ways to use ''Overwatch'' as a tool for spreading its message.<ref>2017-1-26, [http://www.polygon.com/2017/1/26/14376436/overwatch-womens-march-dva Overwatch’s gamer girl hero inspires a feminist movement] ''Polygon.com'', accessed on 2017-1-27</ref> |
||
| − | * |
+ | *Charlet Chung, who is D.Va's English voice actor, has commented positively on her character, commenting "in terms of representation of Asian-American characters in video games, particularly women, they might be over-sexualized - and I don't know if I'm being too candid here - I feel like D.Va is more of a real person. She happens to have some sex appeal, but that's not why she's in the game. She's not there to be an exotic lotus."<ref>2016-09-17, [http://au.ign.com/articles/2016/09/17/overwatch-a-world-fans-built OVERWATCH: A WORLD FANS BUILT]. ''IGN'', accessed on 2016-09-18</ref> |
===Development=== |
===Development=== |
||
| − | D.Va was first announced through the official [https://twitter.com/PlayOverwatch PlayOverwatch] Twitter account, which linked to a mock-up page on the official ''StarCraft II'' World Championship site.<ref>[https://twitter.com/PlayOverwatch/status/660048776824909824 PlayOverwatch Twitter]</ref><ref name |
+ | D.Va was first announced through the official [https://twitter.com/PlayOverwatch PlayOverwatch] Twitter account, which linked to a mock-up page on the official ''StarCraft II'' World Championship site.<ref>[https://twitter.com/PlayOverwatch/status/660048776824909824 PlayOverwatch Twitter]</ref><ref name="A">[https://web.archive.org/web/20170219064037/http://wcs.battle.net/sc2/en/players/dva D.Va] (Archive), ''WCS''. Accessed on 2015-11-12</ref> She had previously been depicted in posters in the attacking team's starting area in [[Hanamura]]. Her StarCraft page was later taken down and the link instead redirects to the StarCraft II home page. |
The StarCraft WCS web page first introduced D.Va as a former professional StarCraft player. Michael Chu later clarified on February 1, 2018 that this was not intended to be canon and was just a fun way to tease the character. He also explained that the unnamed game that she was best known for in her career was one that best matched the skills needed to pilot her mech.<ref>2018-02-01, [https://us.battle.net/forums/en/overwatch/topic/20761806067?page=2#post-38 Michael Chu on Battle.net] ''Battle.net forums''. Accessed on 2018-02-01.</ref> |
The StarCraft WCS web page first introduced D.Va as a former professional StarCraft player. Michael Chu later clarified on February 1, 2018 that this was not intended to be canon and was just a fun way to tease the character. He also explained that the unnamed game that she was best known for in her career was one that best matched the skills needed to pilot her mech.<ref>2018-02-01, [https://us.battle.net/forums/en/overwatch/topic/20761806067?page=2#post-38 Michael Chu on Battle.net] ''Battle.net forums''. Accessed on 2018-02-01.</ref> |
||
| Line 454: | Line 340: | ||
===Merchandise=== |
===Merchandise=== |
||
[[File:Figma DVA.jpg|thumb|The Figma D.Va statue]] |
[[File:Figma DVA.jpg|thumb|The Figma D.Va statue]] |
||
| + | |||
*A ''StarCraft II'' portrait and announcer for D.Va was available for those who attended BlizzCon 2016 or bought a Virtual Ticket for the event.<ref>2016-10-17, [http://us.battle.net/sc2/en/blog/20325209/blizzcon-in-game-goodies-dva-announcer-and-portrait-10-17-2016 BlizzCon In-Game Goodies: D.Va Announcer and Portrait!] ''Battle.net'', accessed on 2016-11-17</ref> The announcer has since been made available for regular purchase. |
*A ''StarCraft II'' portrait and announcer for D.Va was available for those who attended BlizzCon 2016 or bought a Virtual Ticket for the event.<ref>2016-10-17, [http://us.battle.net/sc2/en/blog/20325209/blizzcon-in-game-goodies-dva-announcer-and-portrait-10-17-2016 BlizzCon In-Game Goodies: D.Va Announcer and Portrait!] ''Battle.net'', accessed on 2016-11-17</ref> The announcer has since been made available for regular purchase. |
||
| Line 468: | Line 355: | ||
==Gallery== |
==Gallery== |
||
<gallery> |
<gallery> |
||
| − | File: |
+ | File:DVa_teaser.png |
| − | File: |
+ | File:DVa_Hanamura_poster.png|D.Va on a poster in 1 second {{A |
</gallery> |
</gallery> |
||
| Line 480: | Line 367: | ||
===Curse=== |
===Curse=== |
||
{{#ev:twitchvod|v97317837|||||}} |
{{#ev:twitchvod|v97317837|||||}} |
||
| − | |||
==Balance Change Log== |
==Balance Change Log== |
||
{{PatchTableStart}} |
{{PatchTableStart}} |
||
| − | {{PatchTableElement| |
+ | {{PatchTableElement|2021-04-22|{{Al|Call Mech}} |
| + | *Damage increased from 50 to 250 |
||
| ⚫ | |||
| + | ''Developer Comment: D.Va's respawn is often intentionally delayed by the enemy team if she is the last player alive from her team and without her mech. This change will make it more dangerous to be near the Call Mech arrival area for low health heroes.'' |
||
| ⚫ | |||
| ⚫ | |||
''Developer Comment: We're increasing the ratio of armor to health that D.Va's mech has to enable it to withstand more damage from shotguns, beams, and weapons with a high rate of fire.'' |
''Developer Comment: We're increasing the ratio of armor to health that D.Va's mech has to enable it to withstand more damage from shotguns, beams, and weapons with a high rate of fire.'' |
||
}} |
}} |
||
| − | {{PatchTableElement|2020-06-30| |
+ | {{PatchTableElement|2020-06-30|{{Al|Fusion Cannons}} |
| − | {{Al|Fusion Cannons}} |
||
*Movement penalty reduced from 50 to 40% |
*Movement penalty reduced from 50 to 40% |
||
{{Al|Defense Matrix}} |
{{Al|Defense Matrix}} |
||
| Line 498: | Line 386: | ||
''Developer Comment: These buffs are aimed at making D.Va feel more fluid and responsive to play.'' |
''Developer Comment: These buffs are aimed at making D.Va feel more fluid and responsive to play.'' |
||
}} |
}} |
||
| − | {{PatchTableElement|2020-05-19| |
+ | {{PatchTableElement|2020-05-19|*Restored functionality allowing D.Va to maintain her current aim pitch when de-meching |
| − | *Restored functionality allowing D.Va to maintain her current aim pitch when de-meching |
||
}} |
}} |
||
{{PatchTableElement|2020-03-12|{{Al|Boosters}} |
{{PatchTableElement|2020-03-12|{{Al|Boosters}} |
||
| Line 592: | Line 479: | ||
==References== |
==References== |
||
| − | <references/> |
+ | <references /> |
==External links== |
==External links== |
||
| + | |||
| − | * [http://playoverwatch.com/en-us/heroes/dva/ Official Site - D.Va] |
||
| − | * |
+ | *[http://playoverwatch.com/en-us/heroes/dva/ Official Site - D.Va] |
| + | *[http://www.icy-veins.com/overwatch/dva-strategy-gameplay-guide D.Va Guide on Icy Veins] |
||
{{Heroes}} |
{{Heroes}} |
||
Revision as of 04:10, 16 October 2021
| D.Va | |
|---|---|
|
| |
| “I play to win.” | |
Real Name |
Hana Song (송하나) |
Age |
19 |
Nationality |
|
Occupation |
Professional gamer (formerly) Mech Pilot Actress |
Base |
Busan, South Korea |
Affiliation |
Mobile Exo-Force of the Korean Army (MEKA) (South Korean Army) |
| Charlet Chung[1] (English)
Genevieve Doang (French) | |
Cosmetics |
Cosmetic page |
Quotes |
Quotation page |
Role |
Tank |
Health |
150 (Pilot) 300 (Mech) (Open queue) Expression error: Unexpected ( operator. (Role queue) |
Armor |
300 (Mech) |
Character Video
| |
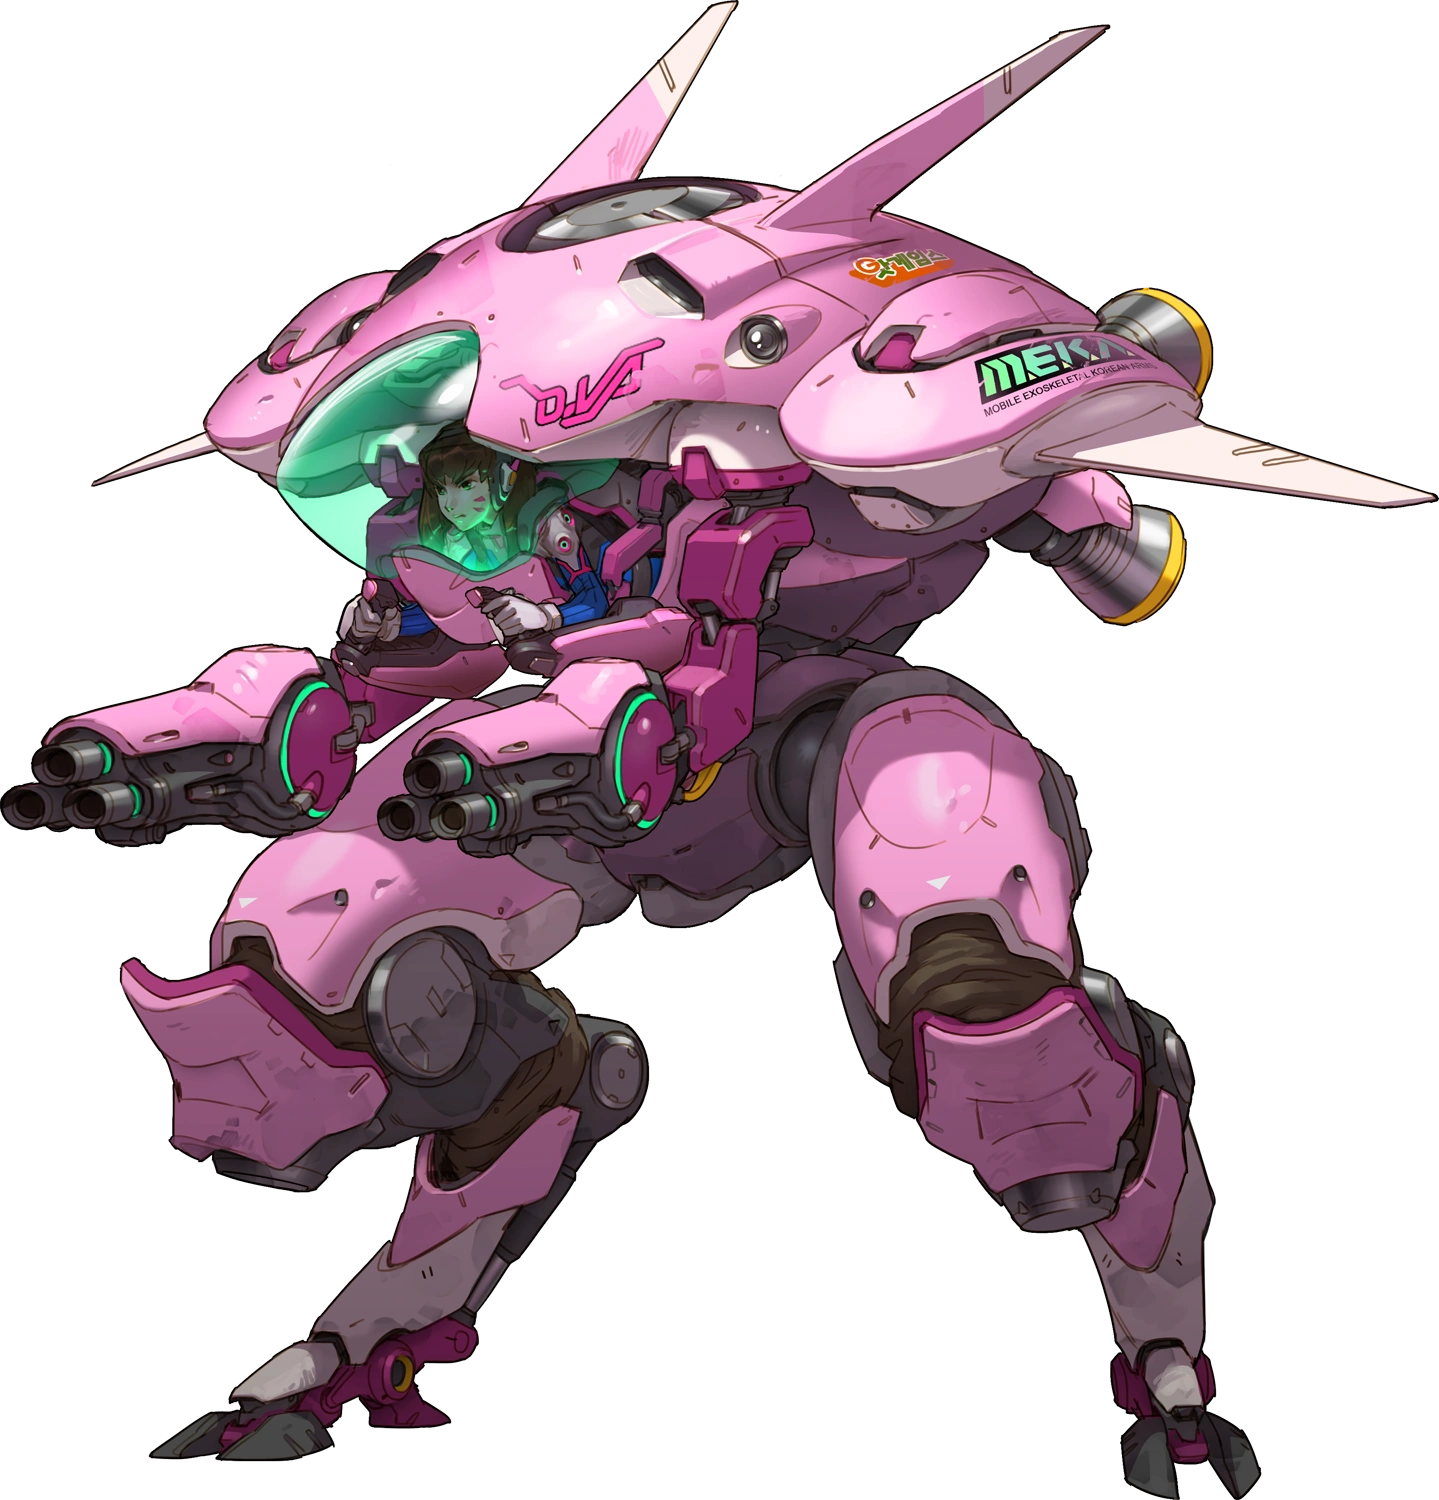
D.Va is a Tank hero in Overwatch.
Overview
D.Va’s mech, Tokki is nimble and powerful — its twin ![]() Fusion Cannons blast away with autofire at short range, and she can use its
Fusion Cannons blast away with autofire at short range, and she can use its ![]() Boosters to barrel over enemies and obstacles, or absorb attacks with her projectile-destroying
Boosters to barrel over enemies and obstacles, or absorb attacks with her projectile-destroying ![]() Defense Matrix.
Defense Matrix.
Abilities

- D.Va can use
 Self-Destruct while ejecting.
 - D.Va is invulnerable while ejecting.

- Damage per second: 44.00 - 146.67

- Damage per second: 98.00 while firing (this can also be considered as a burst DPS rate), 65.01 overall

- D.Va cannot use
 Fusion Cannons while the ability is active.
 - Uses a resource meter that, after a 0.75 second delay, recharges at a rate of 16% per second.
- Takes 7 seconds to fully recharge.

- The cooldown triggers after the
 Boosters ability ends.
 - Cancelled upon using quick melee.
- Does not affect
 Fusion Cannons or Micro Missiles' accuracy.

Splash: 1 - 4 per missile
Self: 1 - 4 per missile
- Deals up to 126 total damage. (8.18% ultimate charge)
- Can be used alongside Fusion Cannons.
- Cannot be manually cancelled.


300 armor
- Becomes completely charged after Self-Destruct detonates, or if D.Va is Resurrected.
- Automatically reloads the Light Gun.
Strategy
D.Va is a unique tank with some mobility. With very high health and ![]() Boosters, she can close a gap to the enemy with ease. She has high damage output at close-range, making her a strong fighter in a 1-on-1 match. Her
Boosters, she can close a gap to the enemy with ease. She has high damage output at close-range, making her a strong fighter in a 1-on-1 match. Her ![]() Defense Matrix is useful against all incoming projectiles, protecting her teammates from enemy fire. The
Defense Matrix is useful against all incoming projectiles, protecting her teammates from enemy fire. The ![]() Micro Missiles deal high amount of damage when used in close range. She is a dangerous flanker in the Tank class, dealing consistent damage to the enemy.
Micro Missiles deal high amount of damage when used in close range. She is a dangerous flanker in the Tank class, dealing consistent damage to the enemy. ![]() Self-Destruct will wipe all opponents within the blast area. However, she doesn't have an extended barrier to properly protect her team like Reinhardt. She is also slow while firing, allowing the enemy to outrun her to disengage or move around her to distract her aiming. Both
Self-Destruct will wipe all opponents within the blast area. However, she doesn't have an extended barrier to properly protect her team like Reinhardt. She is also slow while firing, allowing the enemy to outrun her to disengage or move around her to distract her aiming. Both ![]() Fusion Cannons and
Fusion Cannons and ![]() Micro Missiles are ineffective against anything further than medium-range, meaning she can be outranged by the enemy before she even has a chance to close a gap with
Micro Missiles are ineffective against anything further than medium-range, meaning she can be outranged by the enemy before she even has a chance to close a gap with ![]() Boosters.
Boosters.
Weapons & Abilities
- Fusion Cannons: D.Va's main weapons on the mech. Her mech can fire consistent shotgun-like bullets onto the targeted point. She can rapidly fire her bullets without needing to reload, but suffers from slow movement while firing.
- While firing her Fusion Cannons, D.Va's movement speed is reduced by 40%, down to 3.3 m/s.
- Fusion Cannons have 11 bullets per shot and large spreading; position yourself to the closest of the targets so that they won't be able to escape from you while firing.
- Aiming for the upper-body is recommended due to the nature of spread in combination with infinite ammo.
- Spraying the bullets at mid-to-long range has little to no effect, but it can pressure the enemy and sometimes interrupt some certain abilities when hit, like Mercy's self-healing and Sombra's Stealth.
- The Light Gun does not have damage falloff, and is actually more effective than the Fusion Cannons at long range.
- While firing her
- Defense Matrix: D.Va's primary defensive ability. When activated, the targeting-array will pop up from the front of her mech. All incoming projectiles will be shot down mid-air when they come into range of this ability. D.Va cannot attack with her Fusion Cannons while using it.
- While Defense Matrix has infinite "health" and can block any number of projectiles, it only lasts for 2 seconds when used continuously, and requires 1 second before beginning a recharge. Try to use it as a quick-burst protection instead of as a main blocking tool like the barriers of Reinhardt or Sigma.
- If some hero rushes into a group of enemies, use Defense Matrix to cover your allies when needed. For example, cover Winston when he jumps in or cover Pharah when she is using her ultimate. You can protect your teammates with Defense Matrix without needing to be right next to them thanks to its long range. Keep its short duration in mind; try not to spend all of its charge and leaving yourself as the enemy's main target.
- Defense Matrix only blocks fire from the front, and cannot prevent incoming projectiles from other directions, making it ineffective against flankers and less viable when used as a barrier to protect her team or herself.
- Keep playing a mind game; try to lure some heroes like Zarya or Mei into thinking that you have run out of Defense Matrix so that you can use it to block their Ultimate. D.Va's Defense Matrix is very useful to erase a powerful ultimate if timed properly.
- When retreating from a group of enemies, activating Defense Matrix while moving backward will greatly help D.Va to survive a strong attack.
- While
- Boosters: When activated, D.Va's mech will launch into the air. She will move forward with faster movement speed and be able to adjust her momentum for 2 seconds. Deals damage and knockback to enemies when collided with. Fusion Cannons are available to use during Boosters.
- The cooldown triggers after the Boosters ability ends.
- Despite its small damage, it can still be used with a melee combo to guarantee a strong knockback and decent damage dealt.
- Using Boosters in combination with Fusion Cannons can guarantee a kill on injured enemies who are trying to retreat.
- D.Va can activate Defense Matrix during the flight to protect herself from enemy fire.
- Boosters can be stopped mid-use by a melee attack or Boosters' key again.
- The cooldown triggers after the
- Micro Missiles: When activated, D.Va's mech will launch a volley of missiles after a short cast time. The missiles will travel in a straight line and hit the first solid target. The ability can be activated in all actions and can't be stopped until D.Va is stunned or the mech is destroyed. The missiles can damage the D.Va who fired them.
- Combining the ability with primary fire can ensure a kill on an isolated enemy. It is less effective when used on a group of enemies, but still provides a strong pressure and enough damage to gain a great amount of ultimate charge.
- Since it can be activated at any time, consider using it when Defense Matrix is activated. This will render the enemy's attack useless and hurt them with a bunch of missiles.
- Try not to waste the ability on a hero with a stun attack, since a stun effect can interrupt the missiles immediately.
- It's better not to use missiles apart from close range. The missiles travel at a slow speed and only deal small damage upon impact. Additionally, the enemy team can easily see it coming from afar and walk a step back to dodge it.
- Self-Destruct: (Ultimate): The ultimate of D.Va's mech. D.Va will eject from her mech, which will detonate after 3 seconds. It deals massive damage upon explosion in a very large area around it.
- The mech will receive any momentum from Boosters if they were used prior to activating Self-Destruct. Use this to launch it in the right direction, and even to stall its travel around corners and catch enemies by surprise.
- The blast creates a strong knockback effect on any opponents that survive, sometimes launching them into a pit or off a cliff.
- Any cover will block the damage from Self-Destruct entirely; even a light post that is large enough to cover the hero's size will allow them to survive the blast.
- Succeeding in using Self-Destruct's explosion will fully charge D.Va's Call Mech ability. However, if your mech is blown off a cliff while the countdown is still going, you will not gain any ultimate charge.
- After her mech takes critical damage, there is a brief window between the damage being taken and her ejecting from the cockpit where an ultimate can be used to cause the mech to detonate rather than simply being destroyed. This will also give her a full Call Mech ultimate charge.
- The mech will receive any momentum from
- Light Gun: D.Va's main weapon after her mech is destroyed. The Light Gun deals considerable damage with fast (but not hitscan) projectile bullets.
- The weapon is very accurate at most ranges. D.Va can use while kiteing enemies and charge her ultimate meter to call a new mech.
- With her small hitbox, D.Va can dance around and kite the enemy, using the weapon's projectile nature to cut off the enemy's escape routes. Keep in mind that you have low survivability and lack movement options in pilot form, though.
- The Light Gun does not have damage falloff, and is actually more effective than the Fusion Cannons at long range.
- Call Mech: (Ultimate): D.Va can call a new mech after her previous one is destroyed.
- The mech will deal considerable damage around it upon impact, killing any low health character. However, you must make sure that you can safely return to the mech.
- The ability creates a strong knockback upon cast. It can launch the enemy to an environmental kill.
- Both D.Va and her mech can be damaged or killed while she is entering the mech.
- When not fully operating the mech, any damage being dealt to you will not transfer to ultimate charge for your enemies.
General Strategies
- While D.Va is considered a Tank, a lot of successful D.Va players use her like Reaper. Flanking and harassing are some of D.Va's strong suits. Her high damage output at close range coupled with her Boosters movement ability makes it easy for her to get "shotgun-like" damage in and escape with ease.
- Defense Matrix is especially strong against most damage dealers. It can even negate a dangerous bullet from McCree's Deadeye or even Pharah's Barrage.
- You can close the gap on most heroes with Boosters, but you will be susceptible to enemy fire while airborne. Defense Matrix can be used during Boosters, so activate it while flying towards a target that's shooting at you.
- You need to prioritize protecting the team from flankers and snipers, potentially by rushing them down at close range. Snipers are your first target since they are vulnerable at close range followed by other damage dealers depending on the situation and their position.
- It is not recommended to play D.Va without a shield tank on your team due to her own lack of shield and the short duration of Defense Matrix. She can't offensively eliminate an entire enemy team by herself like a Damage hero, and she can't provide extended cover like a shield tank such as Reinhardt or Orisa, but she can alternate between the two roles in short, well-timed bursts.
- Strategize where and when to place a Self-Destructing mech. The 3 seconds countdown of Self-Destruct is long enough for your enemies to find cover or get behind a friendly Barrier. One effective tool is to use Boosters before Self-Destruct to send the Ultimate out from a blind spot towards a place where there is less cover.
- D.Va's high damage in her mech is useful against Tanks. Due to their large size and slow speed, the burst damage of Micro Missiles and Fusion Cannons can chew through a lot of health.
- Even though Defense Matrix will destroy all projectiles, it will not absorb beams such as Zarya's Particle Cannon, Mei's Endothermic Blaster, Moira's Biotic Grasp, or Symmetra's Photon Projector.
- D.Va has a large critbox in front of her mech (the cockpit). You will receive critical damage easier than most heroes, so avoid turning your mech to face oncoming fire without Defense Matrix active.
- Ramming an enemy with Boosters deals damage in addition to mild knockback, which may be enough to finish off a low-health opponent.
- When out of the suit, D.Va's primary goal is to score as many headshots as possible, as fast as possible, to call her next mech. You may want to target a distant, large enemy such as Roadhog or an enemy D.Va to regain your ultimate charge.
Match-Ups and Team Synergy
Tank
| Hero | Match-Up | Team Synergy |
|---|---|---|
D.Va |
D.Va mirror matches are extremely bizarre. Both of you are going to try to act smart and fight around each others' Don't use more than 0.364 seconds, or 18.2%, of your |
D.Va has no notable team synergy with another D.Va. |
Orisa |
Orisa's |
A sturdy Orisa as your teammate frees you up to play as a more aggressive Tank. With that in mind, don't leave her to fend for herself; once you've picked off any flankers or lone enemies, try to stay by your Orisa to make sure she isn't ambushed, since she's not as handy as you are in a close range fight. |
Reinhardt |
Your quick mobility, ramming potential, and burst-fire capabilities may allow you to chase down a lone Reinhardt and quickly finish him off. Conversely, if Reinhardt is chasing after you, fly away and he will be incapable of catching up. Using |
As D.Va lacks any capability to produce shields, a friendly Reinhardt can cover your role as a primary Tank while you block large-impact attacks and chase after enemies Reinhardt is incapable of pursuing. The stun of |
Roadhog |
Roadhog fights are extremely unfortunate, because your |
Teaming up a D.Va and Roadhog will result in your team lacking heavily in protection. However, among the Roles#Tanks, D.Va and Roadhog are also arguably the most offensively powerful. With the right team comp that focuses more on barreling through an enemy line rather than slowly pushing and protecting your team, you can pick off key targets while your Damage allies finish off any stragglers. |
Sigma |
Sigma's |
With a friendly Sigma on your team, you'll have an incredibly easy time negating incoming projectiles and covering each other's bases. That being said, you'll have a much greater difficulty against beam weapons such as those of Zarya and Symmetra. Try to do your fair share of absorbing projectiles and don't put the burden of protection on your friendly Sigma; if his |
Wrecking Ball |
If you and Wrecking Ball both stay put and fire away at one another, you're almost certain to come out on top. Unfortunately, due to his high mobility, this will rarely be the case. While it's unlikely that Wrecking Ball will ever land a kill on you unless he's supported by his allies, his primary asset against you is being a nuisance who will refuse to die. Ramming him with your |
If your team decides to run both D.Va and Wrecking Ball as your tanks, you're offering your team extremely minimal protection. That being said, if your team is filled with heroes who prefer to stay mobile and fend for themselves, such as Genji, Tracer and Lucio, this may be an acceptable, aggressive team composition. |
Winston |
Out of your mech, Winston is a nightmare, because he'll just |
The classic "dive comp" combo, D.Va and Winston both have the ability to quickly move towards, or "dive", an enemy. This is especially helpful to ambush foes that wish to remain on the backline, such as Widowmaker or Support heroes. Try to coordinate with a friendly Winston so you both ambush the same target simultaneously. |
Zarya |
Zarya is among D.Va's greatest enemies, as she can build lots of charge from the fire of D.Va's |
While having a Zarya as a second tank will cost your team traditional barriers, you each have unique ways to negate incoming fire. As long as you keep constant awareness of your teammates, you can both keep them safe from enemy fire. Zarya's Ultimate, |
Damage
| Hero | Match-Up | Team Synergy |
|---|---|---|
Ashe |
You excel at taking down snipers, and Ashe is no exception. |
D.Va has no notable team synergy with Ashe. |
Bastion |
You can negate an enemy Bastion's |
While D.Va isn't as well-suited to protect a friendly Bastion as Reinhardt or Orisa, her |
Doomfist |
D.Va has no notable team synergy with Doomfist. | |
Echo |
Echo can use |
D.Va is a very complimentary tank for Echo. You're both capable of large amounts of burst damage, so you should have no trouble securing a kill or two when you go diving. Follow her call and keep close to her so she can shield you with |
Genji |
Due to Genji's constant mobility, he can be extremely difficult to pin down as D.Va, and his |
At higher skill levels, the classic "dive" composition almost always includes both D.Va and Genji, along with Winston and Tracer. |
Hanzo |
Your |
D.Va has no notable team synergy with Hanzo. |
Junkrat |
D.Va is able to combo her | |
McCree |
D.Va has no notable team synergy with McCree. | |
Mei |
At close range, Mei will almost always freeze you before your |
Mei's |
Pharah |
Your |
You and Pharah tend to be the most airborne heroes. You can take advantage of this by both taking control of the skies, especially if you have a friendly Mercy on your team. Pharah's primary counters are hitscan and sniper heroes, which happen to be some of your easiest targets; you can cover her counters, while her powerful rockets can help keep flankers off your back. |
Reaper |
Both you and Reaper need close range to effectively deal damage, and at close range Reaper will rip through you in seconds. While negating his |
D.Va has no notable team synergy with Reaper. |
Soldier: 76 |
D.Va has no notable team synergy with Soldier: 76. | |
Sombra |
With a well-timed |
A well-timed |
Symmetra |
Your large health pool and close-range fire are both great assets in quickly taking out Symmetra's turrets as well as Symmetra herself. Since your |
Symmetra can create a teleporter through which D.Va can send her mech during |
Torbjörn |
In addition to blocking an enemy Torbjörn's |
D.Va's |
Tracer |
Like Reaper, you and Tracer both excel when fighting at close range. Also like Reaper, Tracer will outdamage you in most circumstances. While Reaper has |
Tracer is absolutely essential to the classic "dive" composition that includes D.Va and Winston. Your team's lack of a shield tank (such as Reinhardt, Orisa, or Sigma) can potentially be made up for if an accurate Tracer dances around your enemies with well-used |
Widowmaker |
With her high mobility and ability to negate incoming fire, D.Va is an incredibly strong counter for Widowmaker. A common Widowmaker tactic is for her to fall to a lower altitude, wait for you to chase her, then use |
D.Va is able to distract potential targets, leaving them open to easier shots from an allied Widowmaker. |
Support
| Hero | Match-Up | Team Synergy |
|---|---|---|
Ana |
Ana is both a Support hero and a sniper, making her one of your highest-priority targets. With |
You may be a large target for your friendly Ana to heal, but you're also a mobile one. Make sure you're always in your Ana's line of sight to stay at full health. While a |
Baptiste |
Fighting a Baptiste one-on-one isn't too difficult for D.Va. However, his |
When Baptiste activates |
Brigitte |
Due to her |
D.Va has no notable team synergy with Brigitte. |
Lúcio |
Due to Lúcio's high mobility and self-heal, it can be very difficult to definitively finish him off, even with your |
D.Va has no notable team synergy with Lúcio. |
Mercy |
When an enemy Mercy is in sight, you need to be decisive on whether or not you're going to focus on her. If you damage her somewhat but let her fly away, she'll simply heal back to full health due to her self-healing abilities. In particular, while Pharah is one of your greatest targets, she becomes far more difficult to deal with if she has a Mercy attached at the hip. If she's well-protected in the rear of the enemy team, don't barrel in after her unless you have other teammates who are coming with you, otherwise she'll fly from teammate to teammate to avoid your attacks while her teammates promptly rip you to shreds. That being said, if you do have the likes of a Winston or Doomfist on your side, you can safely dive in and focus her down. If you catch Mercy alone, her lack of mobility and puny firepower makes her an easy target; just kill her quickly, because if one teammate shows up, she can fly to them and use them as a shield. | Like Pharah, D.Va's flight provides a massive boon to a friendly Mercy's aerial mobility. If a friendly Mercy is willing to pocket you, you can withstand most fights thanks to your impressive health and close-range damage output. If the situation is dire, though, be willing to flee from the fight; you might survive a group fight, but if your Mercy is killed because you weren't protecting her, she'll be much less inclined to pocket you in the future. By flying away from a fight, you're giving your friendly Mercy the out she needs. |
Moira |
Moira's only real tool to escape D.Va is |
D.Va has no notable team synergy with Moira. |
Zenyatta |
Zenyatta can shut you down in a number of ways. His |
Because she has high damage output at close range (as well as medium to long range with her |
Story
D.Va is a former professional gamer who now uses her skills to pilot a state-of-the-art mech in defense of her homeland.[2] She is a very competitive individual,[3] and coupled with her pro-gamer skills, this makes her an extremely effective mech pilot. Never backing down, D.Va always plays to win.[4] While she projects a carefree, irreverant attitude, D.Va is burdened by the emotional cost of defending her homeland, and the facade the South Korean media projects on her.
In addition to skills as a mech pilot, D.Va is also a competent mechanic.[5]
Early Life
| “ | It's like how we used to stay up late, and work on your hoverbike. You mean the one you wrecked? Really? You're still mad about that? We won the race! Yeah! And you almost killed yourself! |
„ |
| ~ Dae-hyun and Hana |


Song on the e-sports scene
Hana Song grew up playing classic games with her father, himself a former professional gamer during his younger years.[6] He was the one that introduced her to StarCraft, and her undeniable skill helped lay the foundation for her eventual e-sports victories in other games.[7]
Song has been friends with Dae-hyun since childhood. They would stay up late working on his hoverbike. Hana took part in a race with it and won, albiet at the cost of the bike and nearly her own life.[5]
Like her father before her, Song became a pro-gamer. [8] She became a Mecha Guardian V player in high school, quickly ascending to the #1 rank, winning the world championship[5], surpassing her teammate Yuna Lee [6][9] and rival Kyung-soo Hann.[6] A fierce competitor, Song played to win at any cost, and gained a well-earned reputation for showing no mercy to her opponents.[2]
MEKA
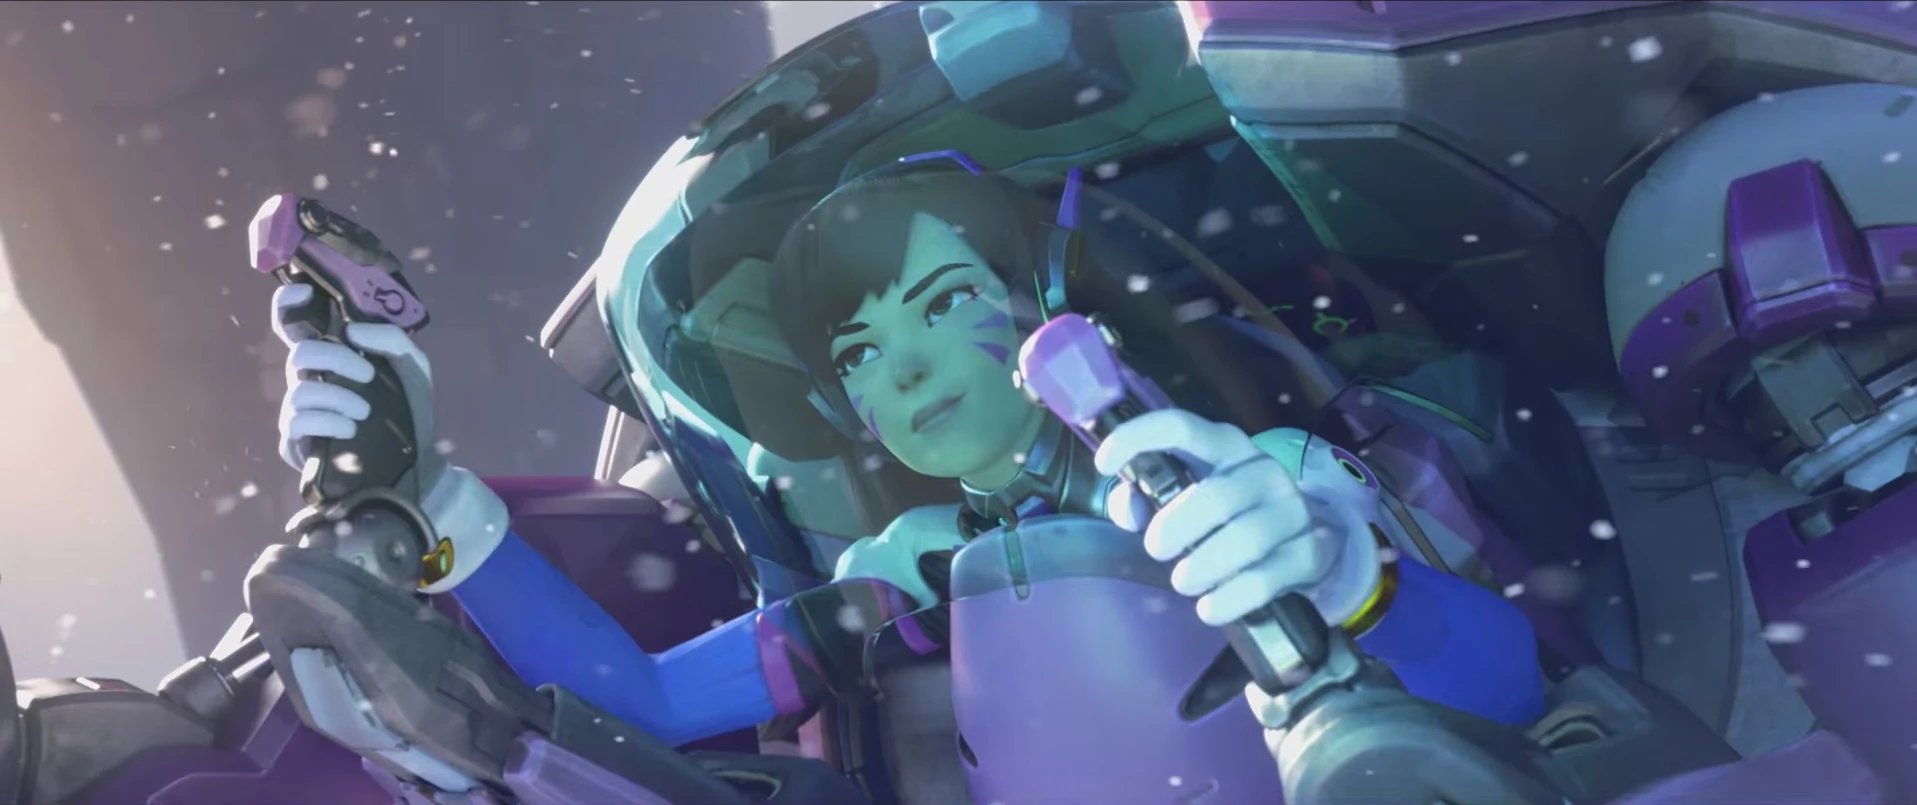
Song pilots her mech
At home, however, not all was well, as MEKA struggled to maintain its defense against the Gwishin omnics that repeatedly attacked the nation. As the omnics continued to adapt, they eventually disrupted MEKA's drone-control networks, forcing the military to place pilots in the mechs. Scrambling to find suitable candidates, the government turned to the country's professional gamers, who possessed the necessary reflexes and instincts to operate the mechs' advanced weapons systems,[2] in addition to standouts from other fields that required similar talents. Top stars were drafted, including the 19-year-old Song,[3] along with Lee and Kyung-soo.[9][6] She saw the new mission as a game,[2] and an evolution of her own career. Without fear or hesitation, she abandoned the limelight of her pro-gamer career, and got an armored mech operator's licence. As a member of MEKA, she could put her reflexes to the ultimate test on a real battlefield, instead of a digital one.[3] Her skills and intense competitive spirit made her an extremely effective pilot.[4]
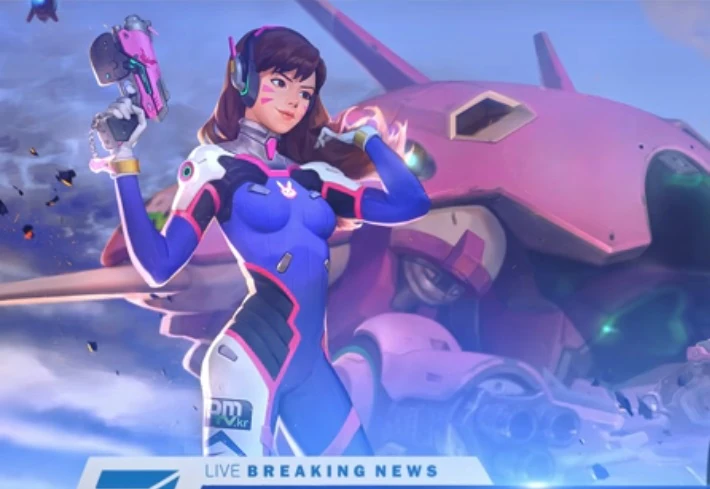
A MEKA poster of D.Va
Song now fearlessly charges into battle alongside the rest of her MEKA unit, ready to spring to her nation's defense at a moment's notice. Recently, she has begun to stream combat operations to her adoring fans, and her growing following has turned her into a global icon.[2] Sponsorship deals and her fanbase provided her with the means to customize her mech,[10] such as Nano Cola.[5]
At some point she also played one of the leading roles in the movie Hero of My Storm.[11][12]
As an active member of the military, Song was no longer able to freely travel as she could've as a civilian. She became an avid reader of Mei's Adventures, the publicly-posted travel journal of climatologist Mei-Ling Zhou, fascinated with all the different places Mei has seen.[13]
Shooting Star
| “ | Oh man. This time off is great, isn't it? What's not to like? There's delicious food, and drinks... Yeah... And good friends. The kind that are always there for you-- when you need them most. |
„ |
| ~ Dae-hyun and Song after the Gwishin attack |
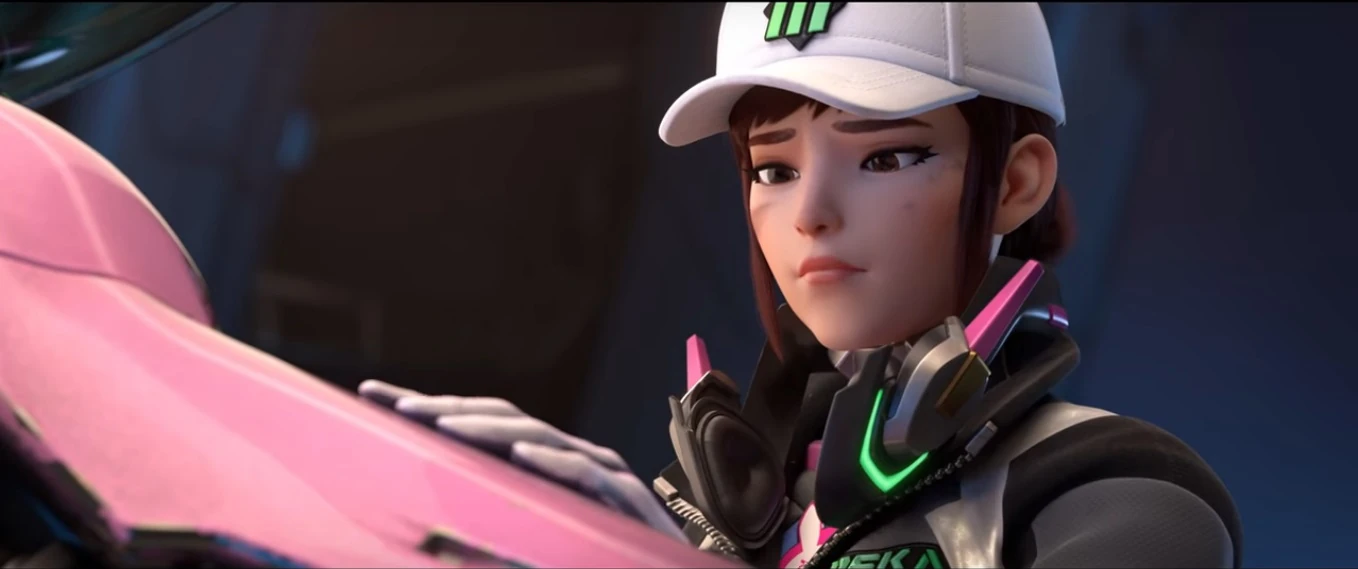

D.Va reflects on her burden
As time went on, the cost of defending South Korea from the Gwishin began to take its toll on Song. In one battle in Busan during a thunder storm, the squad barely managed to defeat the omnics, but the other mechs were put out of commision due to serious damage and their pilots sustained some injuries; only Song came out of it relatively unscathed. While the rest of the squad went on leave and the media reporting that Song was celebrating the victory by schmoozing with celebrities, Song had actually chosen to remain on active duty and spent time over the next week fixing and fine-tuning her mech alongside Dae-hyun, who had also joined MEKA as her assigned mechanic. As she stated that the squad and the rest of Busan were counting on her to keep the city safe, and any mistakes on her part could cost them everything, Dae-hyun recognized the emotional weight Song was carrying. He tried to convince her that she needed a break and that it was okay to ask for help, not needing to bear it alone, but she assured him that she had things under control.
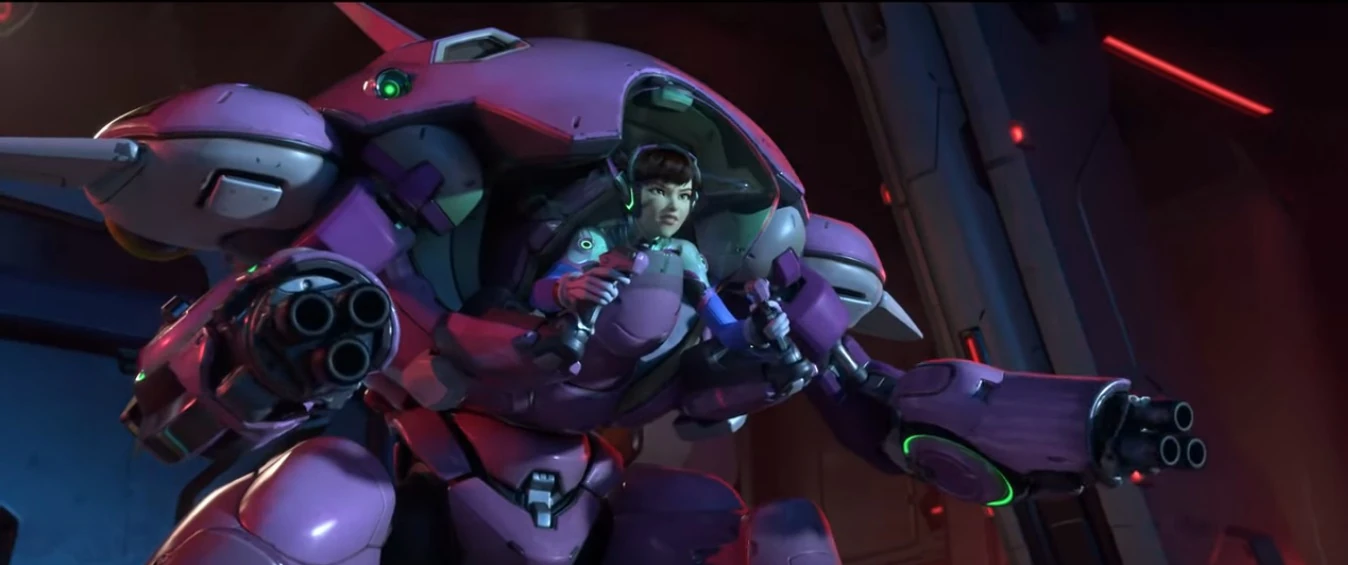
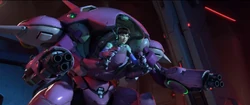
Ready to launch
That didn't last long however, as five Gwishin omnics returned to attack Busan—while previous attacks were spaced between months, this one was just one week, which left the pair the only ones present to defend against the omnics. Song launched her mech to engage them. She took out two of the Gwishin, but the remaining three outmaneuvered her, damaging her mech and destroying one of the fusion cannons. Dae-hyun told her to get to cover and wait for reinforcements, but Song stated that they wouldn't get there in time. Performing a 180 on the pursuing omnics, she managed to destroy two of them, while the last Gwishin broke off and headed for Busan. Song pursued it, but it avoided her weapons fire and micro missile barrage before turning around and entangled her mech, tearing off the other cannon when she tried to fire on it. Left without any weapons, all her status readouts in the redline, and the city still in danger, she realized she could do nothing else and asked for her friend's help.
With Dae-hyun going over the mech's status, on the mention of the reactor becoming unstable Song remembered their earlier conversation of the destruction of his hovercycle, and suggested purposely overloading the mech's reactor. After some protest, Dae-hyun obliged, and as Song distracted the omnic to buy him some time he successfully triggered an overload that would destroy the reactor in sixty seconds. The omnic would reach Busan before that however, so Song ejected from the mech and used her light gun to shoot the exposed reactor from afar, destroying both the mech and the omnic. She fell into the sea, where she was recovered by a search-and-rescue team and taken for medical treatment, Dae-hyun accompanying her.


Enjoying 'time off'
South Korean media later made an update on the attack, reporting that authorities had stated that she had emerged without a scratch. In reality, she came out of the ordeal with a broken leg and arm, along with other more minor injuries. That didn't stop her from using her time off by assisting Dae-hyun with assembling her new mech. She thanked him for being there for her when she'd needed him.[5]
Achievements
| Name | Icon | Description | Reward |
|---|---|---|---|
|
|
Prevent 1500 damage with a single use of D.Va's Defense Matrix in Quick or Competitive play. |  | |
|
|
Kill 4 enemies with a single use of D.Va's Self-Destruct in Quick or Competitive play. |  |
Trivia
- Self-Destruct: In line with D.Va's ultimate voice line, "Nerf this!", which can be interpreted as a challenge to the developers to nerf her ultimate, as of October 15, 2021, Self-Destruct has never been nerfed.
- Her name is a play on the word "Diva", meaning a female celebrity.
- The stylization of her name is reminiscent of Korean pop idols, who often adopt pseudonyms to stand out. In the Korean version of the game, D.Va's name is the only name not in Hangul, reflective of the romanization of these idols' names. This makes sense considering D.Va is a Korean idol through her fame as a pro-gamer.
- The way her name has a prefix "D." is reminiscent of the way esports players have an abbreviated team tag before their names. This is supported by how she and D.Mon played on the same team.
- D.Va's given name Hana (하나) is the same as the Korean number 1. This parallels her personality, as she is a world champion and self-proclaimed "Number One."
- D.Va's jersey number when she was a pro player was also the number 1. [14]
- D.Va's suit has sponsors all over it, which is a reference to the same advertising style of sponsors in Korean esports.
- D.Va's mech is named Tokki (토끼), which means rabbit.[15]
- Hana is a fan of Lúcio's music, and has apparently bought his album. He in turn also knows enough of the pro-gaming scene to be a fan of hers.
- D.Va is the youngest launch hero, and was the youngest hero overall until Orisa was introduced. D.Va is sometimes teased by others because of her age, such as when Widowmaker mockingly says, "This is no place for children."
- D.Va is the fifth playable Overwatch character in Heroes of the Storm.[16]
- D.Va is a purchasable announcer in Heroes of the Storm, along with Genji.
- Defense Matrix has D.Va manually shoot down incoming projectiles, counting towards her APM. In-game, D.Va is able to reach an APM of 84,480 in a best-case scenario by blocking the combined 1,408 pellets per second of 11 simultaneous Whole Hogs.
- D.Va is the first hero to use randomized "Quick Melee" attacks with both arms (in mech mode). Outside of her mech, she uses her right hand for "Quick Melee" attacks.
- D.Va is used as the symbol for the National D.Va Association, now called FAMERz, a progressive feminist movement composed of Overwatch fans. The group achieved international notability after a photograph of their flag—featuring D.Va's bunny-ears logo—was photographed in a news report for an international Women's March event in Seoul on January 21st, 2017. Based in South Korea, the group chose D.Va as its symbol owing to an earlier incident where professional teenage Overwatch player Geguri was accused of cheating owing to an eighty percent win rate; which some believed was "impossible" for girls to achieve. The group distributes stickers of D.Va's bunny logo, among other paraphernalia. It plans on finding new ways to use Overwatch as a tool for spreading its message.[17]
- Charlet Chung, who is D.Va's English voice actor, has commented positively on her character, commenting "in terms of representation of Asian-American characters in video games, particularly women, they might be over-sexualized - and I don't know if I'm being too candid here - I feel like D.Va is more of a real person. She happens to have some sex appeal, but that's not why she's in the game. She's not there to be an exotic lotus."[18]
Development
D.Va was first announced through the official PlayOverwatch Twitter account, which linked to a mock-up page on the official StarCraft II World Championship site.[19][20] She had previously been depicted in posters in the attacking team's starting area in Hanamura. Her StarCraft page was later taken down and the link instead redirects to the StarCraft II home page.
The StarCraft WCS web page first introduced D.Va as a former professional StarCraft player. Michael Chu later clarified on February 1, 2018 that this was not intended to be canon and was just a fun way to tease the character. He also explained that the unnamed game that she was best known for in her career was one that best matched the skills needed to pilot her mech.[21]
D.Va's design and kit seems to take inspiration from Brit, one of the hero concepts created for the Overwatch pitch meeting.
Merchandise
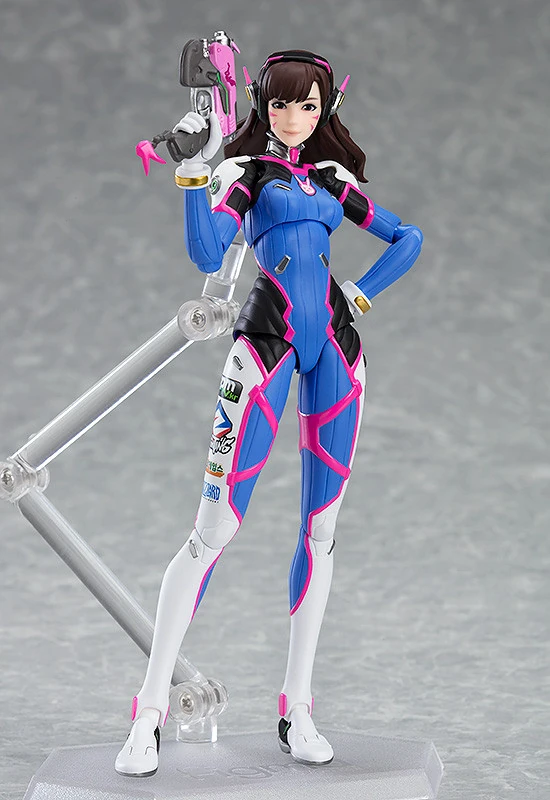
The Figma D.Va statue
- A StarCraft II portrait and announcer for D.Va was available for those who attended BlizzCon 2016 or bought a Virtual Ticket for the event.[22] The announcer has since been made available for regular purchase.
- A D.Va statue is available.[23]
- A Funko Pop D.Va statue is available for purchase from the Blizzard Store.[24]
- A D.Va-themed hoodie is available from JINX.[25]
- A Figma D.Va statue is available.[26]
- D.Va will appear in LEGO Overwatch, as part of a set shared with Genji.[27]
Gallery
D.Va on a poster in 1 second {{A
Videos
Official
Curse
Balance Change Log
- Damage increased from 50 to 250
Developer Comment: D.Va's respawn is often intentionally delayed by the enemy team if she is the last player alive from her team and without her mech. This change will make it more dangerous to be near the Call Mech arrival area for low health heroes.
Developer Comment: We're increasing the ratio of armor to health that D.Va's mech has to enable it to withstand more damage from shotguns, beams, and weapons with a high rate of fire.
- Movement penalty reduced from 50 to 40%
- Cooldown reduced from 1.5 to 1 second
- Activation delay reduced from 0.5 to 0.25 seconds
Developer Comment: These buffs are aimed at making D.Va feel more fluid and responsive to play.
- Cooldown decreased from 5 to 3 seconds
Developer Comment: The lower cooldown on her mobility will enable D.Va to more readily swap between playing offensively and defensively.
- Defense Matrix cooldown decreased from 2 seconds to 1.5 seconds
Developer Comment: With role locks in place there is some room to improve D.Va’s impact as a tank, so we’re partially reverting a previous change which increased Defense Matrix’s cooldown.
- Regeneration rate increased from 12.5% to 16% per second
- Delay before regeneration begins lowered from 1 second to 0.75 seconds
Developer Comment: This change will allow D.Va to absorb more damage over time, while still keeping the maximum duration she can absorb at one time the same.
- Pilot ultimate cost reduced by 12%
Developer Comment: This change is just meant to counteract the global increase in ultimate cost. The time it takes to generate a D.Va’s ultimate when out of her mech should remain the same as it was before this update.
- Reduced length of Defense Matrix from 15 meters to 10 meters.
Developer Comments: Defense Matrix is a very powerful defensive ability and can often feel oppressive from far away. Reducing the range on it will require D.Va to position herself more carefully to take advantage of its effects.
- Heroes that are flying can now be knocked back and slowed
Developer Comments: Knockbacks are now less affected by how the enemy was moving when they were hit. Instead of having small or large knockbacks that depend on chance, knockbacks will feel similar regardless of the enemy’s movement leading up to the knockback. Allowing flying heroes, like Mercy when using her Valkyrie ability or D.Va using her Booster ability, to be properly knocked back makes for more fluid, realistic gameplay.
- Cooldown increased from 1 second to 2 seconds
Developer Comments: This change allows D.Va’s enemies to play around her Defense Matrix by increasing its downtime between uses.
- Explosive damage reduced from 6 to 4
- Impact damage reduced from 25 to 10
Developer Comments: D.Va’s burst potential is a bit too high, so we’re reducing the damage of her Micro Missiles and Boosters impact. Prior to this change, each missile dealt 3 impact damage and 6 explosive damage. We’re reducing explosive damage from 6 to 4 but leaving the impact damage the same, the net result being 21% damage reduction.
- An option to manually hold down D.Va’s boosters rather than toggling them has been added under Options > Controls > D.Va
- D.Va fires a barrage of small rockets that detonate on impact, dealing damage in a limited radius around each explosion. These can be fired while D.Va is using any other ability or firing her Fusion Cannons
- Defense Matrix's resource meter will now deplete twice as quickly
- Energy regeneration per second has been increased to 12.5% (formerly 10%)
- Fusion Cannons can now be fired while flying
Developer Comment: D.Va’s Defense Matrix uptime has proven to be too strong, but simply reducing it without making other changes would make her too weak (and far less interesting to play). Instead, we’re adding a new ability and giving her the ability to fire while flying. These changes give D.Va new options while maintaining Defense Matrix’s ability to shut down big enemy attacks.
- New sound effects and voice lines have been added, indicating when Defense Matrix has absorbed an enemy’s ultimate ability
Enemy shots no longer need to travel a minimum distance before they can be blocked Developer Comment: Previously, there was a minimum distance a projectile had to travel before it could be destroyed by Defense Matrix. This made it nearly worthless in situations where an enemy was right next to your teammate, such as when Roadhog hooks your ally. This change removes that restriction so Defense Matrix should now reliably destroy projectiles regardless of how far they have traveled.
- Armor decreased from 400 to 200
- Bullet damage decreased from 3 to 2
- Number of bullets per shot has been increased from 8 to 11
Developer Comment: D.Va’s armor often made her feel like she had no weaknesses, even against heroes that are typically effective against bigger targets (like Reaper). The changes to her primary fire will result in a small overall decrease in damage, but her Fusion Cannons should feel more consistent now.
- Ultimate cost has been decreased by 20%
- Mech health increased to 200 (formerly 100). Armor remains at 400
- Movement speed while firing has been increased by 25%
Developer Comment: We reduced the cost of the Call Mech ultimate ability to compensate for the increased ultimate cost across all heroes (detailed above). D.Va players shouldn’t experience a noticeable change. The rest of these changes help D.Va’s withstand attacks, which will allow her to keep pressuring enemies.
- After being activated, Defense Matrix will begin regenerating following a 1-second delay (formerly .5 seconds)
Developer Comment: Defense Matrix was too efficient when tapped repeatedly, instead of being held. Now, the recovery delay matches the ability cooldown.
- Cooldown decreased from 10 seconds to 1 second
- A new resource meter has been added. This meter will deplete while Defense Matrix is active and then recharge when it’s not in use.
- Defense Matrix takes 10 seconds to reach full charge from empty
- At a full charge, Defense Matrix will last for 4 seconds
- Defense Matrix will now remain active as long as its assigned hotkey is held
- Defense Matrix has been reclassified as an alternate fire and is now bound to RMB (by default)
- An option to "Toggle Defense Matrix" has been added under Options > Controls > D.Va
- Ultimate cost decreased by 15%
- Explosion delay reduced from 4 seconds to 3 seconds
- Explosion no longer damages D.Va (the player who activates it)
Developer Comment: D.Va isn't being selected as often as our other tanks, and we feel a lot of that stems from the underperformance of her damage absorption abilities. So, we've reconfigured her Defensive Matrix, making it more flexible and giving players the ability to use it more often. We’ve also given Self-Destruct a little more oomph, because it felt slightly underwhelming when compared to many of Overwatch's other ultimate abilities.
References
- ↑ 2015-11-24, "I AM D.VA". 'Facebook. Accessed on 2016-05-18
- ↑ 2.0 2.1 2.2 2.3 2.4 D.Va, Blizzard Entertainment. Accessed on 2015-11-12
- ↑ 3.0 3.1 3.2 2017-16-05, D.VA ENTERS THE NEXUS!. Blizzard Entertainment, accessed on 2017-05-17
- ↑ 4.0 4.1 2017-05-08, D.Va Spotlight – Heroes of the Storm. YouTube, accessed on 2017-05-18
- ↑ 5.0 5.1 5.2 5.3 5.4 Shooting Star
- ↑ 6.0 6.1 6.2 6.3 2018-08-28 D.Va Deconstructed
- ↑ Announcer: D.Va, Blizzard Entertainment. Accessed on 2018-12-28
- ↑ 2015-11-07, Overwatch: What’s New | Summary. Blizzplanet, accessed on 2015-11-12
- ↑ 9.0 9.1 Overwatch, Busan
- ↑ Pro D.Va, Blizzard Entertainment. Accessed on 2017-05-17
- ↑ Overwatch, Oasis
- ↑ Overwatch, Hollywood
- ↑ Overwatch, D.Va Quotes
- ↑ Michael Chu's Twitter, Accessed on 2018-08-24
- ↑ Michael Chu's Twitter
- ↑ Heroes of the Storm 2.0 – Hanamura Showdown
- ↑ 2017-1-26, Overwatch’s gamer girl hero inspires a feminist movement Polygon.com, accessed on 2017-1-27
- ↑ 2016-09-17, OVERWATCH: A WORLD FANS BUILT. IGN, accessed on 2016-09-18
- ↑ PlayOverwatch Twitter
- ↑ D.Va (Archive), WCS. Accessed on 2015-11-12
- ↑ 2018-02-01, Michael Chu on Battle.net Battle.net forums. Accessed on 2018-02-01.
- ↑ 2016-10-17, BlizzCon In-Game Goodies: D.Va Announcer and Portrait! Battle.net, accessed on 2016-11-17
- ↑ 2017-06-29, NEW STATUE D.Va | Pre-Order Now! | Overwatch. YouTube, accessed on 2017-07-03
- ↑ 2017-08-22, Gamescom 2017 swag and more, including new Blizzard exclusives. Blizzard Watch, accessed on 2017-08-23
- ↑ 2017-11-22, Overwatch Hoodies. Blizzplanet, accessed on 2017-11-23
- ↑ 2020-02-24, Toy Fair NY 2020: Figma Overwatch Action Figures. Blizzplanet, accessed on 2020-04-10
- ↑ 2018-10-02, Blizzard teases new Overwatch LEGO sets. Shack News, accessed on 2018-10-08
External links
| Heroes in Overwatch 2
| ||||||||||
|---|---|---|---|---|---|---|---|---|---|---|
D.Va |
||||||||||