Warframelord (talk | contribs) |
RainbowFlavouredPancakes (talk | contribs) Tag: Visual edit |
||
| (22 intermediate revisions by 10 users not shown) | |||
| Line 4: | Line 4: | ||
| image2 = Genji-ow2-portrait.png |
| image2 = Genji-ow2-portrait.png |
||
| caption = "Even if I sacrifice my body, I will never sacrifice my honor." |
| caption = "Even if I sacrifice my body, I will never sacrifice my honor." |
||
| − | | realname = Genji Shimada (島田源氏)<ref>Square Enix uses katakana "ゲンジ・シマダ".</ref> |
+ | | realname = Genji Shimada (島田 源氏)<ref>Square Enix uses katakana "ゲンジ・シマダ".</ref> |
| aliases = Sparrow |
| aliases = Sparrow |
||
| age = 35 |
| age = 35 |
||
| Line 59: | Line 59: | ||
| ability_type = Weapon (Primary Fire) |
| ability_type = Weapon (Primary Fire) |
||
| shot_type = {{proj|proj}} |
| shot_type = {{proj|proj}} |
||
| − | | damage = |
+ | | damage = {{tt|29|Damage per projectile}} |
| pspeed = 60 meters per second |
| pspeed = 60 meters per second |
||
| − | | fire_rate = {{tt|3 shurikens per 0. |
+ | | fire_rate = {{tt|3 shurikens per 0.88 seconds|3 shurikens in 0.2 seconds + 0.68 second recovery}} |
| ammo = 30 |
| ammo = 30 |
||
| reload_time = 1.5 second |
| reload_time = 1.5 second |
||
| Line 76: | Line 76: | ||
| ability_type = Weapon (Secondary Fire) |
| ability_type = Weapon (Secondary Fire) |
||
| shot_type = {{proj|proj}} |
| shot_type = {{proj|proj}} |
||
| − | | damage = |
+ | | damage = 29 |
| pspeed = 60 meters per second |
| pspeed = 60 meters per second |
||
| − | | fire_rate = 0. |
+ | | fire_rate = 0.68 second recovery |
| ammo = 30 |
| ammo = 30 |
||
| ammo_drain = 3 |
| ammo_drain = 3 |
||
| Line 105: | Line 105: | ||
* The cooldown will reset no matter what ability is used for the kill. |
* The cooldown will reset no matter what ability is used for the kill. |
||
* Swift Strike does not deal damage to traps such as Junkrat's {{al|Steel Trap}} or Widowmaker's {{Al|Venom Mine}}. |
* Swift Strike does not deal damage to traps such as Junkrat's {{al|Steel Trap}} or Widowmaker's {{Al|Venom Mine}}. |
||
| + | * While Dragonblade is active, Genji will Swift Strike with his katana instead. |
||
| duration = 0.3 seconds |
| duration = 0.3 seconds |
||
}} |
}} |
||
| Line 134: | Line 135: | ||
| ability_type = Ultimate Ability |
| ability_type = Ultimate Ability |
||
| shot_type = {{proj|melee}} |
| shot_type = {{proj|melee}} |
||
| − | | damage = |
+ | | damage = 110 |
| mspeed = {{tt|+30%|7.8 m/s}} [[movement speed|buff]] |
| mspeed = {{tt|+30%|7.8 m/s}} [[movement speed|buff]] |
||
| range = 5 meters |
| range = 5 meters |
||
| Line 140: | Line 141: | ||
| duration = 6 seconds |
| duration = 6 seconds |
||
| headshot = ✕ |
| headshot = ✕ |
||
| − | | ult_req = |
+ | | ult_req = 1932 points |
| ability_video = ADrxw94XHLg |
| ability_video = ADrxw94XHLg |
||
| ability_details = |
| ability_details = |
||
| Line 190: | Line 191: | ||
*You must choose the moment to use [[Dragonblade]] carefully. Genji is not any more durable than normal while using it, meaning that your enemies can easily knock you away and kill you at range if you use it inappropriately. Try to use Dragonblade when there are multiple enemies with low base Health (such as [[Symmetra]] or [[Mercy]]) within reach, as this will let you quickly kill them and chain your Swift Strikes to both eliminate more targets and remain evasive to survive longer. Make sure you're within melee range of your enemies before activating it. |
*You must choose the moment to use [[Dragonblade]] carefully. Genji is not any more durable than normal while using it, meaning that your enemies can easily knock you away and kill you at range if you use it inappropriately. Try to use Dragonblade when there are multiple enemies with low base Health (such as [[Symmetra]] or [[Mercy]]) within reach, as this will let you quickly kill them and chain your Swift Strikes to both eliminate more targets and remain evasive to survive longer. Make sure you're within melee range of your enemies before activating it. |
||
| + | |||
| + | *Flanking Support heroes is one of Genji's main roles. Targets like [[Mercy]] and [[Zenyatta]] are vulnerable to well-executed attacks and eliminating them will help your team immensely. However, targets like [[Brigitte]] and [[Moira]] will prove to be very difficult to flank successfully, because they can evade you or simply beat you most of the time in close range combat. Choose your targets wisely. |
||
==Match-Ups and Team Synergy== |
==Match-Ups and Team Synergy== |
||
| Line 223: | Line 226: | ||
|- |
|- |
||
|<center>[[Image:icon-wrecking_ball.png|75px|link=http://overwatch.gamepedia.com/Wrecking Ball]]<br />[[Wrecking Ball]]</center> |
|<center>[[Image:icon-wrecking_ball.png|75px|link=http://overwatch.gamepedia.com/Wrecking Ball]]<br />[[Wrecking Ball]]</center> |
||
| + | |<small>Although both of you are mobile, Wrecking Ball moves faster than you in Roll. This means he can retreat from you better than you from him. Plus, Deflect doesn't block Grappling Claw and Piledriver. You also can't block his mines and they can be deadly to you if you're caught in it. Since they can also latch to ceiling and walls, you should exercise caution when traversing his Minefield. Also, Wrecking Ball can use Adaptive Shields to tank some of your damage.</small> |
||
| − | |<small>(To be added)</small> |
||
| + | |<small>Both you and Wrecking Ball are mobile, so it can serve in both of your interests to travel together and dive on the same opponents.</small> |
||
| − | |<small>(To be added)</small> |
||
|- |
|- |
||
|<center>[[Image:icon-winston.png|75px|link=http://overwatch.gamepedia.com/Winston]]<br />[[Winston]]</center> |
|<center>[[Image:icon-winston.png|75px|link=http://overwatch.gamepedia.com/Winston]]<br />[[Winston]]</center> |
||
| Line 245: | Line 248: | ||
|- |
|- |
||
|<center>[[Image:icon-ashe.png|75px|link=http://overwatch.gamepedia.com/Ashe]]<br />[[Ashe]]</center> |
|<center>[[Image:icon-ashe.png|75px|link=http://overwatch.gamepedia.com/Ashe]]<br />[[Ashe]]</center> |
||
| + | |<small>As a sniper, Ashe usually prefers to stay in the back. You can easily sneak up on her and flank her so long as you stay out of her line of sight. Even at a distance, you can Deflect her scoped shots. You can also deflect her Coach Gun pellet to damage her as she tries to flee. With Dynamite, you can deflect it but your Shurikens won't detonate it earlier. Also, you can burn yourself with Dynamite (since Ashe normally could).</small> <small>With B.O.B., you can't block his charge but you can deflect the bullets. It won't be enough to kill B.O.B. since Deflect has a short duration. However, you can redirect those bullets to Ashe or another enemy player.</small> |
||
| − | |<small>(To be added)</small> |
||
|<small>(To be added)</small> |
|<small>(To be added)</small> |
||
|- |
|- |
||
| Line 253: | Line 256: | ||
|- |
|- |
||
|<center>[[Image:icon-doomfist.png|75px|link=http://overwatch.gamepedia.com/Doomfist]]<br />[[Doomfist]]</center> |
|<center>[[Image:icon-doomfist.png|75px|link=http://overwatch.gamepedia.com/Doomfist]]<br />[[Doomfist]]</center> |
||
| + | |<small>Deflect cannot block Doomfist's abilities, which will give him bonus shields. Rocket Punch can stun you, effectively cancelling Deflect and possibly Swift Strike.</small> |
||
|<small>(To be added)</small> |
|<small>(To be added)</small> |
||
| + | |- |
||
| + | |<center>[[Image:icon-echo.png|75px|link=http://overwatch.gamepedia.com/Echo]]<br />[[Echo]]</center> |
||
| + | |<small>The one ability you can't deflect is Focusing Beam, which means you're in great danger when you've been weakened. Also, you'll have a hard time fight her as she can fly. However, Cyber-Agility and Swift Strike can help close the distance between you and Echo to even the playing.</small> |
||
|<small>(To be added)</small> |
|<small>(To be added)</small> |
||
|- |
|- |
||
| Line 294: | Line 301: | ||
|<center>[[Image:icon-symmetra.png|75px|link=http://overwatch.gamepedia.com/Symmetra]]<br />[[Symmetra]]</center> |
|<center>[[Image:icon-symmetra.png|75px|link=http://overwatch.gamepedia.com/Symmetra]]<br />[[Symmetra]]</center> |
||
|<small>You can't Deflect Symmetra's Photon Projector's primary fire since it is a channeled weapon, which can make her a difficult opponent to fight. Her Sentry Turrets not only deal substantial damage, but also slow you down, making you a much easier target for Symmetra and the rest of her team. Your Shuriken aren't suitable for destroying Turrets as they have low spread and rate of fire. If the enemy team has a Symmetra, be careful when roaming and make sure you aren't caught by Sentry Turrets. If you are, try to quickly kill it, and if Symmetra or her team arrive to finish you off, use Swift Strike to disengage immediately so she can't easily kill you. Unless you're heckling her from a distance, only move in for the kill if she's at low health and you're certain you can finish her off.</small> |
|<small>You can't Deflect Symmetra's Photon Projector's primary fire since it is a channeled weapon, which can make her a difficult opponent to fight. Her Sentry Turrets not only deal substantial damage, but also slow you down, making you a much easier target for Symmetra and the rest of her team. Your Shuriken aren't suitable for destroying Turrets as they have low spread and rate of fire. If the enemy team has a Symmetra, be careful when roaming and make sure you aren't caught by Sentry Turrets. If you are, try to quickly kill it, and if Symmetra or her team arrive to finish you off, use Swift Strike to disengage immediately so she can't easily kill you. Unless you're heckling her from a distance, only move in for the kill if she's at low health and you're certain you can finish her off.</small> |
||
| − | |<small> |
+ | |<small>Using her teleporter will let you conserve your Swift Strike.</small> |
|- |
|- |
||
|<center>[[Image:icon-torbjörn.png|75px|link=http://overwatch.gamepedia.com/Torbjörn]]<br />[[Torbjörn]]</center> |
|<center>[[Image:icon-torbjörn.png|75px|link=http://overwatch.gamepedia.com/Torbjörn]]<br />[[Torbjörn]]</center> |
||
| − | |<small>It is easy enough to stay far enough from Torbjörn's Turret and harass it with Shuriken. However, your fairly low damage and the inability for Turrets to receive headshot damage means Torbjörn can continue repairing the Turret with little difficulty. You can Deflect a Turret's fire back at it, but its low rate of fire means that the damage usually won't be sufficient to destroy it. You should only activate Deflect if the Turret is nearly destroyed, or if you want to move past its field of view safely, as otherwise it will track your movements and quickly shoot you down. Don't assume a lone Torbjörn is an easy Swift Strike target, as once he activates Overload, he can prove to be a sturdy, hard to kill opponent. When Torbjörn activates Molten Core, use Cyber-Agility and Swift Strike to get away from the ground and Torbjörn's magma as quickly as possible.</small> |
+ | |<small>It is easy enough to stay far enough from Torbjörn's Turret and harass it with Shuriken. However, your fairly low damage and the inability for Turrets to receive headshot damage means Torbjörn can continue repairing the Turret with little difficulty. You can Deflect a Turret's fire back at it, but its low rate of fire means that the damage usually won't be sufficient to destroy it. You should only activate Deflect if the Turret is nearly destroyed, or if you want to move past its field of view safely, as otherwise it will track your movements and quickly shoot you down. Don't assume a lone Torbjörn is an easy Swift Strike target, as once he activates Overload, he can prove to be a sturdy, hard to kill opponent. When Torbjörn activates Molten Core, use Cyber-Agility and Swift Strike to get away from the ground and Torbjörn's magma as quickly as possible. Strangely enough, you can deflect the globules he fires, making them yours.</small> |
|<small>(To be added)</small> |
|<small>(To be added)</small> |
||
|- |
|- |
||
| Line 323: | Line 330: | ||
|- |
|- |
||
|<center>[[Image:icon-baptiste.png|75px|link=http://overwatch.gamepedia.com/Baptiste]]<br />[[Baptiste]]</center> |
|<center>[[Image:icon-baptiste.png|75px|link=http://overwatch.gamepedia.com/Baptiste]]<br />[[Baptiste]]</center> |
||
| + | |<small>If Immortality Field is active, you are not killing anyone within its range. Baptiste will have free reign to land shots on you. Also, he use Regenerative Burst to heal from your damage.</small> |
||
| − | |<small>(To be added)</small> |
||
| + | |||
| + | |||
| + | <small>With [[Amplification Matrix]], there's a strange interaction. Genji can deflect any bullets or projectiles that pass through Amplification Matrix. Since the damage has a %100 increase, it means that Genji can return abilities with highly destructive (and possibly) one-shot potential. This can further compounded if an amplified abilities gets deflected and passes through an ally matrix. Now, the damage has a 200% increase.</small> |
||
|<small>(To be added)</small> |
|<small>(To be added)</small> |
||
|- |
|- |
||
|<center>[[Image:icon-brigitte.png|75px|link=http://overwatch.gamepedia.com/Brigitte]]<br />[[Brigitte]]</center> |
|<center>[[Image:icon-brigitte.png|75px|link=http://overwatch.gamepedia.com/Brigitte]]<br />[[Brigitte]]</center> |
||
| + | |<small>Never try to solo kill or 1v1 Brigitte, because it's literally impossible with her superiority over you in close range. She can stun you, displace you, regenerate health at a steady pace and block a lot of Shurikens with her shield. All you should ever try to do is fire Shurikens from a distance where she cannot reach you. Do not use Dragonblade on a Brigitte using Rally or enemies receiving armour from it, you will take too long to strike anybody down and they can easily retaliate. You're better off just wasting your ultimate to deny her the satisfaction of protecting her teammates from it and outplaying you.</small> |
||
| − | |<small>(To be added)</small> |
||
|<small>(To be added)</small> |
|<small>(To be added)</small> |
||
|- |
|- |
||
| Line 339: | Line 349: | ||
|- |
|- |
||
|<center>[[Image:icon-moira.png|75px|link=http://overwatch.gamepedia.com/Moira]]<br />[[Moira]]</center> |
|<center>[[Image:icon-moira.png|75px|link=http://overwatch.gamepedia.com/Moira]]<br />[[Moira]]</center> |
||
| + | |<small>Moira should be avoided because she is very difficult to kill. She can easily create a lot of distance between you two with Fade if you try to flank her and you won't have any means to catch up and take her out. Although it may seem practical, trying to Swift Strike to close some distance is not a smart tactic, because after using Fade, most Moira players will heal off any prior damage you dealt to them, and you will have no means to escape if things go sour, which they most likely will. In a 1v1 scenario, you cannot deflect her Biotic Grasp and because it locks onto you, trying to take advantage of your mobility will not work. However, you can deflect Biotic Orbs, so if she uses one to heal herself or damage you, make sure you deflect it back at her for some extra damage or even some healing for yourself.</small> |
||
| − | |<small>(To be added)</small> |
||
| + | |<small>You can combo Coalescence with Dragonblade, as she can keep you healed up while you're attacking the enemy.</small> |
||
| − | |<small>(To be added)</small> |
||
|- |
|- |
||
|<center>[[Image:icon-zenyatta.png|75px|link=http://overwatch.gamepedia.com/Zenyatta]]<br />[[Zenyatta]]</center> |
|<center>[[Image:icon-zenyatta.png|75px|link=http://overwatch.gamepedia.com/Zenyatta]]<br />[[Zenyatta]]</center> |
||
| Line 351: | Line 361: | ||
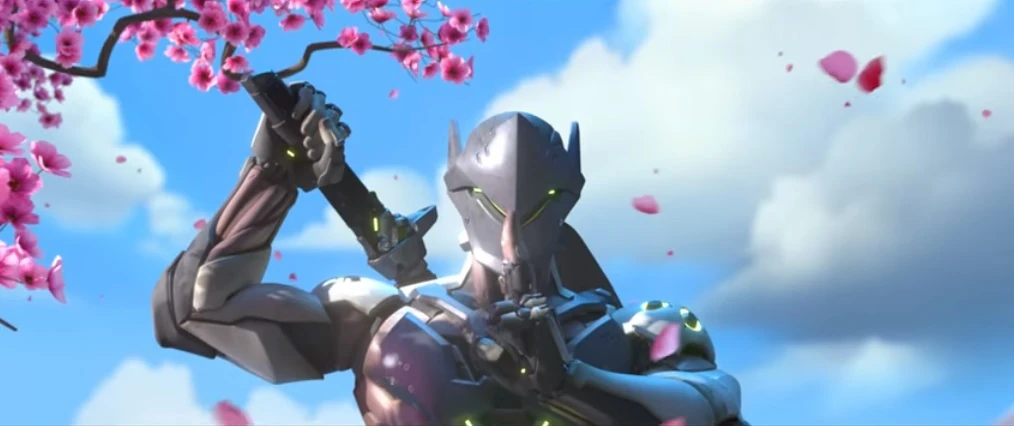
<center>'''''"Even if I sacrifice my body, I will never sacrifice my honor."'''''</center> |
<center>'''''"Even if I sacrifice my body, I will never sacrifice my honor."'''''</center> |
||
| − | The cyborg Genji Shimada has made peace with the augmented body he once rejected, and in doing so, he has discovered a higher humanity.<ref name = "Genji"/> While wary of his past, he has acknowledged, and made peace with it. He (almost) constantly wears a mask, as, in his words, "I do not people to fear me...or pity me."<ref name = "GenjiQuotes"/> |
+ | The cyborg Genji Shimada has made peace with the augmented body he once rejected, and in doing so, he has discovered a higher humanity.<ref name = "Genji"/> While wary of his past, he has acknowledged, and made peace with it. He (almost) constantly wears a mask, as, in his words, "I do not want people to fear me...or pity me."<ref name = "GenjiQuotes"/> |
Genji's sword is a katana named Ryū ichimonji (竜一文字); he maintains it personally and has never allowed anyone else to examine or repair it. It is paired with a traditional wakizashi sheathed horizontally on his lower back.<ref>''[[Overwatch Visual Source Book]]''</ref> |
Genji's sword is a katana named Ryū ichimonji (竜一文字); he maintains it personally and has never allowed anyone else to examine or repair it. It is paired with a traditional wakizashi sheathed horizontally on his lower back.<ref>''[[Overwatch Visual Source Book]]''</ref> |
||
| Line 358: | Line 368: | ||
{{Quote|I know what it is to leave behind a past you are not proud of.|Genji}} |
{{Quote|I know what it is to leave behind a past you are not proud of.|Genji}} |
||
[[File:Genji Skin Young Genji.png|thumb|Genji in his youth]] |
[[File:Genji Skin Young Genji.png|thumb|Genji in his youth]] |
||
| − | As the youngest son of [[Sojiro Shimada]], the master of the [[Shimada Clan|Shimada ninja clan]], Genji lived a life of luxury and privilege. He had little interest in the family's illegal businesses, and although he excelled at and enjoyed his ninja training, he spent most of his time pursuing a playboy lifestyle |
+ | As the youngest son of [[Sojiro Shimada]], the master of the [[Shimada Clan|Shimada ninja clan]], Genji lived a life of luxury and privilege. He had little interest in the family's illegal businesses, and although he excelled at and enjoyed his ninja training, he spent most of his time pursuing a playboy lifestyle.<ref name = "Genji"/> He was trained in the ways of the sword by [[Asa Yamagami]].<ref>2021-01-11, [https://playoverwatch.com/en-us/news/23608156/ CORRESPONDENCE POST FOR TOSHIRO YAMAGAMI]. ''Blizzard Entertainment'', accessed on 2021-01-13</ref> |
| + | |||
| + | Many within the clan considered the carefree Genji to be a dangerous liability, and they resented his father for coddling and protecting him.<ref name = "Genji"/> He spent a lot of his time in an arcade in [[Hanamura]], where he racked up numerous high scores on the arcade machines.<ref name = "GenjiQuotes"/> |
||
At some point, Sojiro called Genji "sparrow" as an insult. He would later come to adopt it as a nickname.<ref name = "GenjiQuotes"/> |
At some point, Sojiro called Genji "sparrow" as an insult. He would later come to adopt it as a nickname.<ref name = "GenjiQuotes"/> |
||
| Line 375: | Line 387: | ||
====Uprising==== |
====Uprising==== |
||
[[File:TracerGenji.jpg|thumb|left|Genji spars with Tracer]] |
[[File:TracerGenji.jpg|thumb|left|Genji spars with Tracer]] |
||
| − | Seven years before Overwatch |
+ | Seven years before Overwatch Genji was still a member of [[Blackwatch]]. While [[Null Sector]] carried out an [[King's Row Uprising|uprising]] in [[King's Row]], he trained with [[Lena Oxton]].<ref>''[[Tracer: Uprising]]''</ref> Genji would later comment that Tracer was "the only one I have trouble keeping up with."<ref name = "HotS">''[[Heroes of the Storm]]''</ref> |
Within a year after the King's Row Uprising. Genji would cut contact with his old team members.<ref name = "StormRising"/> |
Within a year after the King's Row Uprising. Genji would cut contact with his old team members.<ref name = "StormRising"/> |
||
| Line 417: | Line 429: | ||
[[File:Genji-ZH.jpg|thumb|left|Genji's return]] |
[[File:Genji-ZH.jpg|thumb|left|Genji's return]] |
||
Sometime after Winston's recall, Genji arrived on location in [[Paris]], where he aided former Overwatch members in repelling [[Null Sector]]'s forces after the opposition began pushing them toward an early retreat. After playing a crucial part in crippling and taking down the terrorist organization's [[Titan]], Genji rejoined Overwatch, alongside [[Reinhardt]], [[Brigitte]], [[Mercy]], and [[Echo]].<ref>''[[Zero Hour]]''</ref> He was willing to work with Overwatch, at least in the short term.<ref name = "HotS"/> |
Sometime after Winston's recall, Genji arrived on location in [[Paris]], where he aided former Overwatch members in repelling [[Null Sector]]'s forces after the opposition began pushing them toward an early retreat. After playing a crucial part in crippling and taking down the terrorist organization's [[Titan]], Genji rejoined Overwatch, alongside [[Reinhardt]], [[Brigitte]], [[Mercy]], and [[Echo]].<ref>''[[Zero Hour]]''</ref> He was willing to work with Overwatch, at least in the short term.<ref name = "HotS"/> |
||
| + | |||
| + | ===A New War=== |
||
| + | After Paris, Genji and the others traveled to [[Watchpoint: Gibraltar]], which they used as their base of operations.<ref>Blizzcon 2019 Overwatch: Evolving the Art Panel</ref> As it turned out, Null Sector's attack on Paris was simply the prelude to a global invasion. [[Winston]] pointed out that Null Sector wasn't the only threat Overwatch had to deal with. He declared that they'd had to fight their way through one city at a time. <ref name = "OW2Gameplay">2019-11-01, [https://www.youtube.com/watch?v=dZl1yGUetjI Overwatch 2 Gameplay Trailer]. ''YouTube'', accessed on 2019-11-08</ref> |
||
| + | |||
| + | ''Note: The following events aren't necessarily in chronological order.'' |
||
| + | |||
| + | ====Rio==== |
||
| + | [[File:GenjiBrigitte.jpg|thumb|Genji and Brigitte in Rio]] |
||
| + | Genji and the rest of Overwatch deployed to [[Rio de Janeiro]] when it was attacked by Null Sector. They teamed up with [[Lúcio]] and were able to blunt the initial attack, though Lúcio warned that as long as Null Sector's [[command ship]] remained airborne, the [[omnic]]s would just keep coming. Genji and Brigitte kept Null Sector busy, while Winston and Ziegler evacuated civilians, and the rest of the team assaulted the command ship. The plan was a success, and the command ship successfully destroyed.<ref>2019-11-02, [https://www.youtube.com/watch?v=xQ9EZUEvw_o Overwatch 2 | Rio de Janeiro Mission Co-op PVE | Blizzcon 2019 Demo]. ''YouTube'', accessed on 2020-09-17</ref> |
||
| + | |||
| + | {{clear}} |
||
| + | |||
| + | ===Reunion=== |
||
| + | {{Quote|I knew you would return one day.<br/>It has been too long, master.|Zenyatta and Genji}} |
||
| + | [[File:GenjiZenyatta-OW2.jpg|thumb|Genji reunites with Zenyatta]] |
||
| + | After helping thwart [[Null Sector]]'s attack on [[Paris]], Genji returned to Zenyatta.<ref name = "OW2Gameplay">2019-11-01, [https://www.youtube.com/watch?v=dZl1yGUetjI Overwatch 2 Gameplay Trailer]. ''YouTube'', accessed on 2019-11-08</ref> |
||
{{clear}} |
{{clear}} |
||
| Line 477: | Line 505: | ||
Genji Oni skin concept art.jpg|Oni skin concept art |
Genji Oni skin concept art.jpg|Oni skin concept art |
||
Ben-zhang-pacific-genji-skin-concept.jpg|Pacific skin concept art |
Ben-zhang-pacific-genji-skin-concept.jpg|Pacific skin concept art |
||
| − | Karasu Tengu .jpg|Karasu Tengu skin concept art |
+ | Karasu Tengu skin concept.jpg|Karasu Tengu skin concept art |
| + | BushiGenji.jpeg|Bushi Genji skin concept art |
||
| + | BushiGenjiweapon.jpeg|Bushi Genji weapon concept art |
||
GenjiOverwatch2concept.jpg|''Overwatch 2'' concept art |
GenjiOverwatch2concept.jpg|''Overwatch 2'' concept art |
||
</gallery> |
</gallery> |
||
| Line 486: | Line 516: | ||
==Balance Change Log== |
==Balance Change Log== |
||
{{PatchTableStart}} |
{{PatchTableStart}} |
||
| + | {{PatchTableElement|2021-03-11| |
||
| + | {{Al|Shuriken}} |
||
| + | *Recovery lowered from 0.75 to 0.68 |
||
| + | {{Al|Dragonblade}} |
||
| + | *Ultimate cost increased 15% |
||
| + | ''Developer Comment: We're increasing Genji's Shuriken fire rate to enable him to have more impact outside of his ultimate and increasing the cost of Dragonblade to account for the increased damage potential.'' |
||
| + | }} |
||
{{PatchTableElement|2020-06-16| |
{{PatchTableElement|2020-06-16| |
||
{{Al|Shuriken}} |
{{Al|Shuriken}} |
||
Revision as of 02:25, 14 August 2021
| Genji | |
|---|---|
| "Even if I sacrifice my body, I will never sacrifice my honor." | |
Real Name |
Genji Shimada (島田 源氏)[1] |
Aliases |
Sparrow |
Age |
35 |
Nationality |
|
Occupation |
Adventurer |
Base |
Hanamura, Japan (formerly) |
Affiliation |
Shimada Clan (formerly) Overwatch Blackwatch (formerly) |
Relations |
Sojiro Shimada (father) Hanzo Shimada (older brother) |
| Gaku Space [2][3] (English)
Bernard Gabay (French)
| |
Cosmetics |
Cosmetic page |
Quotes |
Quotation page |
Role |
Damage |
Health |
200 |
Genji is a Damage hero in Overwatch.
Overview
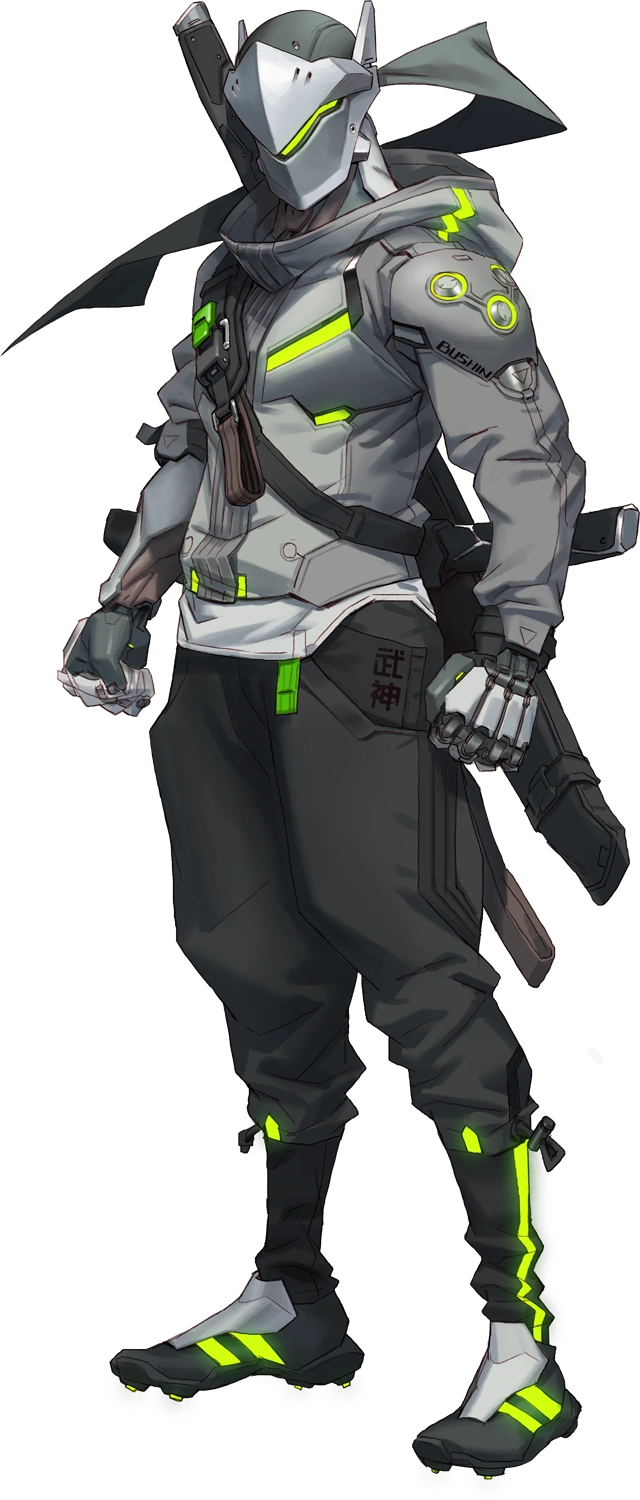
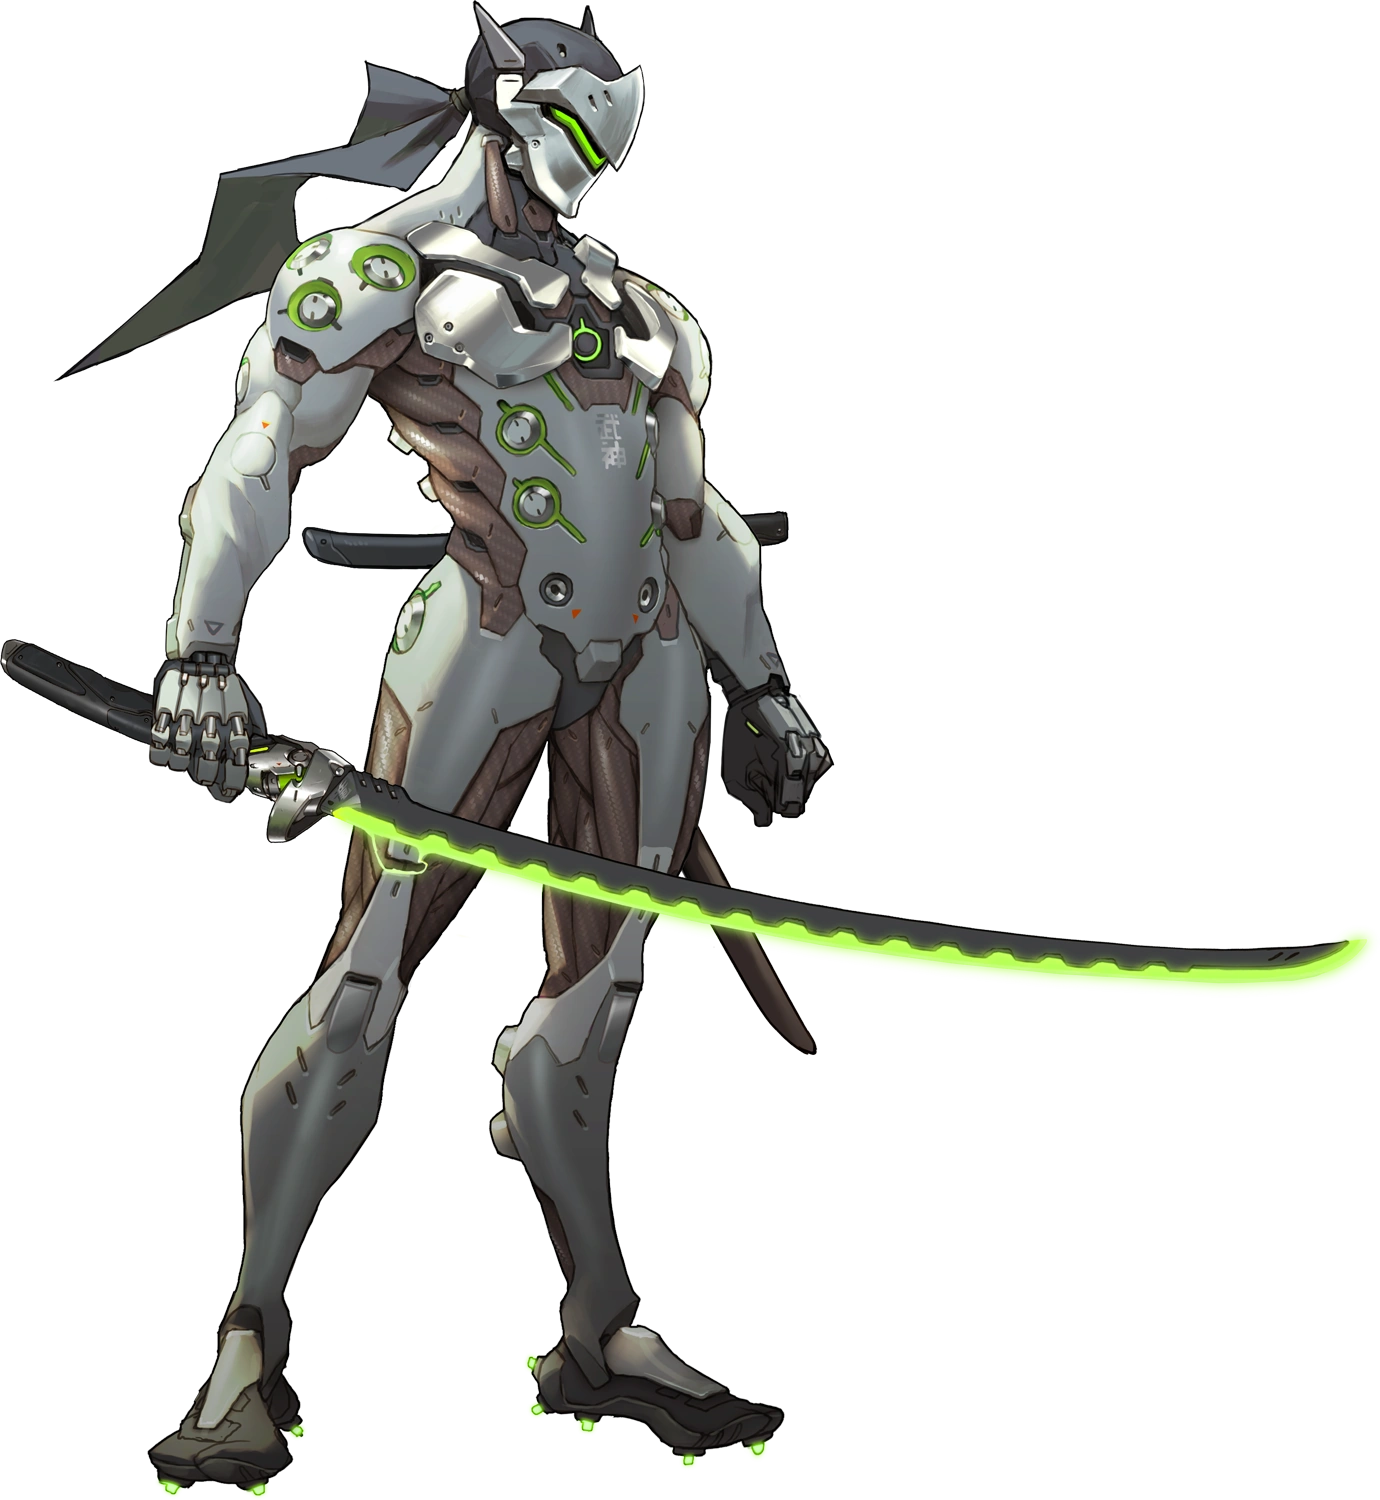
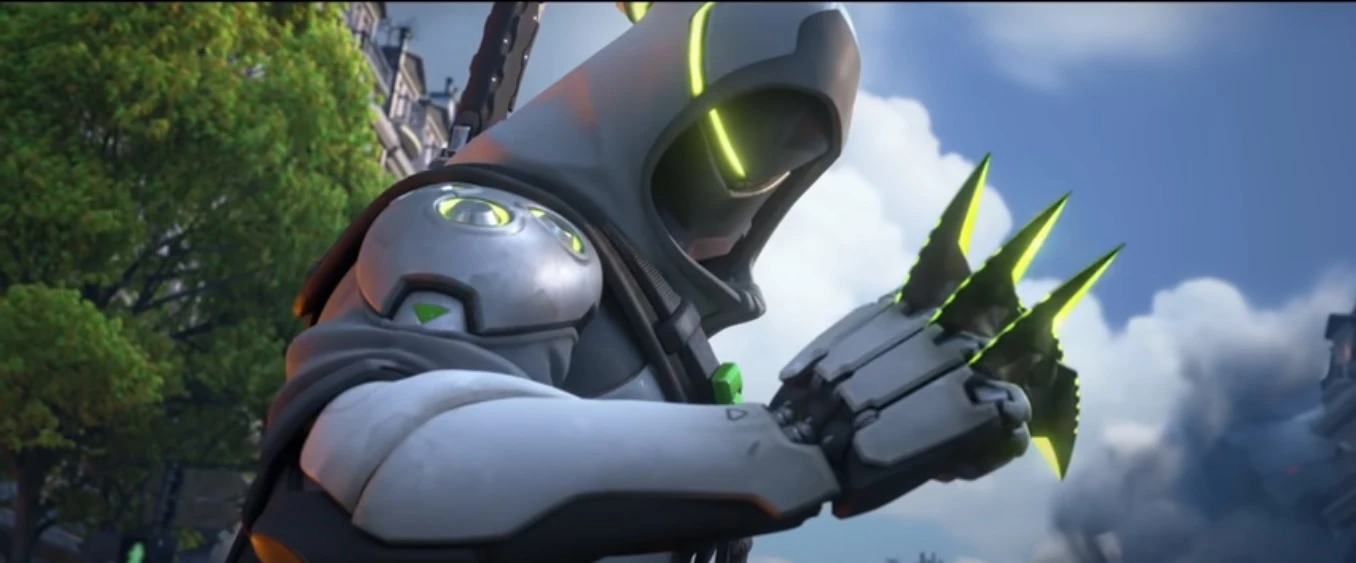
Genji flings precise and deadly Shuriken at his targets, and uses his wakizashi to deflect projectiles or delivers a Swift Strike with his technologically-advanced "dragonblade" that cuts down enemies.
Abilities


- Double jumping doesn't reset on wall climbing.
- Shuriken's alternate fire is also called "Fan of Blades."
- Even if there are fewer than three shuriken in his magazine, three shurikens will be fired.

- The cooldown will reset no matter what ability is used for the kill.
- Swift Strike does not deal damage to traps such as Junkrat's
 Steel Trap or Widowmaker's
  Venom Mine.
 - While Dragonblade is active, Genji will Swift Strike with his katana instead.

(front only)
- Can be cancelled manually.
- Any projectile deflected is treated as Genji's, and damage falloff is reset.
- Blocks melee attacks, Chain Hook, and Whip Shot.
- While Dragonblade is active, Genji will Deflect with his katana instead.
- Certain projectiles are unaffected by Deflect. A list can be found here.

~0.2 seconds (initial swing)
1 second (sheathing)
- Genji cannot use his Shuriken while Dragonblade is active.
- Activating Dragonblade resets the cooldown of Swift Strike.
- Genji can swing his sword 7 times at most.
- Ammunition is restored after completion.
Strategy
Genji is a versatile flanker with very high mobility, boasting some of the best movement options of all the heroes. Genji is better suited for mid-range to make use of his mobility and Shurikens, but can still be formidable at range. Cyber-Agility makes Genji a difficult target and allows him to navigate the map with ease. Swift Strike allows Genji to engage, escape, or move between targets efficiently. The damage on Swift Strike is considerable for most heroes but is insignificant to a tank. As such, Genji should use Swift Strike to either maneuver around his enemies or deal small but quick and easy damage. Deflect allows Genji to turn enemies' damage back towards them and even allows him to turn around entire ultimate abilities. This allows for potentially lethal burst damage if it is timed properly and Genji is well-positioned. Be wary when estimating your own abilities as Genji, though; you are not the most agile hero, nor do you deal the most damage. Genji fills a middle ground when it comes to these factors.
Weapons & Abilities
- Cyber-Agility (Passive): Genji gains two benefits from this passive. First, Genji is able to climb up flat, vertical surfaces by holding the jump button while next to them. Second, Genji is capable of performing a double jump by pressing the jump button while already in the air.
- Almost any vertical surface can be climbed with Cyber-Agility. You can jump again at any time while climbing, allowing you to reach catwalks and other areas that don't have a direct, vertical path up to them.
- You can change the direction Genji is jumping when using the double jump. Simply hold the direction you want him to jump towards while executing the double jump.
- Shuriken: Genji's primary weapon. Primary fire will cause Genji to shoot three projectile shurikens towards his crosshair in a volley. Secondary fire will cause Genji to quickly throw three shurikens in a cone in front of him.
- The shurikens from both the primary and secondary fire can headshot, and are not subject to damage falloff.
- The secondary fire throws the stars at a much faster rate. Use the secondary fire at short range where accuracy is less of a concern and the primary fire for longer-range engagements.
- Deflect: When activated, Genji assumes a defensive stance for several seconds, during which time he cannot attack. While in this stance, most enemy projectiles or hitscan weapons that hit him in the front will be deflected in the direction he is aiming in. Deflected attacks use the same damage numbers and effects as the original, and can affect the shooter and their team.
- An immensely powerful ability. With a few exceptions, Genji is immune to frontal attacks while Deflect is active. Make sure you aren't being attacked from behind to get the full use out of Deflect.
- Frontal melee attacks are blocked, but do not deliver damage back to the enemy. Roadhog's Chain Hook will also be blocked, but not reflected in any way (as if the hook had hit a wall).
- The attacks that cannot be deflected or blocked include Winston's Tesla Cannon, Lúcio's Sound Wave, the primary firing mode of Symmetra's Photon Projector, Zarya's Particle Cannon, and Mei's Endothermic Blaster.
- Swift Strike: When activated, Genji dashes straight forward a fixed distance, dealing damage to all enemies he passes through along the way. The cooldown on Swift Strike is reset whenever Genji scores an elimination.
- Swift Strike is also useful as a way of traveling around the map, as well as an escape method. It can also be used as a finishing move, dealing a quick burst of damage to an opponent who's on low Health.
- Because Swift Strike will reset whenever Genji gets an elimination, you can use it to quickly chain kills between multiple low-Health targets. Use it to dash through the first target to kill them, scoring an elimination, and then dash through another low-Health target. The elimination doesn't actually have to be made with Swift Strike; finishing a target through other means (or even getting a kill assist) also resets the cooldown.
- Dragonblade (Ultimate): Genji's Ultimate ability. When activated, Genji unsheathes his ōdachi, disabling the use of his shurikens for the duration. His primary fire is replaced with a fast-swinging melee-ranged slash that hits all targets in a small cone in front of Genji, dealing high damage with every hit. Genji will sheathe the blade at the end of Dragonblade's duration, regaining the use of his shurikens.
- Dragonblade is a high risk, high reward Ultimate. While Genji gains extremely high melee damage (beating even Reinhardt), he loses the ability to attack at range for the duration.
- Remember that Cyber-Agility is still active when using Dragonblade. Use your double jump and wall climb to remain evasive so that you can get as many kills as possible.
- The high damage from Dragonblade allows you to easily get eliminations. Remember to use Swift Strikes to deal more damage and close the distance with other enemies whenever you get a kill.
- Activating Dragonblade also refreshes the cooldown of Swift Strike.
General Strategies
- Genji is a deadly offensive threat, capable of easily sneaking behind enemy lines and harassing his opponents with constant volleys of Shurikens. You should always be taking side routes to flank the enemy team, as Genji contributes much less when he is merely hanging with his team. Remember, however, not get too far away from your team as Genji has much less capability to escape from bad engagements compared to Tracer.
- Genji is usually better at fighting his enemies mid-range than up close. He lacks the evasiveness of Tracer and the damage/self-healing of Reaper, making him vulnerable to being killed if he opts to get too close to the enemy team. Only engage up close if either Dragonblade is up, or if the enemy you're fighting is vulnerable (such as a lone Widowmaker).
- Deflect provides Genji with an incredibly high skill ceiling. It can be used to deflect everything from Pharah's Barrage, Tracer's Pulse Bomb, to McCree's Deadeye, allowing you to rapidly turn the tables on almost any engagement. Smarter enemies will usually wait for you to use Deflect before using their abilities, so don't use Deflect too early. Trick them into thinking that your Deflect is on cooldown, then use it at the right moment to send their most lethal attacks back at them.
- A burst damage combo is to engage with Swift Strike, followed by a secondary fire at melee range and then melee attack. This combo requires a good precision on the landing point of Swift Strike.
- The wall climb of Cyber-Agility has a variety of uses, even in combat. When fighting near a doorway, get your enemy to chase you towards the doorway, then utilize Cyber-Agility to climb up over the top of the doorway and ambush them.
- You must choose the moment to use Dragonblade carefully. Genji is not any more durable than normal while using it, meaning that your enemies can easily knock you away and kill you at range if you use it inappropriately. Try to use Dragonblade when there are multiple enemies with low base Health (such as Symmetra or Mercy) within reach, as this will let you quickly kill them and chain your Swift Strikes to both eliminate more targets and remain evasive to survive longer. Make sure you're within melee range of your enemies before activating it.
- Flanking Support heroes is one of Genji's main roles. Targets like Mercy and Zenyatta are vulnerable to well-executed attacks and eliminating them will help your team immensely. However, targets like Brigitte and Moira will prove to be very difficult to flank successfully, because they can evade you or simply beat you most of the time in close range combat. Choose your targets wisely.
Match-Ups and Team Synergy
Tank
| Hero | Match-Up | Team Synergy |
|---|---|---|
D.Va |
D.Va has difficulty tracking her shots on a mobile hero like Genji. In addition, Deflect can buy you time as well as reflect her Fusion Cannons and Micro Missiles back at her for decent damage. Because D.Va's Mech is so large, Fan of Blades can easily hit her with quick and successive attacks. She will attempt to use Defense Matrix to negate your Shuriken, so try to attack her from a blind spot where she can't block your attacks or pressure her until Defense Matrix runs out. If you need to escape, you can use Swift Strike and Cyber-Agility; just be wary that D.Va's Boosters can allow her to track you down and finish you off if you attempt to escape at low health. When using Dragonblade, D.Va can be troublesome since her Mech's large health makes it hard to destroy, and destroying it doesn't restore Swift Strike like a normal kill would (plus D.Va's ejection time wastes more of your Ultimate's precious time). Consider saving Dragonblade until after D.Va has lost her Mech. Once D.Va's out of her Mech, you have a much better shot at finishing her off; a few Shuriken and a Swift Strike should do the job. | (To be added) |
Orisa |
(To be added) | (To be added) |
Reinhardt |
Your mobility will allow you to stay above Reinhardt and out of his reach, allowing you to flank teammates he's protecting or even Reinhardt himself from behind. While Reinhardt's massive health makes him difficult to kill, your mobility can allow you to always remain on Reinhardt's blind side and pelt him with Shuriken. You can even Swift Strike through his shield to deal some damage and begin attacking him from behind. If you catch Reinhardt alone, you can get behind him to force him to turn your way, allowing the rest of your team to swarm him and take him down. If Reinhardt turns around and decides to start attacking you at close range, try to use Swift Strike and Cyber-Agility to keep your distance, as it only takes him a few hammer swings to kill you. If you have Dragonblade activated, only engage with Reinhardt if he has low health. Otherwise, try to focus on his teammates with lower health. | While you normally want to be mobile rather than hiding behind a barrier, sticking with a friendly Reinhardt has its uses. While slowly pushing with your team or holding a defensive position, you can hang behind his shield and toss Shuriken, only moving out of the shield's safety once you're ready to land a kill with Swift Strike. If Reinhardt hits a large number of enemies with Earthshatter, they'll be prime targets for you to finish off with Swift Strike, or even Dragonblade if you're so inclined. |
Roadhog |
Deflect can block Roadhog's Chain Hook to defend yourself or a teammate. Otherwise, neither Roadhog nor Genji have a direct advantage over one another in a close range fight. Try to consistently jump around him to avoid his Scrap Gun and use Fan of Blades to pelt his body and build up Dragonblade. At a safe distance, you should be able to land successive headshots as he has no way to block your attacks and can't hit you from that distance. Genji's fairly low damage can be quickly healed back up by Roadhog's Take a Breather. During this time, you'll need to decide whether to stick around and continue fighting him, or to take the opportunity to flee and gain some distance while you have the chance. If you do get Hooked, while you have a small chance of avoiding Roadhog's follow-up attack, you're most likely going to die, so always be wary and ready to Deflect it. You can Deflect Whole Hog back at Roadhog, sending him flying backwards and keeping your team safe. If Roadhog has most of his health, try not to activate Dragonblade; not only will he probably survive the onslaught, he can Hook you while you're swinging away and take you out. | Enemies snagged by a friendly Roadhog's Chain Hook will usually be reduced to extremely low health if they survive his combo, rendering them easy targets for you to kill with a Swift Strike. |
Sigma |
(To be added) | (To be added) |
Wrecking Ball |
Although both of you are mobile, Wrecking Ball moves faster than you in Roll. This means he can retreat from you better than you from him. Plus, Deflect doesn't block Grappling Claw and Piledriver. You also can't block his mines and they can be deadly to you if you're caught in it. Since they can also latch to ceiling and walls, you should exercise caution when traversing his Minefield. Also, Wrecking Ball can use Adaptive Shields to tank some of your damage. | Both you and Wrecking Ball are mobile, so it can serve in both of your interests to travel together and dive on the same opponents. |
Winston |
Winston's Tesla Cannon can't be Deflected and it has a wide range that tracks its target, meaning your mobility and Deflect are useless against him. You can try to pelt him with Shuriken, but his damage output is about the same as yours while he has much higher health. His Projected Barrier will be very difficult for you to penetrate, and if you try to move through it to attack at close range, you put yourself at risk of Winston's Tesla Cannon. Even if you try to flee with Swift Strike or Cyber Agility, Winston can use his Jump Pack to chase after you and finish you off, making it very difficult to disengage. Try to let your teammates battle Winston, or if you must, hit him with Shuriken at a safe distance. | Both you and Winston are mobile, so it can serve in both of your interests to travel together and dive on the same opponents. |
Zarya |
Provided Zarya has enough charge, the primary fire on her Particle Cannon can make very short work of you. Your overall damage is low when battling Zarya, but you can keep tossing Shurikens from a distance where Zarya can't attack you back. Unlike Winston, Zarya's primary fire requires more precise aim, so when fighting at close range, try to jump around Zarya to confuse her and disrupt her aiming. While it's incredibly risky, you can Deflect Graviton Surge, which can swerve the game completely in your favor. | (To be added) |
Damage
| Hero | Match-Up | Team Synergy |
|---|---|---|
Ashe |
As a sniper, Ashe usually prefers to stay in the back. You can easily sneak up on her and flank her so long as you stay out of her line of sight. Even at a distance, you can Deflect her scoped shots. You can also deflect her Coach Gun pellet to damage her as she tries to flee. With Dynamite, you can deflect it but your Shurikens won't detonate it earlier. Also, you can burn yourself with Dynamite (since Ashe normally could). With B.O.B., you can't block his charge but you can deflect the bullets. It won't be enough to kill B.O.B. since Deflect has a short duration. However, you can redirect those bullets to Ashe or another enemy player. | (To be added) |
Bastion |
Although Deflect is a powerful tool to turn Bastion's strength against itself, a smart Bastion will stop firing as soon as you use Deflect, so try to do so at close range so it has much less reaction time. Thanks to your high mobility, you can quickly get behind Bastion and destroy it by attacking its weak spot in the rear with Fan of Blades. When Bastion swerves around to attack you, that's the perfect time to retaliate with a Deflect and seal the deal. If you can't finish it off with Deflect, however, you may have difficulty with Bastion; you can use Swift Strike and Cyber-Agility to stay mobile and keep it from gunning you down, but unless you escape around a corner or up a wall, Bastion can finish you off before you get the chance to destroy it. Heckling it with Shuriken from a distance and from behind corners can help chip away at its health, but its Self-Repair can heal at a quick enough rate to nullify your damage. If you wish to kill Bastion with Dragonblade, try to wait until it's dead or in Recon Configuration. Bastion's Ironclad will help it withstain a sword swing or two, which will be enough time for it to mow you down, and you don't want to waste your Ultimate's duration using Deflect. | (To be added) |
Doomfist |
Deflect cannot block Doomfist's abilities, which will give him bonus shields. Rocket Punch can stun you, effectively cancelling Deflect and possibly Swift Strike. | (To be added) |
Echo |
The one ability you can't deflect is Focusing Beam, which means you're in great danger when you've been weakened. Also, you'll have a hard time fight her as she can fly. However, Cyber-Agility and Swift Strike can help close the distance between you and Echo to even the playing. | (To be added) |
Genji |
In a Genji vs Genji fight, both of you will have a hard time landing Shuriken due to your vertical mobility. If you have low health, you can use Deflect to buy time, though keep in mind that the opposing Genji will try to do the same. Deflect can't block Swift Strike though; if the opposing Genji is near death and is Deflecting, swoop in to finish him off before he can use Swift Strike to flee. If an enemy Genji is in a group, it's best to prioritize other enemies before him who you can kill quicker and more efficiently. | (To be added) |
Hanzo |
Hanzo's Storm Arrows can prove to be a threat to you at close range, but a quick Deflect can protect you while either killing Hanzo or causing the duration of his Storm Arrows to wear off. Thanks to your Cyber-Agility, you can close the distance on Hanzo with little time and fight him at your preferred closer range. Hanzo will attempt potshots with his arrows at close range, but by staying mobile with Cyber-Agility and landing Swift Strikes, you can make quick work of him. If you don't know where Hanzo is yet, though, take caution; Hanzo is deadly at long range, and he can snipe you before you get close enough to fight him. It's possible to Deflect Dragonstrike, but the timing is extremely precise. When Hanzo activates his Ultimate, he first fires an arrow, which then transforms into Dragonstrike; you must Deflect the arrow immediately upon the Ultimate's activation. If you time it right, you'll send Dragonstrike right back at your brother, but if not you'll find yourself on its receiving end. | Hanzo's Sonic Arrow is helpful for keeping an eye on enemies' locations. If you see enemies alone, you can hunt them down and retreat before their allies show up to help them. |
Junkrat |
Junkrat can be difficult to deal with at close range due to the large splash damage of his grenades, and he'll have a much easier time hitting you with them point blank than at a distance. If you jump around with Cyber-Agility to avoid the grenades' arcs while pelting him with Shuriken, though, you can handle Junkrat fair enough. You can quickly close the gap and use Swift Strike and Deflect to deal with a Junkrat trying to heckle you from afar. However, Junkrat can still be risky due to his Steel Trap and Total Mayhem. His Steel Trap and Concussive Mine combo is especially dangerous, as if you're caught off guard by the Steel Trap, the Concussion Mine will be enough to kill you. This can be even more problematic if you're caught in his Steel Trap during Dragonblade, which will waste more than half of the duration of your Ultimate while also making you an easy target. If you kill Junkrat at close range, use Swift Strike to escape from Total Mayhem's bombs. | (To be added) |
McCree |
With good aim, McCree can keep you at bay even if you're consistently jumping around. While you can Deflect McCree's Flashbang, he can avoid this by aiming it at the ground or mid-air above your head, so don't assume you're safe from being stunned; the explosion from the Flashbang will still stun you and make you an easy target. To counter the stun, try to position yourself in such a way that you will Deflect Flashbang by standing where you believe the McCree will be throwing it. Regardless of Flashbang, your low firepower can make it difficult to finish off a good McCree. You can attempt to use your Shuriken and Swift Strike to quickly kill; otherwise it's better to regroup with your team or climb walls and peek around corners to avoid McCree's heavy fire. McCree's Deadeye can be Deflected; not only can this protect your team, but it also has a chance to kill the McCree himself. Just be wary about your activation timing; a wise McCree will know that you will attempt to Deflect him, and can wait out your Deflect prior to firing Deadeye. | (To be added) |
Mei |
The slowing effect of Mei's Endothermic Blaster is extremely dangerous to heroes who rely on close range and high mobility such as yourself. You can jump around to avoid Mei's Endothermic Blaster and avoid her consistent freezing stream while tossing attacks her way, but the range of her freezing is respectable and as soon as you get caught in it, the slowdown will be enough to cripple you and let her easily finish freezing you. The best move as Genji is usually to perform a Swift Strike to flee and harass Mei from a distance with Shuriken. You don't have damage falloff at long range, so as long as you avoid Mei's dangerous icicles, you should be able to deal some decent damage at a distance. While you can't Deflect the primary fire of Endothermic Blaster, you can Deflect its icicles, and more importantly, you can Deflect Mei's Blizzard Ultimate, which can completely turn the tides in favor of your team. If Mei tries to block you in an area with Ice Wall, simply climb over them and quickly escape. | (To be added) |
Pharah |
Pharah's aerial superiority can make it difficult for you to land your Shuriken. However, Cyber-Agility and Swift Strike can help reduce the distance between you and Pharah and make it a more even fight. By consistently leaping in the air with Cyber-Agility, you can make it so that Pharah will have a harder time landing her rockets and hitting you with their splash damage. While waiting for Swift Strike to recharge, you can Deflect a rocket or two back at Pharah. Better yet, if she activates Barrage, all you have to do is activate Deflect and position yourself in front of her, and you can send her rockets right back in her face. Otherwise, try to hit her with Shuriken headshots and never stay in one place at a time, and you should handle her okay. | (To be added) |
Reaper |
Thanks to having a higher health and firepower, Reaper can make quick work of you if he catches you at close range. However, you have much greater mobility than him; Cyber-Agility can allow you to climb away and get vertical distance, or in an emergency you can use Swift Strike to increase the gap. You can also attempt to Deflect some of his fire, but he'll be ready to mow you down as soon as Deflect wears off so you'll need to Swift Strike away if you want any hope of surviving. At medium to long range, you have a much better chance against Reaper by firing your Shuriken his way. Even if you don't land headshots, successive bodyshots can gradually rack up damage on him, forcing him to either retreat or meet a gruesome end with a timely Swift Strike. While Deflect works to an extent against Death Blossom, Reaper's Ultimate outlasts your ability, and its area of effect can still hit you even while Deflecting. Its large spread also makes it difficult to turn it back on Reaper to kill him, so it's better to just continue attacking with Shuriken or Swift Strike away when he activates his Ultimate. Just be sure to always keep your distance from Reaper and you should be alright. | (To be added) |
Soldier: 76 |
Soldier: 76's Biotic Field helps him manage a prolonged fight against you, when you usually wants to shoot for a quick kill. While Soldier: 76 doesn't have any way to counter you at close range, he can still outdamage you if he lands his shots. Deflect his Heavy Pulse Rifle and Helix Rockets at a distance, then use Swift Strike to close the gap and attack him at close range with Fan of Blades. Be wary that Soldier: 76 can aim his Helix Rockets at the ground to avoid your Deflect, but if he hits an area too close to him, he can suffer recoil damage. If Soldier: 76 is losing a fight, he will attempt to Sprint away. You can try to finish him off with a long-range Shuriken or a Swift Strike, or you can use Cyber-Agility to climb above and around him to cut him off. If he gets far enough away, though, it's best to regroup with your team and fight him again later. While you can Deflect Tactical Visor, it will only buy you a little bit of time; unless your team is ready to swoop in and take Soldier: 76 out, it's best to Swift Strike to safety once Deflect wears off. | (To be added) |
Sombra |
Sombra can use her Hack to deactivate Deflect and Swift Strike; this will render you an easy target for her team because you can't use Deflect to buy time or Swift Strike to flee. Cyber-Agility is still active under Hack, so climbing a wall to flee is still possible. Sombra's high fire rate can kill you quickly if she can track most of her shots, jumping around and staying nimble can help you avoid her fire. If you hear the sound of her uncloaking or the sound of her hacking you, try to get some distance so you're not caught by surprise, or snap around with a quick Shuriken burst to disrupt her Stealth or Hack. Try not to Deflect her attacks, as she'll take this opportunity to perform an easy Hack on you; if you're in an unfavorable situation, it's better to use Swift Strike to quickly retreat. If she doesn't manage to hack you, you can harass her at mid to long range thanks to your Shuriken's decreased damage falloff in comparison to her Machine Pistol before finishing her off with a Swift Strike. Be careful about getting hacked during Dragonblade; you'll retain your sword's impressive power, but losing the ability to Swift Strike or Deflect will make it much harder for you to carve through the enemy team and much easier for them to carve through you. | Hacked opponents will often prove to be easy pickings for you; this is especially true for enemies such as Doomfist, Tracer and Mercy who rely on their abilities to disengage from combat. While you can combine Dragonblade with EMP, oftentimes a group of weakened enemies will be easily killed just by standard attacks without even needing to use up your Dragonblade. Try to remain in constant communication with your Sombra; if she calls out weakened targets, try to flank and prioritize them so you can quickly regain Swift Strike. Keep a lookout for Hacked health kits; when you're constantly roving around the map, it will often be easier for you to heal up at a Hacked health kit than to find one of your Support allies. |
Symmetra |
You can't Deflect Symmetra's Photon Projector's primary fire since it is a channeled weapon, which can make her a difficult opponent to fight. Her Sentry Turrets not only deal substantial damage, but also slow you down, making you a much easier target for Symmetra and the rest of her team. Your Shuriken aren't suitable for destroying Turrets as they have low spread and rate of fire. If the enemy team has a Symmetra, be careful when roaming and make sure you aren't caught by Sentry Turrets. If you are, try to quickly kill it, and if Symmetra or her team arrive to finish you off, use Swift Strike to disengage immediately so she can't easily kill you. Unless you're heckling her from a distance, only move in for the kill if she's at low health and you're certain you can finish her off. | Using her teleporter will let you conserve your Swift Strike. |
Torbjörn |
It is easy enough to stay far enough from Torbjörn's Turret and harass it with Shuriken. However, your fairly low damage and the inability for Turrets to receive headshot damage means Torbjörn can continue repairing the Turret with little difficulty. You can Deflect a Turret's fire back at it, but its low rate of fire means that the damage usually won't be sufficient to destroy it. You should only activate Deflect if the Turret is nearly destroyed, or if you want to move past its field of view safely, as otherwise it will track your movements and quickly shoot you down. Don't assume a lone Torbjörn is an easy Swift Strike target, as once he activates Overload, he can prove to be a sturdy, hard to kill opponent. When Torbjörn activates Molten Core, use Cyber-Agility and Swift Strike to get away from the ground and Torbjörn's magma as quickly as possible. Strangely enough, you can deflect the globules he fires, making them yours. | (To be added) |
Tracer |
Both Tracer and Genji have high mobility, but in radically different ways: Genji has the advantage in vertical movement, while Tracer has the advantage in horizontal movement. If you continuously jump around with Cyber-Agility, you'll make yourself a difficult target for her to hit. Deflect can turn her quick firing rate against her; before she can react, she'll have lost a good majority of her health, at which point a Swift Strike can easily cut her down. That being said, Tracer has much higher firepower than you, meaning if she has superior aim, she can mow you down if you're not careful with just one or two clips. If she feels the fight isn't in her favor, she can use Blink or Recall to flee. Blink's recharge time is much shorter than Swift Strike, which means if you're still waiting for Swift Strike to recharge, she can easily get away. | (To be added) |
Widowmaker |
Because Widowmaker usual prefers to stay in the back, you can easily sneak up on her and flank her so long as you stay out of her line of sight. Even at a distance, you can Deflect her scoped shots, occasionally managing to kill her via a Deflected headshot. Widowmaker will usually plant a Venom Mine nearby her position or a choke point; if hit by it you'll not only take considerable damage but your position will become known to her, making it much harder for you to sneak up on her and much easier for her to kill you. Try to keep your eyes peeled and take Venom Mines out if you spot them. If Widowmaker catches you in the open without Deflect active, she can shoot you down with a single well-aimed shot, so be cautious about moving out in the open. | Widowmaker's Infra-Sights will grant you full vision of the enemy team behind walls. This can make it easy for you to find lone susceptible targets to pick off. If your friendly Widowmaker lopped off most of an opponent's health with a headshot but failed to kill them, a Swift Strike can help her finish the job before your enemy heals back up. |
Support
| Hero | Match-Up | Team Synergy
|
|---|---|---|
Ana |
As a sniper, Ana is one of your primary targets. Deflect can be used to reflect her primary fire, Sleep Dart and even Biotic Grenade. Your superior mobility will allow you to quickly close the distance between you and Ana while letting you staying out of her line of sight if you take alternate routes and climb walls. Ana has the advantage at a distance, so try not to stay out in the open; instead, try to battle Ana at close range where she has a hard time countering you. Be very careful not to get hit by Sleep Dart; if hit, it only takes a Biotic Grenade and a quick follow-up shot to finish you off. This is especially true when you have Dragonblade active, as Sleep Dart will cause you to completely waste your Ultimate. | Nano-Boost and Dragonblade, or "Nano-Blade", is extremely popular for a reason; with your high dashing speed and already strong damage output combined with Nano-Boost's damage magnifier, you can easily slice through an unprepared enemy team. In other fights, try to stay in an area where your friendly Ana has line of sight, or if need be retreat to her so she can hit you with her Biotic Grenade. |
Baptiste |
If Immortality Field is active, you are not killing anyone within its range. Baptiste will have free reign to land shots on you. Also, he use Regenerative Burst to heal from your damage.
|
(To be added) |
Brigitte |
Never try to solo kill or 1v1 Brigitte, because it's literally impossible with her superiority over you in close range. She can stun you, displace you, regenerate health at a steady pace and block a lot of Shurikens with her shield. All you should ever try to do is fire Shurikens from a distance where she cannot reach you. Do not use Dragonblade on a Brigitte using Rally or enemies receiving armour from it, you will take too long to strike anybody down and they can easily retaliate. You're better off just wasting your ultimate to deny her the satisfaction of protecting her teammates from it and outplaying you. | (To be added) |
Lúcio |
One of Genji's main roles is flanking Support heroes, making Lúcio a high priority target. However, Lúcio has more mobility and methods of escape compared to other Support heroes. His Soundwave will push you away to give him space to flee, while Deflect doesn't work well against his primary weapon. To kill Lúcio, you must stay close and hit him with Shuriken or Fan of Blades. Lúcio will try to restore his health and group up with his team; keep your focus on him and use Swift Strike to finish him off. Lúcio's Sound Barrier can protect his teammates from Dragonblade long enough before the duration expires, so try to time it when you believe Lúcio doesn't have a Sound Barrier ready or if Lúcio isn't around to activate it. When Dragonblade is active, try to get closer to Lúcio without using Swift Strike. As he uses Soundwave and changes to speed boost, perform Swift Strike to chase him and cut him down. | (To be added) |
Mercy |
Mercy has very low mobility unless she has a teammate to use Guardian Angel on. You are best suited to chase and kill Mercy, especially seeing how she doesn't have any abilities to disrupt your attacks. | Your high mobility can provide your Mercy with a strong getaway option. If a fight is turning sour, quickly retreat and stay in your Mercy's field of view, allowing her to use Guardian Angel to keep up with you and help her escape. |
Moira |
Moira should be avoided because she is very difficult to kill. She can easily create a lot of distance between you two with Fade if you try to flank her and you won't have any means to catch up and take her out. Although it may seem practical, trying to Swift Strike to close some distance is not a smart tactic, because after using Fade, most Moira players will heal off any prior damage you dealt to them, and you will have no means to escape if things go sour, which they most likely will. In a 1v1 scenario, you cannot deflect her Biotic Grasp and because it locks onto you, trying to take advantage of your mobility will not work. However, you can deflect Biotic Orbs, so if she uses one to heal herself or damage you, make sure you deflect it back at her for some extra damage or even some healing for yourself. | You can combo Coalescence with Dragonblade, as she can keep you healed up while you're attacking the enemy. |
Zenyatta |
Zenyatta has no way to escape if you choose to hunt him down. Your high mobility allows you to dodge Zenyatta's Orbs and attack him at the same time. In a one-on-one fight, Zenyatta will target you with Orb of Discord to increase his damage, but your mobility and Deflect will help you turn the tides in your favor. Toss Shuriken at a close range while running and jumping around, keeping him confused until you can finish him with a Swift Strike. Keep in mind that Zenyatta's Transcendence is a counter for Dragonblade, as not only does it make him invulnerable, it provides his team with more than enough healing to survive your blows. Like Lúcio's Sound Barrier, try to save Dragonblade for instances where either you believe Zenyatta doesn't have Transcendence ready or if he's not around to protect his team. | Try to focus on enemies affected by your Zenyatta's Orb of Discord, as they'll be much easier targets to quickly kill. |
Story
The cyborg Genji Shimada has made peace with the augmented body he once rejected, and in doing so, he has discovered a higher humanity.[4] While wary of his past, he has acknowledged, and made peace with it. He (almost) constantly wears a mask, as, in his words, "I do not want people to fear me...or pity me."[5]
Genji's sword is a katana named Ryū ichimonji (竜一文字); he maintains it personally and has never allowed anyone else to examine or repair it. It is paired with a traditional wakizashi sheathed horizontally on his lower back.[6]
Background
| “ | I know what it is to leave behind a past you are not proud of. | „ |
| ~ Genji |
Genji in his youth
As the youngest son of Sojiro Shimada, the master of the Shimada ninja clan, Genji lived a life of luxury and privilege. He had little interest in the family's illegal businesses, and although he excelled at and enjoyed his ninja training, he spent most of his time pursuing a playboy lifestyle.[4] He was trained in the ways of the sword by Asa Yamagami.[7]
Many within the clan considered the carefree Genji to be a dangerous liability, and they resented his father for coddling and protecting him.[4] He spent a lot of his time in an arcade in Hanamura, where he racked up numerous high scores on the arcade machines.[5]
At some point, Sojiro called Genji "sparrow" as an insult. He would later come to adopt it as a nickname.[5]
Overwatch
| “ | Together we could've built an empire. That was your dream. Not mine. |
„ |
| ~ Hanzo and Genji |
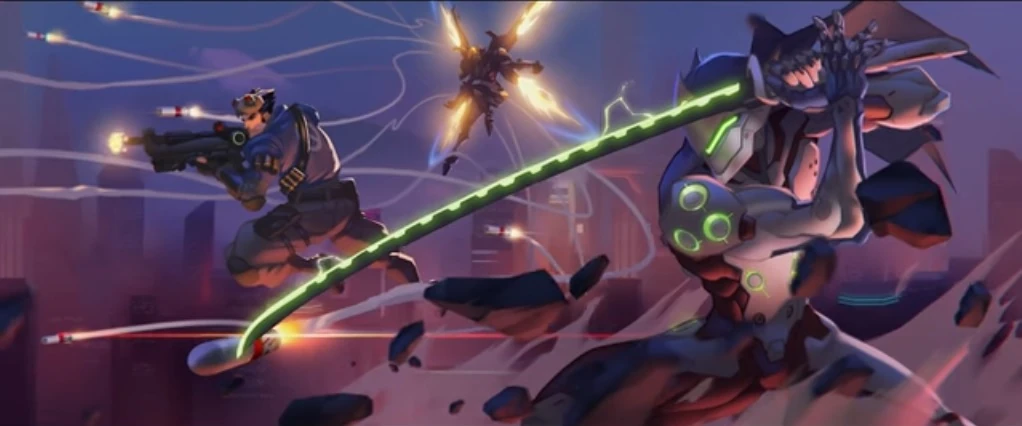

Genji fights alongside Overwatch
Following Sojiro's untimely death, the clan elders instructed Genji's older brother, Hanzo, to demand that Genji take a more active role in their late father's empire. Genji refused, enraging Hanzo. The tension between the brothers built to a violent confrontation that left Genji on the verge of death. Hanzo believed that he had killed his brother, but Genji was rescued by Overwatch and the intervention of Dr. Angela Ziegler. The global security force saw Genji as a potential asset in its ongoing operations to combat the Shimada clan. As Genji's injuries left him clinging to life, Overwatch offered to rebuild his body in exchange for his help. He was put through an extensive process of cyberization, which enhanced his natural speed and agility and augmented his superlative ninja skills. Transformed into a living weapon, Genji single-mindedly set about the task of dismantling his family's criminal empire.[4] At some point he was stationed at Watchpoint: Gibraltar.[5] As a member of Blackwatch, he had mixed views on fellow members Jesse McCree and Moira O'Deorain.[8] He and Ziegler were close, having many late night conversations at Overwatch Headquarters.[5]
Retribution


Genji within Rialto
Eight years before the present day, Genji took part in a mission to Rialto in order to apprehend Talon member Antonio Bartalotti. The Blackwatch team arrived in a Venice safehouse and set up survaillance on the manor. They found Talon soldiers patrolling the grounds. When night fell, they infiltrated the manor.[9] They made their way through its interior, killing and/or incapacitating numerous Talon guards. Upon reaching Antonio's office, they found him there, not surprised to see them. Nor was he intimidated, as he pointed out that Overwatch abducting a "respected businessman" would be a public relations nightmare. Furthermore, even if they did take him, his "friends" would have him released within a week. After some thought, Reyes said "you're right" and shot Antonio, the force of the blast sending him through his office window, setting off an alarm. Genji remained silent, even as they engaged in "Plan B"—fight their way out. During the escape, Genji voiced support for Reyes's actions, stating that the commander had found an "expedient solution." He noticed that McCree was uneasy about what had occurred, pointing out that they'd killed before. Reyes stated that what had happened was an execution. Genji simply responded "dead is dead." He further stated that he felt no sympathy for the Talon guards.
The team succeeded in exfiltrating the manor, but the existence of Blackwatch was revealed to the world, resulting in political and public fallout.[10]
Uprising
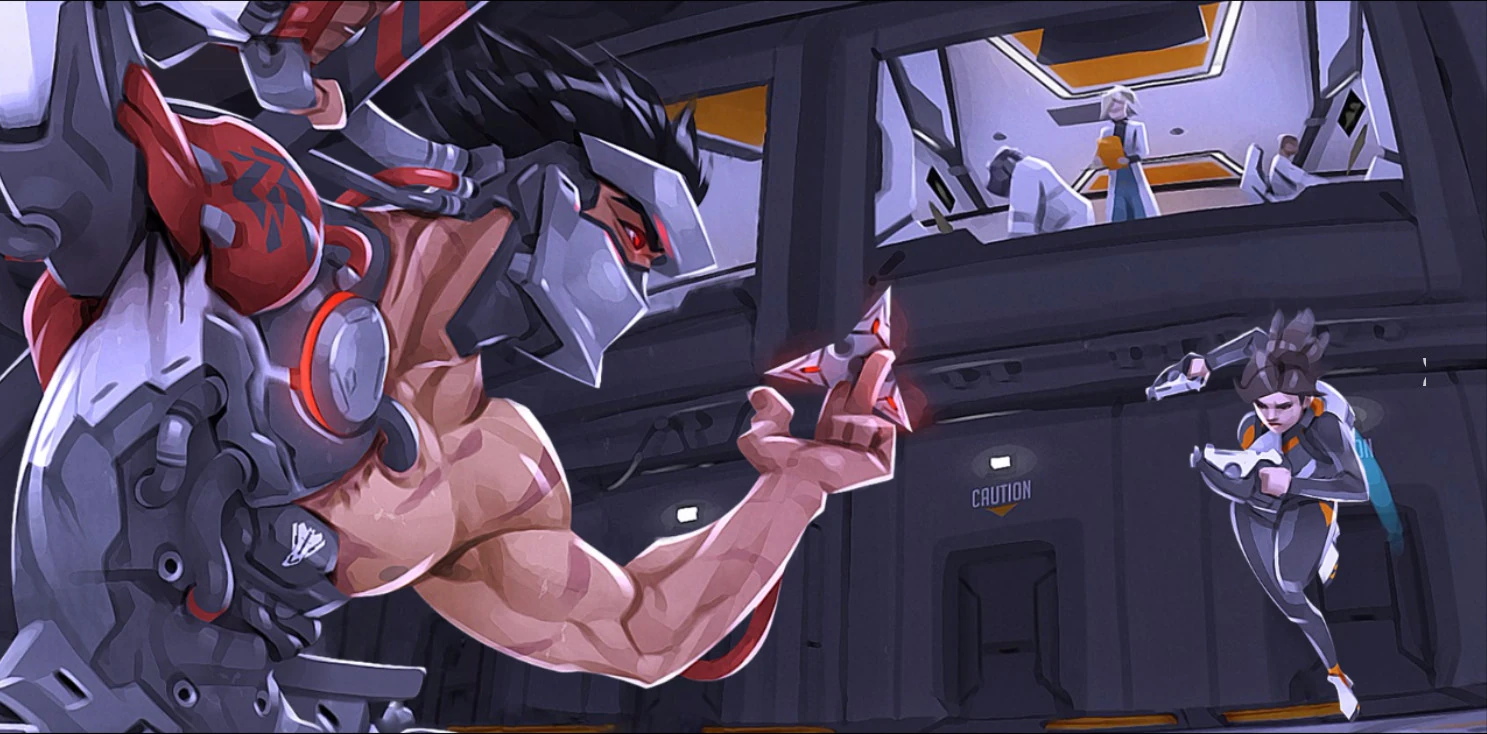

Genji spars with Tracer
Seven years before Overwatch Genji was still a member of Blackwatch. While Null Sector carried out an uprising in King's Row, he trained with Lena Oxton.[11] Genji would later comment that Tracer was "the only one I have trouble keeping up with."[12]
Within a year after the King's Row Uprising. Genji would cut contact with his old team members.[13]
Storm Rising

Genji confronts Maximilian
Six years before the present day, under the command of Sojourn, Genji took part in an operation in Havana consisting of himself, Mercy, Winston, and Tracer. Their objective was to apprehend Maximilien, who was travelling through the city in an armored convoy. The Overwatch team engaged, with Genji using his sword to disable Maximilian's vehicle, and his shuriken to destroy a pair of others. Maximilian fled on foot, but the team was able to catch up with him, Genji putting his sword to the omnic's neck. In exchange for leniency, Maximilian agreed to arrange a "meeting" with Doomfist,[13] informing them that Talon's leader would be in Singapore in three weeks.[14]
Doomfist
| “ | Doomfist, you are truly a worthy foe. If we fight again, I can't promise you'll walk away this time. Nor can I. |
„ |
| ~ Genji and Doomfist reflecting on their battle in Singapore |

Genji in battle
Three weeks later alongside Tracer and Winston, Genji confronted Doomfist in Singapore. He initially attacked Doomfist with his shurikens, but the man either deflected them with his gauntlet, or utilized a powerful shield to keep them at bay. Doomfist slammed his gauntlet into the ground, sending pillars of earth upwards, forcing Genji to jump into the air for safety. It was the opening that Doomfist needed, as he jumped up and hit Genji with his gauntlet, sending him skidding along the streets and smashing into a car. Genji's cybernetic body began to give out, but luckily, Winston was able to defeat Doomfist shortly afterwards.[15]
Inner Peace
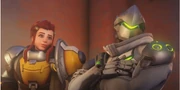
| “ | Genji, how'd you ever get used to...You know...It was hard enough for me and it was just the one arm. It was a long and difficult road, but now, I feel at ease in my own body. |
„ |
| ~ McCree and Genji discussing their cybernetics |

Genji finds inner peace
As time passed, Genji felt increasingly at war with himself. He was repulsed by the mechanical parts of his body and could not come to grips with what he had become. When his mission was complete, he abandoned Overwatch and wandered the world in search of meaning. He drifted for many years before crossing paths with the omnic monk Zenyatta. Though Genji initially rejected Zenyatta's wisdom, the benevolent omnic would not be deterred. In time, Zenyatta became his mentor, and under the monk's tutelage, Genji reconciled his dual existence as both man and machine. He learned to accept that although he had a cyborg body, his human soul was intact, and he came to see his new form as a gift and a unique strength.
Now, for the first time in his life, Genji was free. Even he could not say where his path would ultimately lead.[4]
Recall
When Winston issued a recall of Overwatch agents, Genji was seemingly in western North America.[16]
Dragons
| “ | Real life is not like the stories our father told us. You are a fool for believing it so! Perhaps I am a fool to think that there is still hope for you, but I do. Think on that, brother. |
„ |
| ~ Hanzo and Genji part ways |
Genji reveals himself
At some point after the recall, Genji headed to Japan to confront his brother. He contacted Angela Ziegler, informing her of his decision.[17]
On the tenth anniversary of Genji's supposed death, as he had done every year, Hanzo broke into Shimada Castle and took down the guards before they could alert anyone. In the main room in front of the sword display he lit an incense offering and prayed to honor his brother. Genji had tracked him before he even set foot in the castle, and revealed his presence to Hanzo. The two sparred both physically and verbally, discussing Hanzo's assassination of his brother. Hanzo unleashed his Dragon Strike ability, but Genji was able to manipulate it, a feat that only a Shimada should be capable of. He took off his mask, revealing himself as Hanzo's very much alive brother. He told Hanzo that he had forgiven him, and now, Hanzo had to forgive himself. The world was changing, and they would have to pick sides. Hanzo wasn't swayed, but Genji told him that he still had hope for his brother. And with that, he disappeared into the night.[18]
Reflections

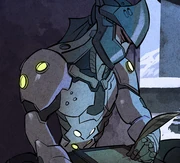
Genji writes his letter
At Christmas, Genji was with Zenyatta. He wrote a letter using a quill. The letter was possibly sent to Mercy, who received a letter with an identical quill (if not the same one) that Genji had used.[19]
Zero Hour
| “ | Hello Genji! Thanks for the help in Paris. I thought your hoodie was very stylish. Our paths cross for now. As to the future, we shall see. |
„ |
| ~ Genji and Mei after the battle in Paris |

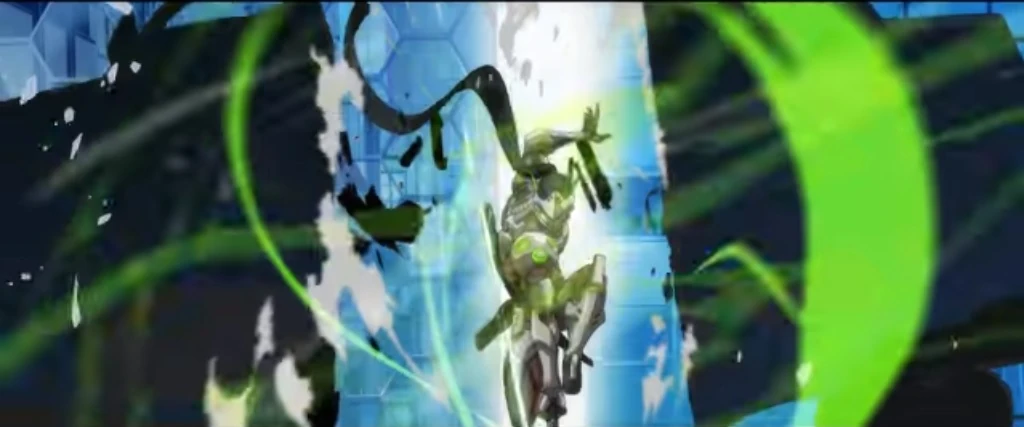
Genji's return
Sometime after Winston's recall, Genji arrived on location in Paris, where he aided former Overwatch members in repelling Null Sector's forces after the opposition began pushing them toward an early retreat. After playing a crucial part in crippling and taking down the terrorist organization's Titan, Genji rejoined Overwatch, alongside Reinhardt, Brigitte, Mercy, and Echo.[20] He was willing to work with Overwatch, at least in the short term.[12]
A New War
After Paris, Genji and the others traveled to Watchpoint: Gibraltar, which they used as their base of operations.[21] As it turned out, Null Sector's attack on Paris was simply the prelude to a global invasion. Winston pointed out that Null Sector wasn't the only threat Overwatch had to deal with. He declared that they'd had to fight their way through one city at a time. [22]
Note: The following events aren't necessarily in chronological order.
Rio

Genji and Brigitte in Rio
Genji and the rest of Overwatch deployed to Rio de Janeiro when it was attacked by Null Sector. They teamed up with Lúcio and were able to blunt the initial attack, though Lúcio warned that as long as Null Sector's command ship remained airborne, the omnics would just keep coming. Genji and Brigitte kept Null Sector busy, while Winston and Ziegler evacuated civilians, and the rest of the team assaulted the command ship. The plan was a success, and the command ship successfully destroyed.[23]
Reunion
| “ | I knew you would return one day. It has been too long, master. |
„ |
| ~ Zenyatta and Genji |
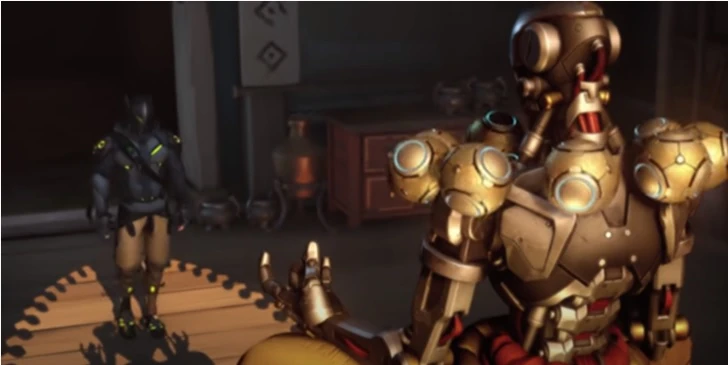
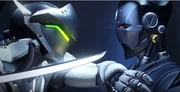
Genji reunites with Zenyatta
After helping thwart Null Sector's attack on Paris, Genji returned to Zenyatta.[22]
Achievements
| Name | Icon | Description | Reward |
|---|---|---|---|
|
|
Kill 2 Enemies with a single use of Genji's Deflect in Quick or Competitive play. |  | |
|
|
Kill 4 enemies with a single use of Genji's Dragonblade in Quick or Competitive play. |  |
Trivia
- Genji's name may be a reference to the main character in the Japanese classic novel, The Tale of Genji. Overwatch's Genji is described as a 'playboy', while the novel's Genji is heavily characterized by his relationships with multiple women. Similarly, both men experience being banished from their families.
- In his youth, Genji's father Sojiro gave him the nickname "Sparrow." He appears to use the feather of a Japanese sparrowhawk as a calling card.
- Genji and Hanzo were the first playable heroes in Overwatch to be related, followed by Pharah and Ana, and Torbjörn and Brigitte.
- A giant action figure of Genji was put on display in Paris as part of a pre-release promotion for Overwatch.[24]
- Genji's sword was replicated by armory series Man at Arms.[25]
- Genji is the fourth playable Overwatch character in Heroes of the Storm.[26] He is also a purchasable announcer.
- Genji seems to be ambidextrous, as he throws shurikens and uses Dragonblade with his right hand, and sword for Swift Strike and Deflect with his left hand.
- Genji used to have an exclusive skin (See Picture: Oni) only obtainable from doing the Nexus Challenge in Heroes of the Storm, it later returned again in the Nexus Challenge 2.0, along with an exclusive skin for D.Va. As of Patch 1.12.0.2, they were added to the classic lootboxes and can also be purchased for 1,000 credits.
- The Japanese word bushin (武神, lit. "wargod") is written on Genji's chest, likely an homage to the Final Fight character Guy.
Merchandise
- A Genji Figma statue was released in Q2 2018.[27]
- A Genji vs. Hanzo Nendoroid diorama is on sale.[28]
- A Genji-themed hoodie is available from JINX.[29]
- A Genji sword replica is available for pre-order from Blizzard's online store.[30]
- Genji will appear in multiple LEGO Overwatch sets.
Development

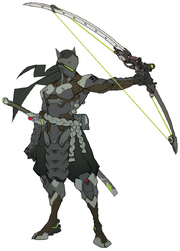
An early Hanzo concept, featuring elements of both Genji and Hanzo.
Genji and Hanzo were originally envisioned as a single cyborg ninja hero named Hanzo who wielded both a bow and a sword, used parkour, and had an assassinate ability, using artwork for the Assassin class from the cancelled Project Titan.[33] They were split into two distinct heroes early in development.[34] During development Hanzo was known as "Bow Ninja" and Genji as "Sword Ninja."[35] Both Genji and Hanzo's kits drew heavily from an early version of Sombra that predated both heroes, which resulted in the Sombra concept being temporarily shelved.[36]
Genji himself was originally conceived as a slow-moving stealth assassin with an ability that allowed him to trip an enemy, stunning them, and then instantly kill them with a sword strike "finishing move" if another enemy didn't interrupt the attack, but this design was found to be unfun.[37] At one point he was also given an Ultimate that would allow him to instantly kill an enemy from behind, which would have had unique stealth kill animations such as stabbing them in the back or cutting their throat.[38] The lessons learned from this iteration of Genji were taken into consideration when developing Sombra as a stealth hacker.[36] Another early version of Genji was treated purely as a melee hero with his sword always drawn and the ability to stick to walls.[39] Some of these abilities appear to be the basis for the Talon Assassin enemy unit that appears in the Overwatch Retribution event.[40]
The concept for Genji's new design in Overwatch 2 originated from the first storyboards for the Zero Hour cinematic, which depicted Genji appearing in a hoodie to rescue Winston. In the original storyboards he was wearing only a hoodie, causing the art team to realize that Genji had been naked this whole time and decide that if he's going to wear a hoodie he should also put on some pants. Jungah Lee, a concept artist for the Story and Franchise Development team, took that idea and fleshed out the design for the cinematic, and the development team liked it so much that they decided to bring it forward as his new design.[41]
Concept Art
Assassin concepts
Young and Blackwatch skin concept arts
Bedouin skin concept art
Baihu skin concept art
Sentai skin concept art
Oni skin concept art
Pacific skin concept art
Karasu Tengu skin concept art
Bushi Genji skin concept art
Bushi Genji weapon concept art
Overwatch 2 concept art
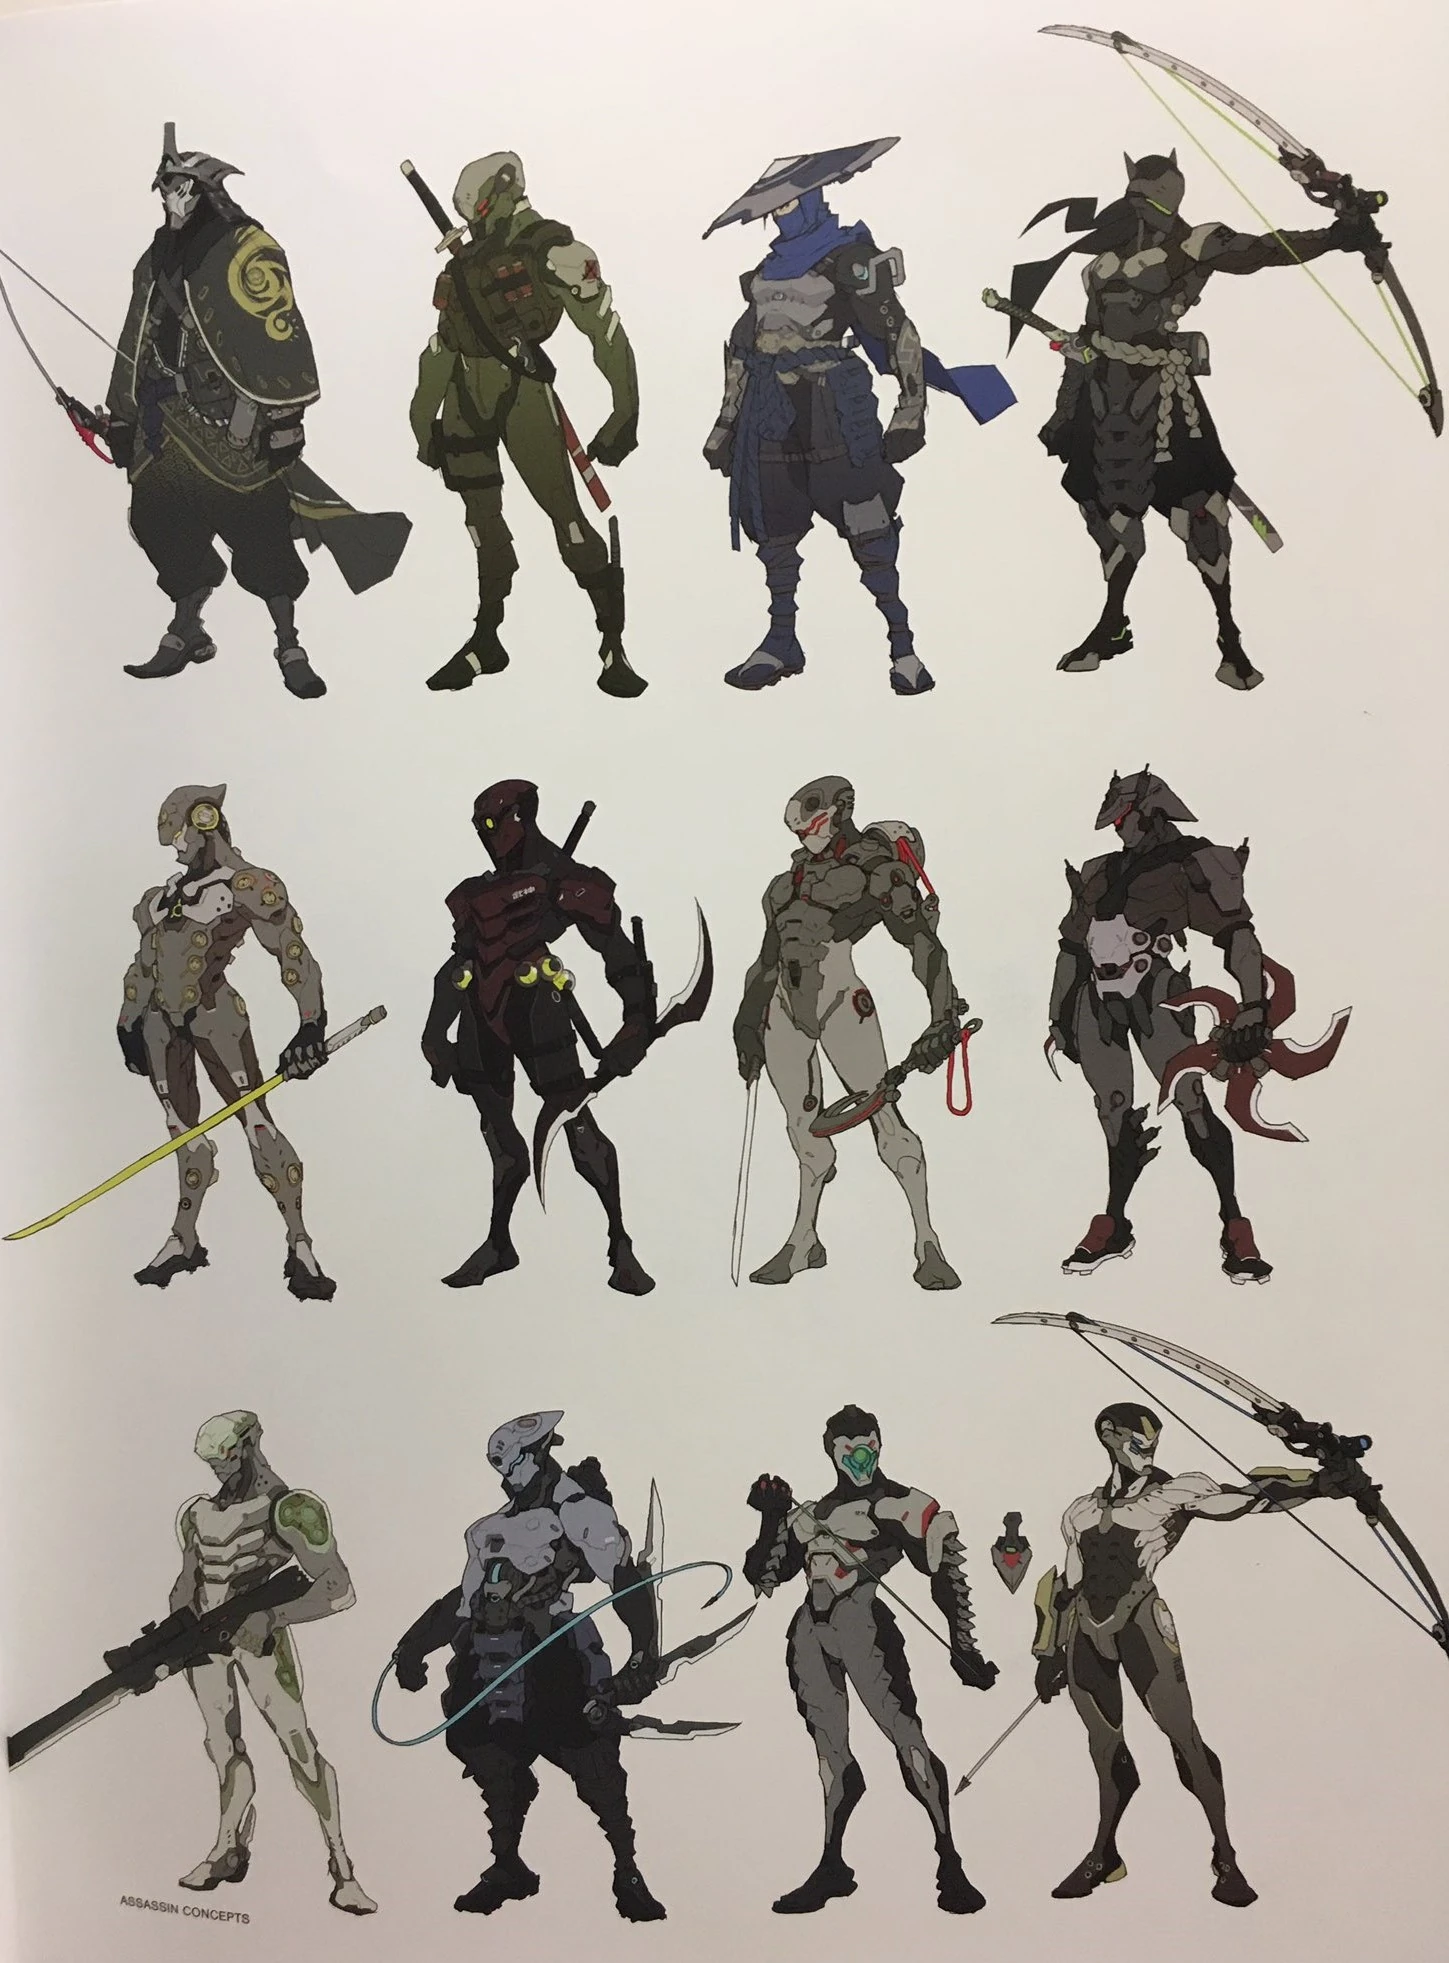
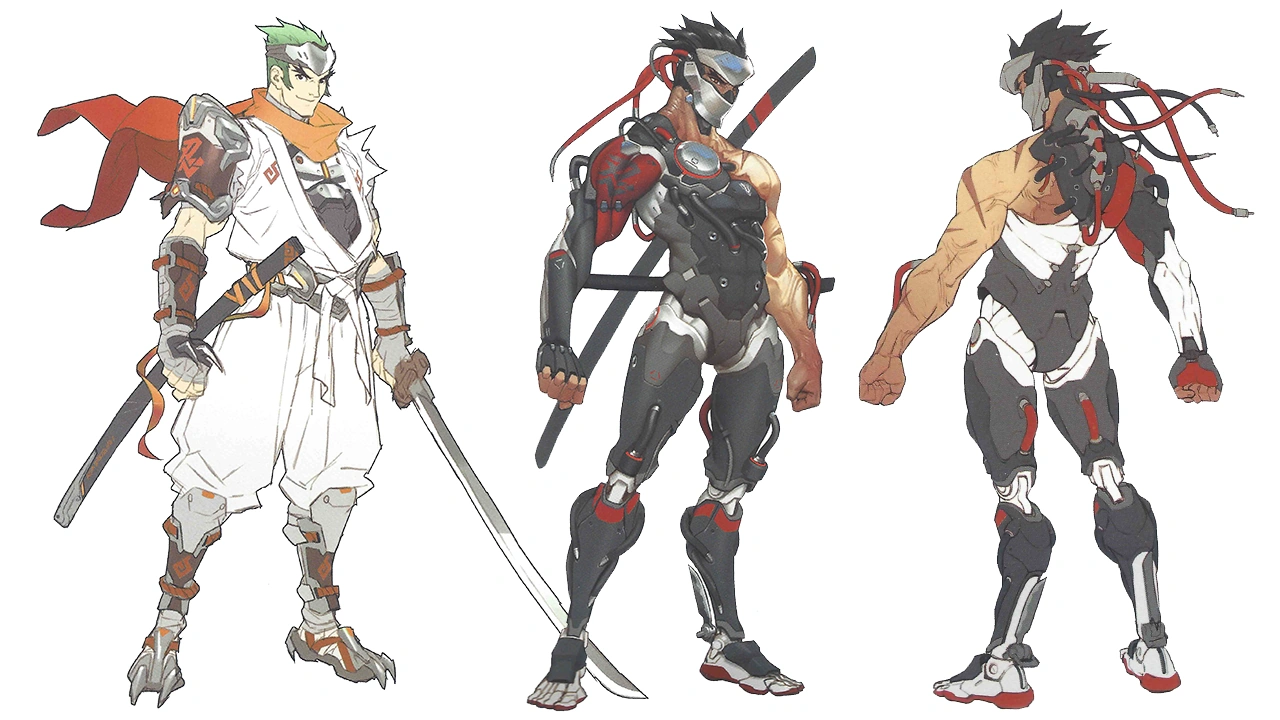
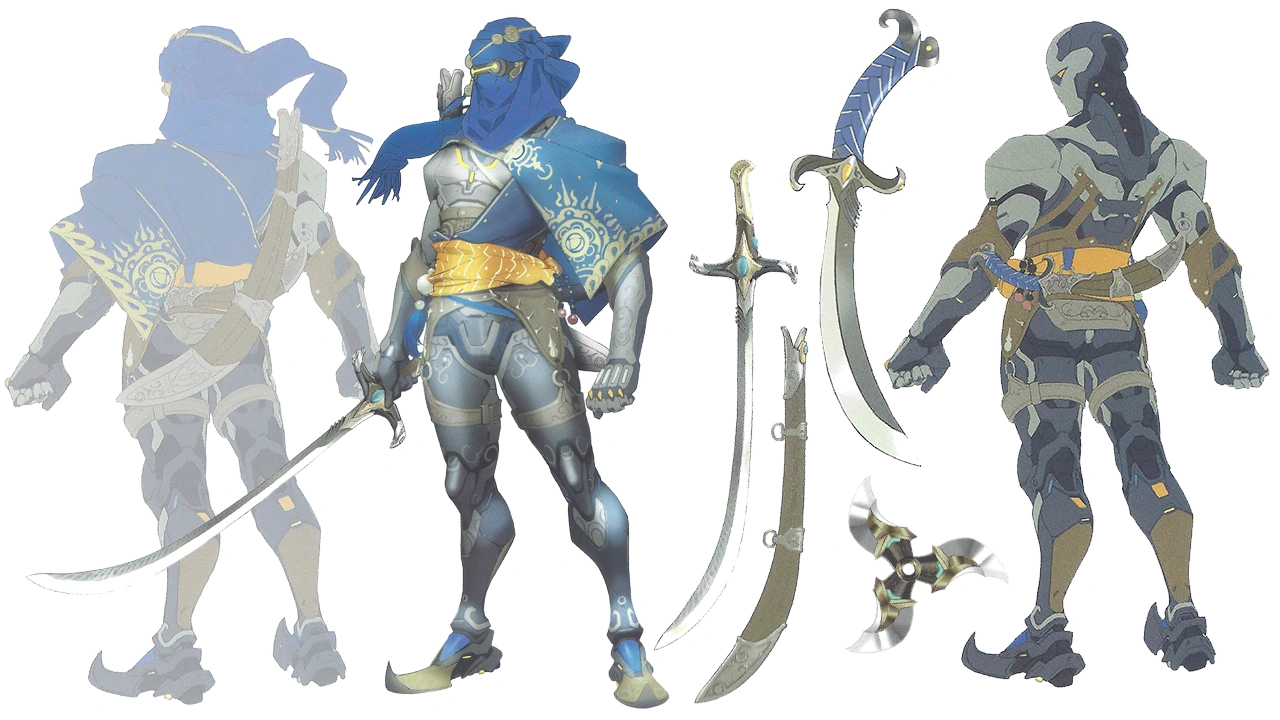
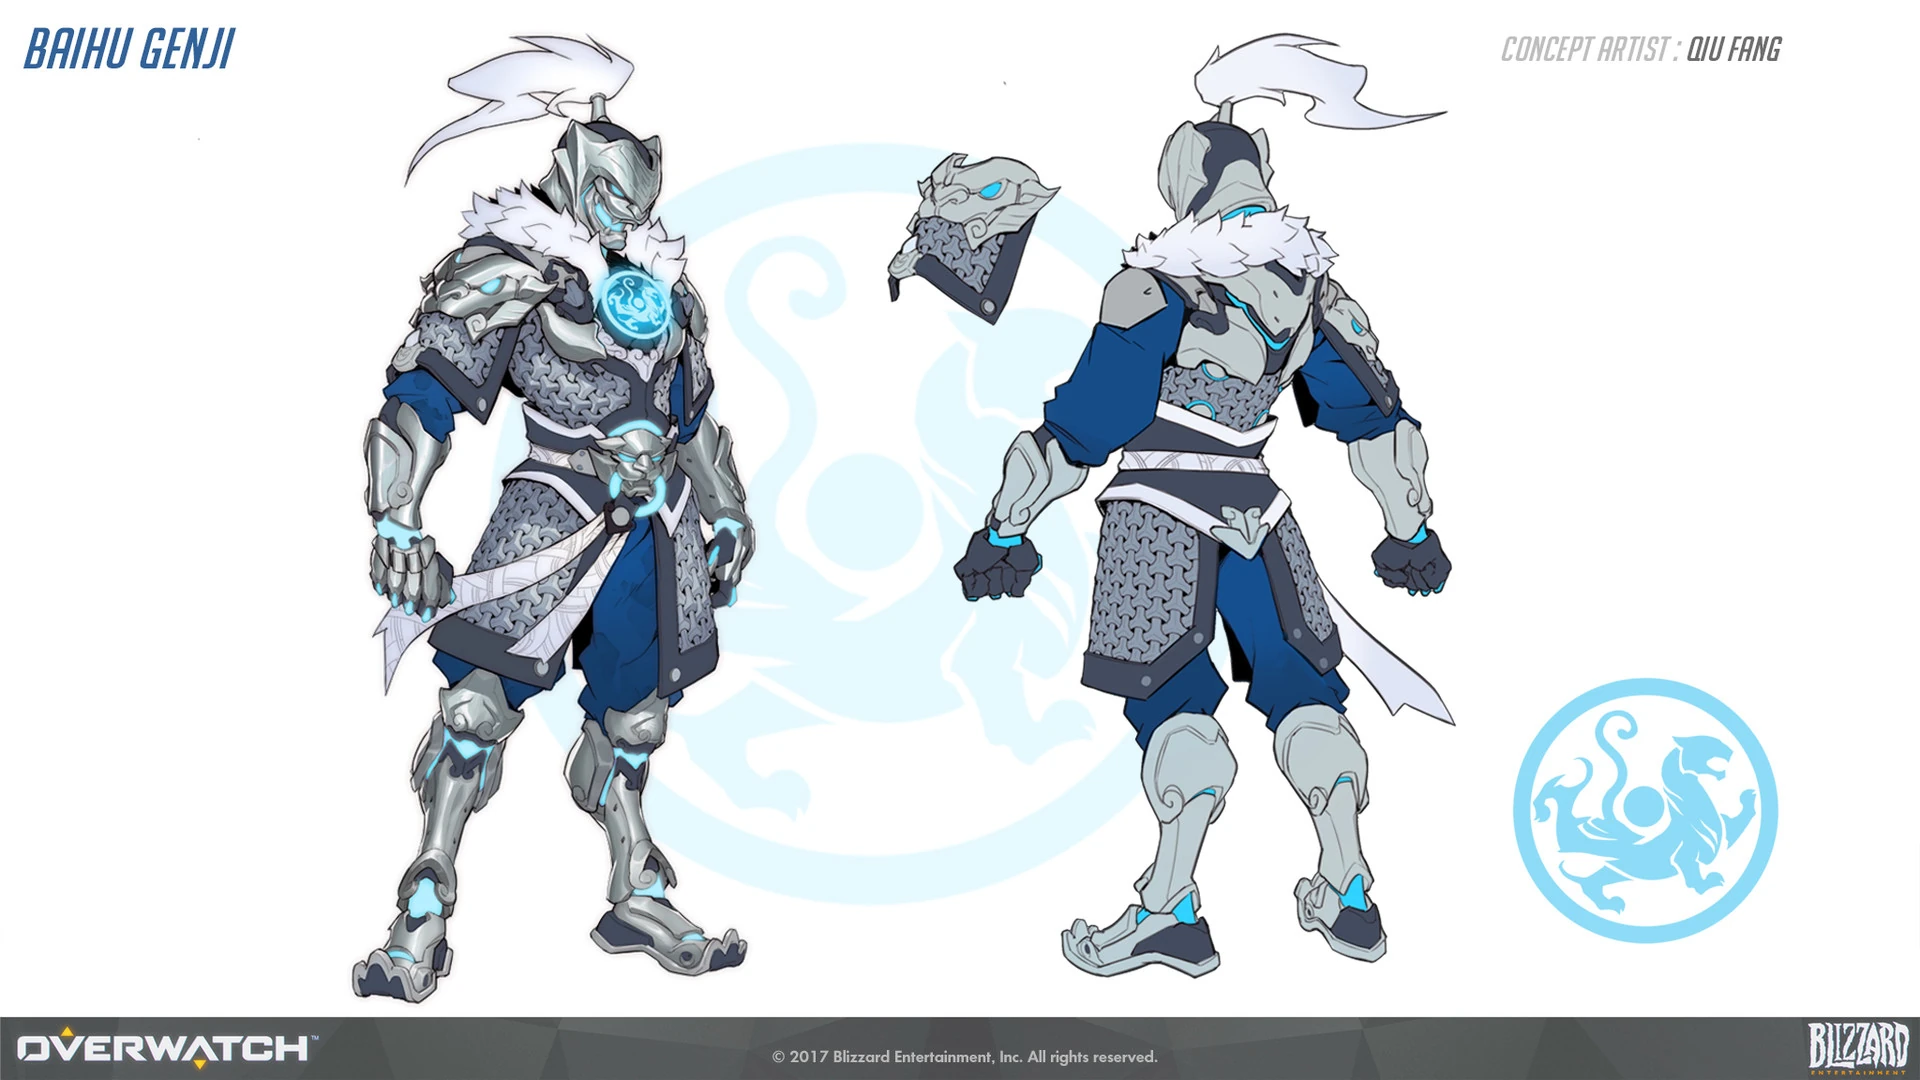
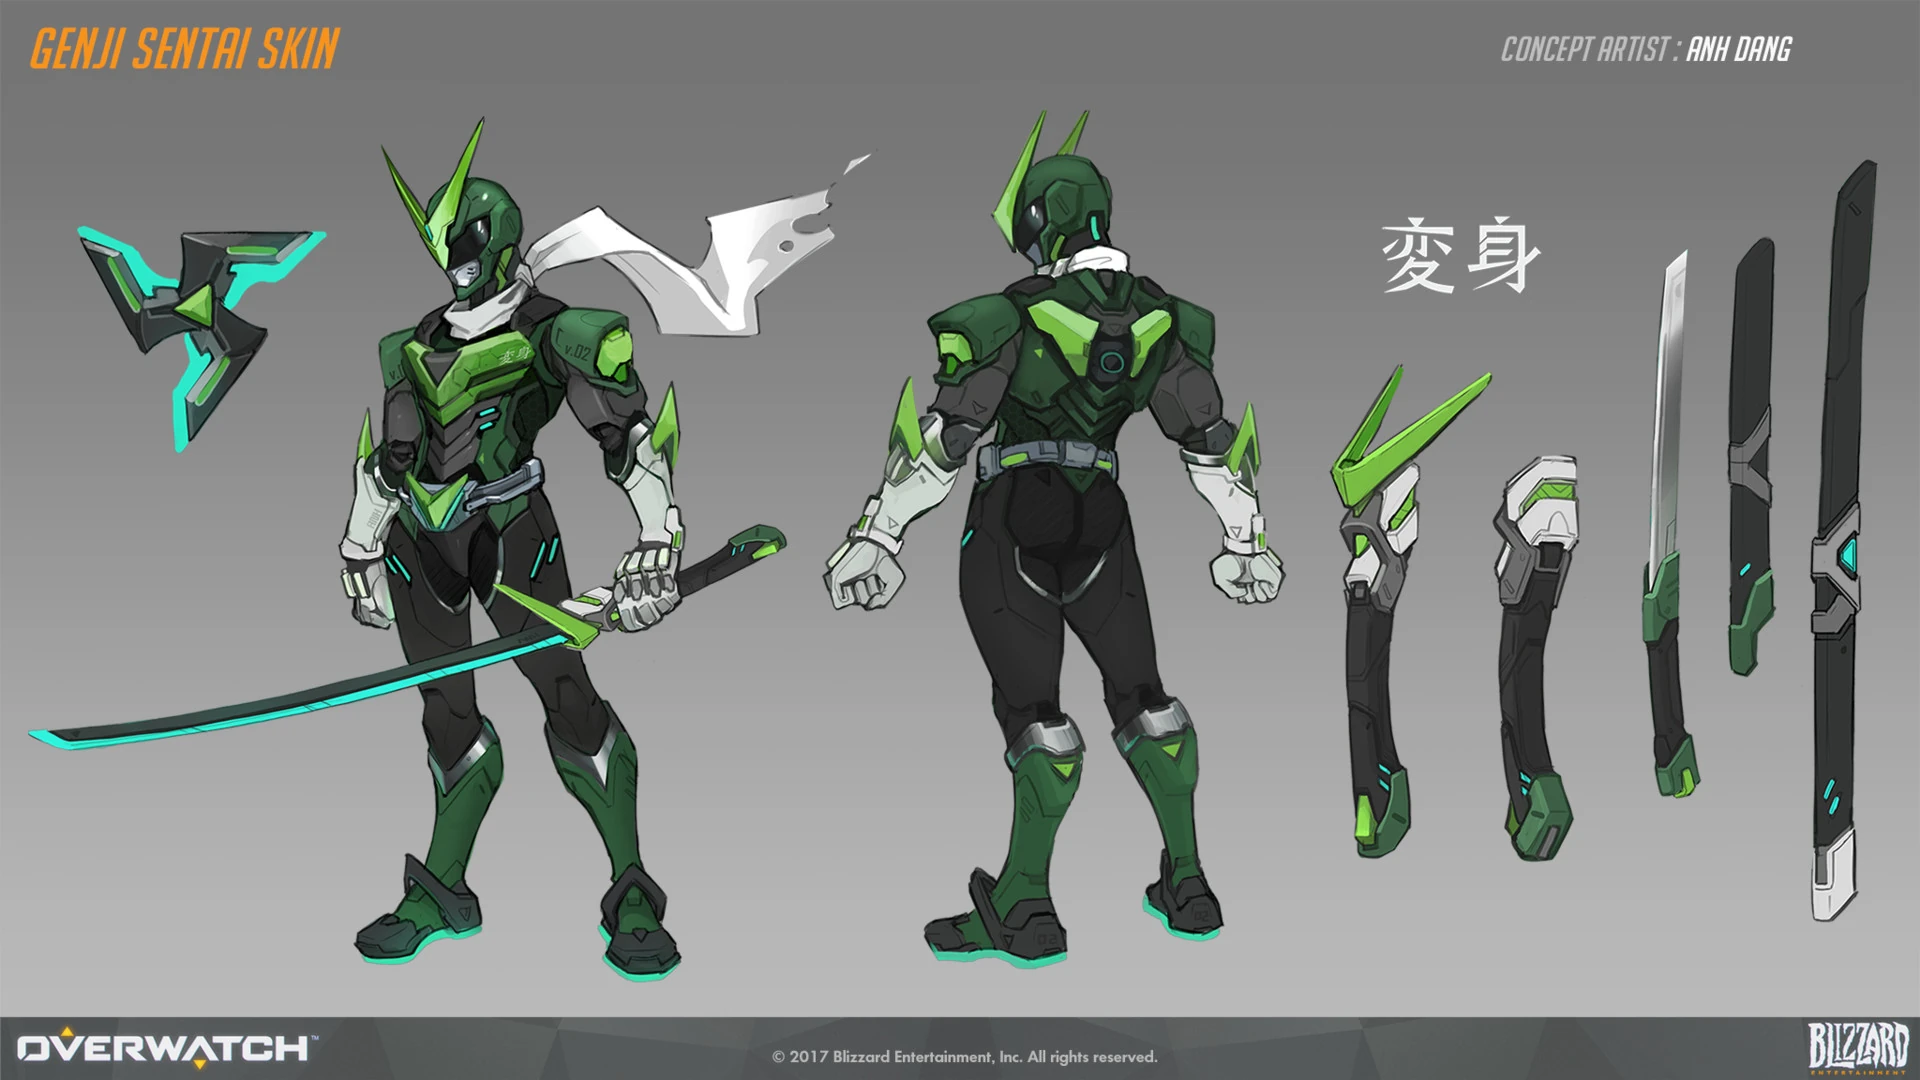
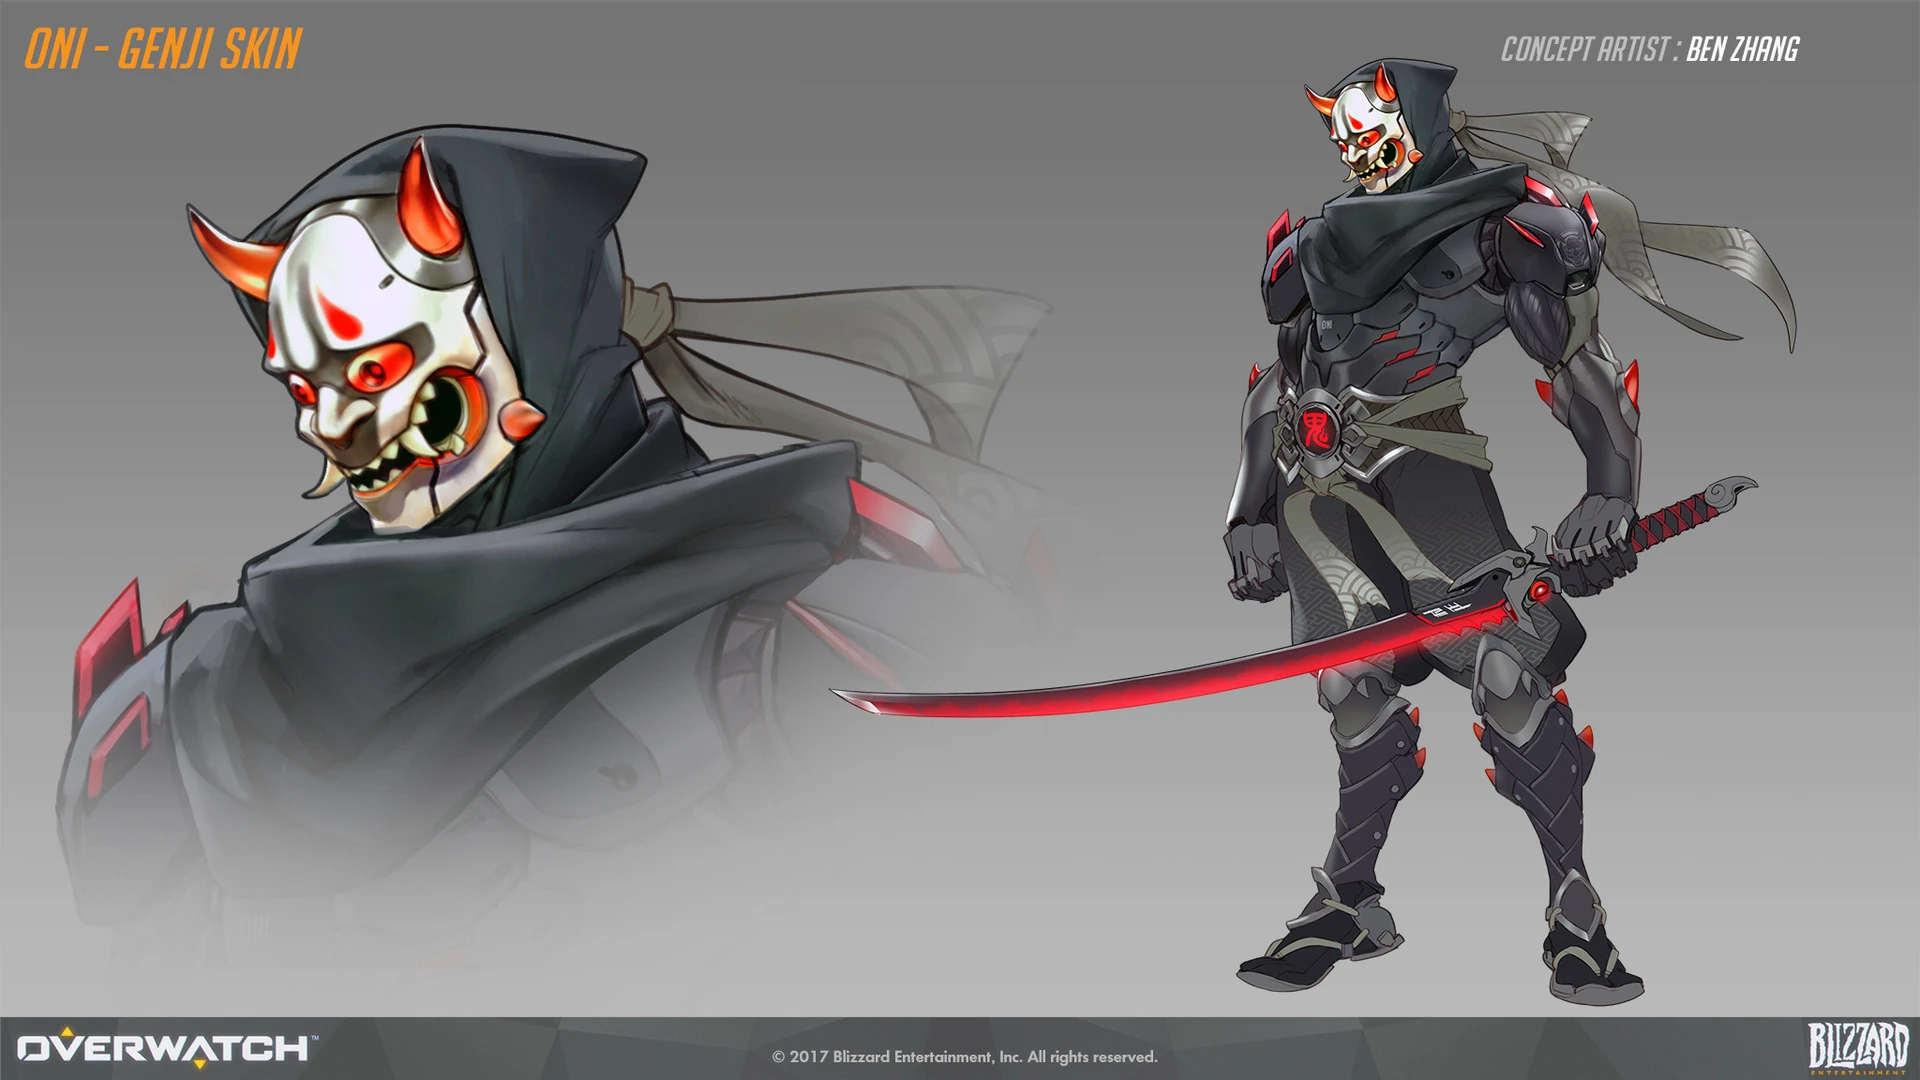
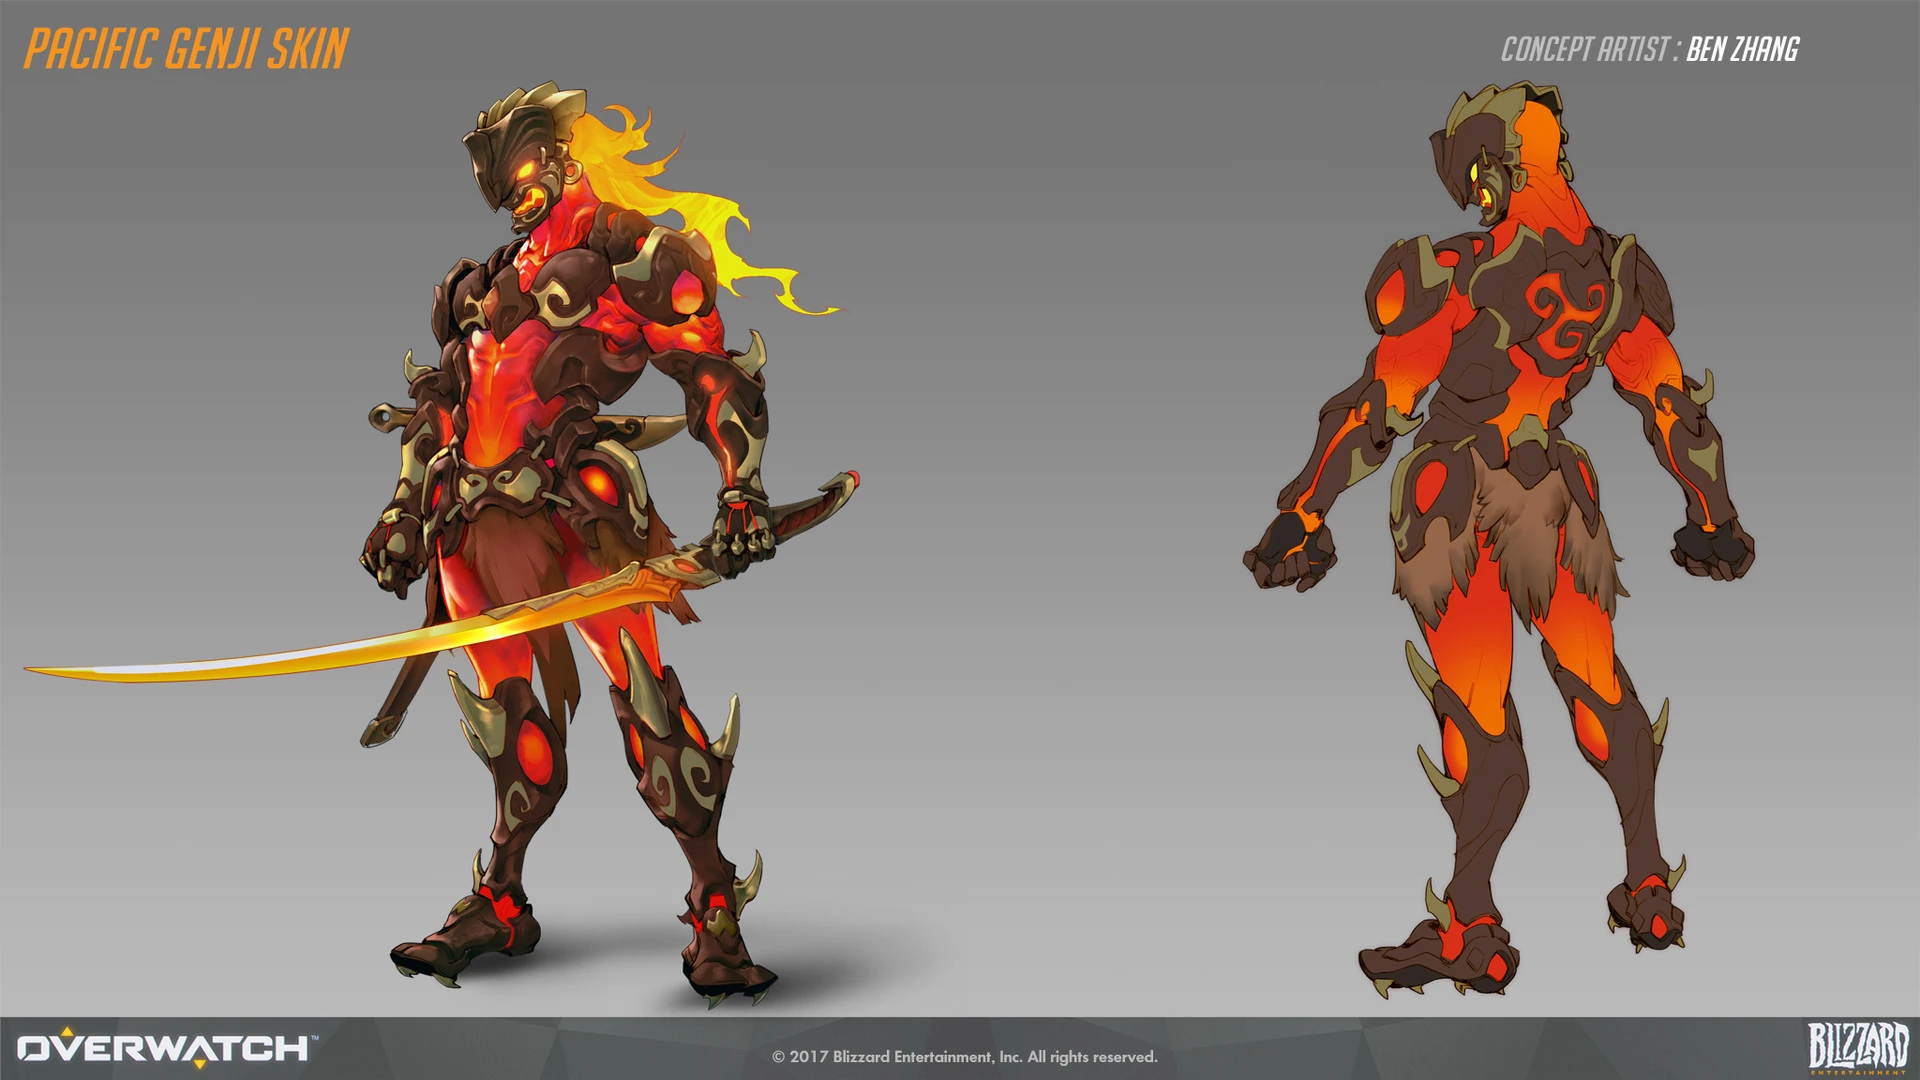
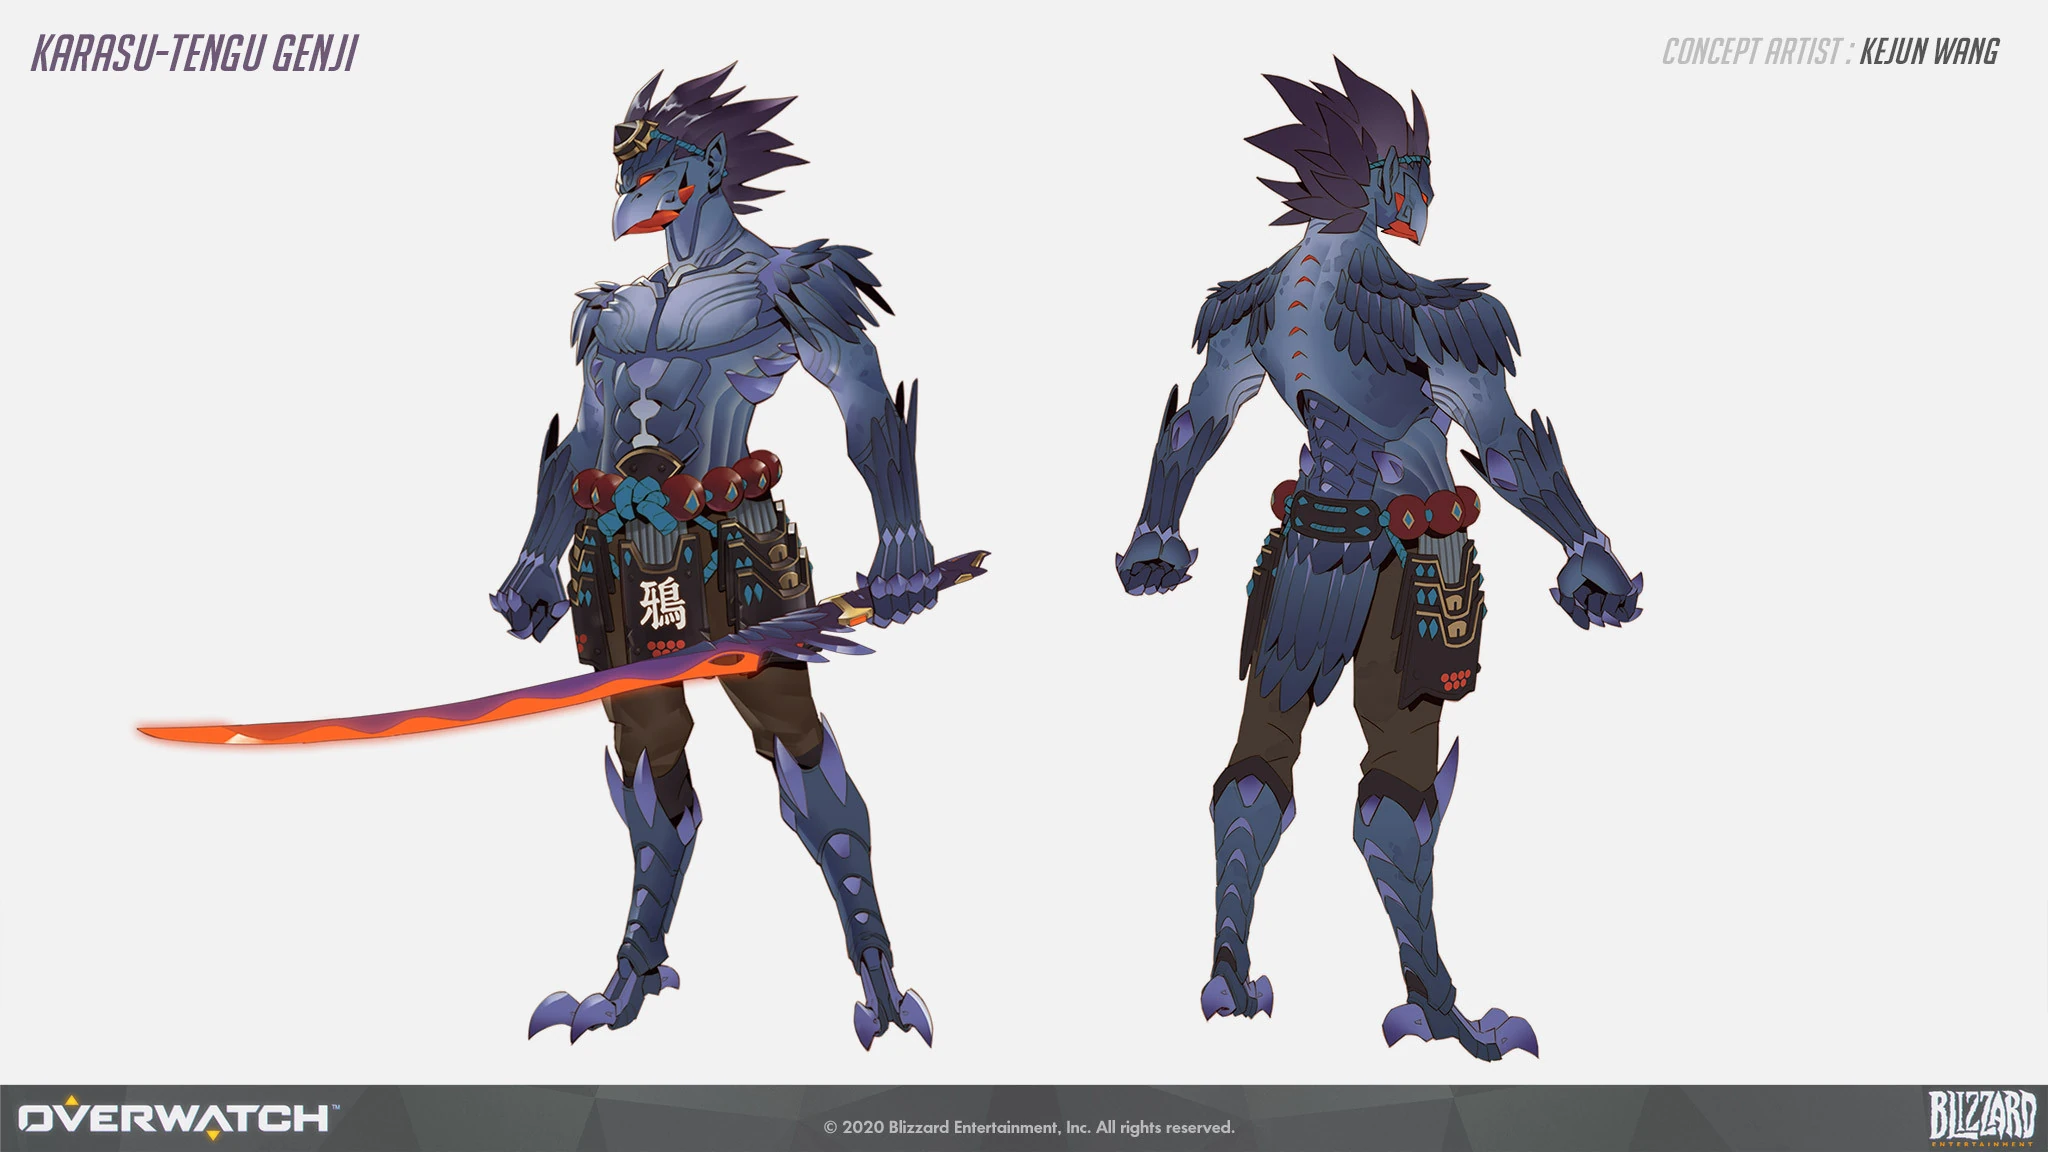
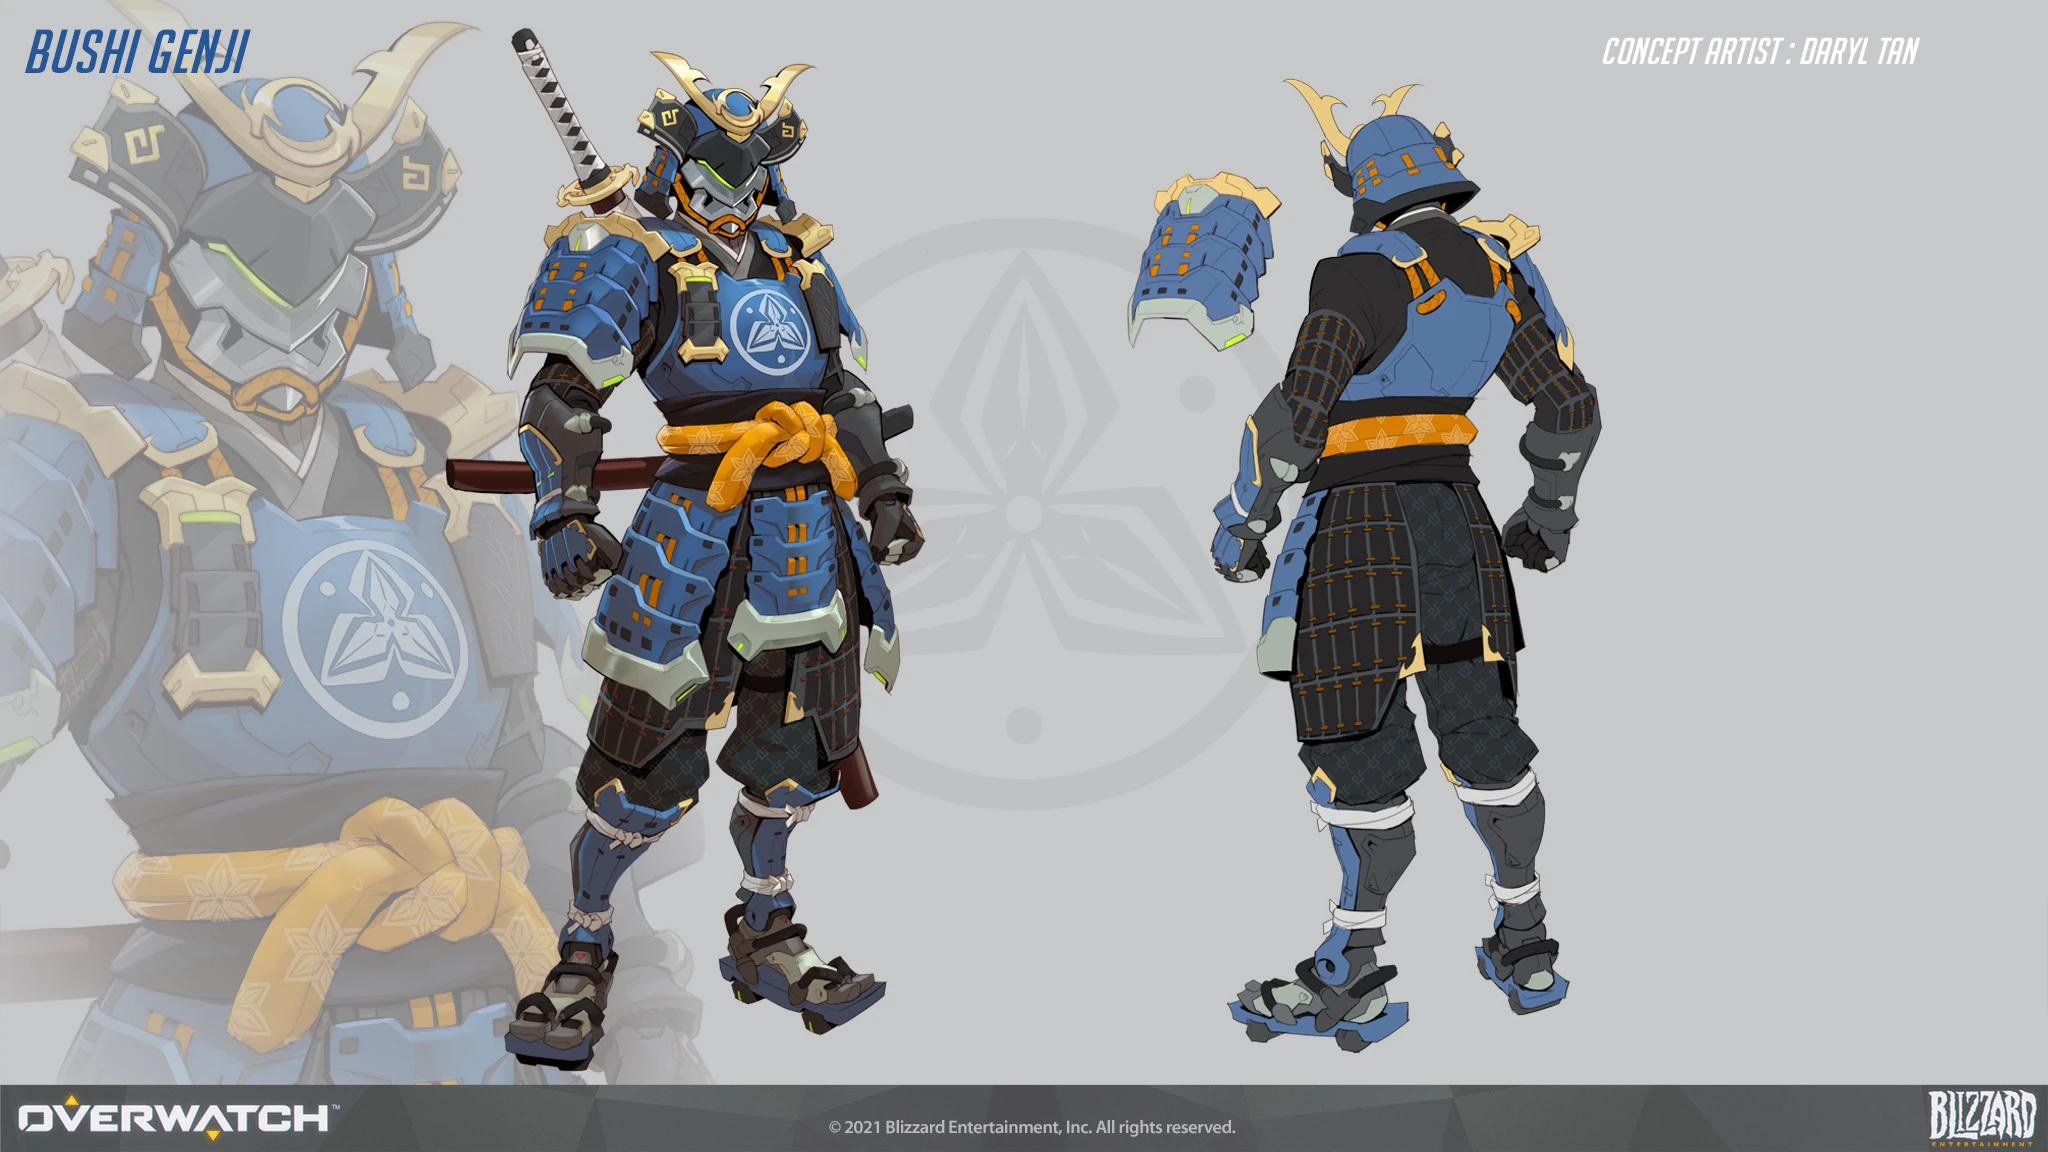
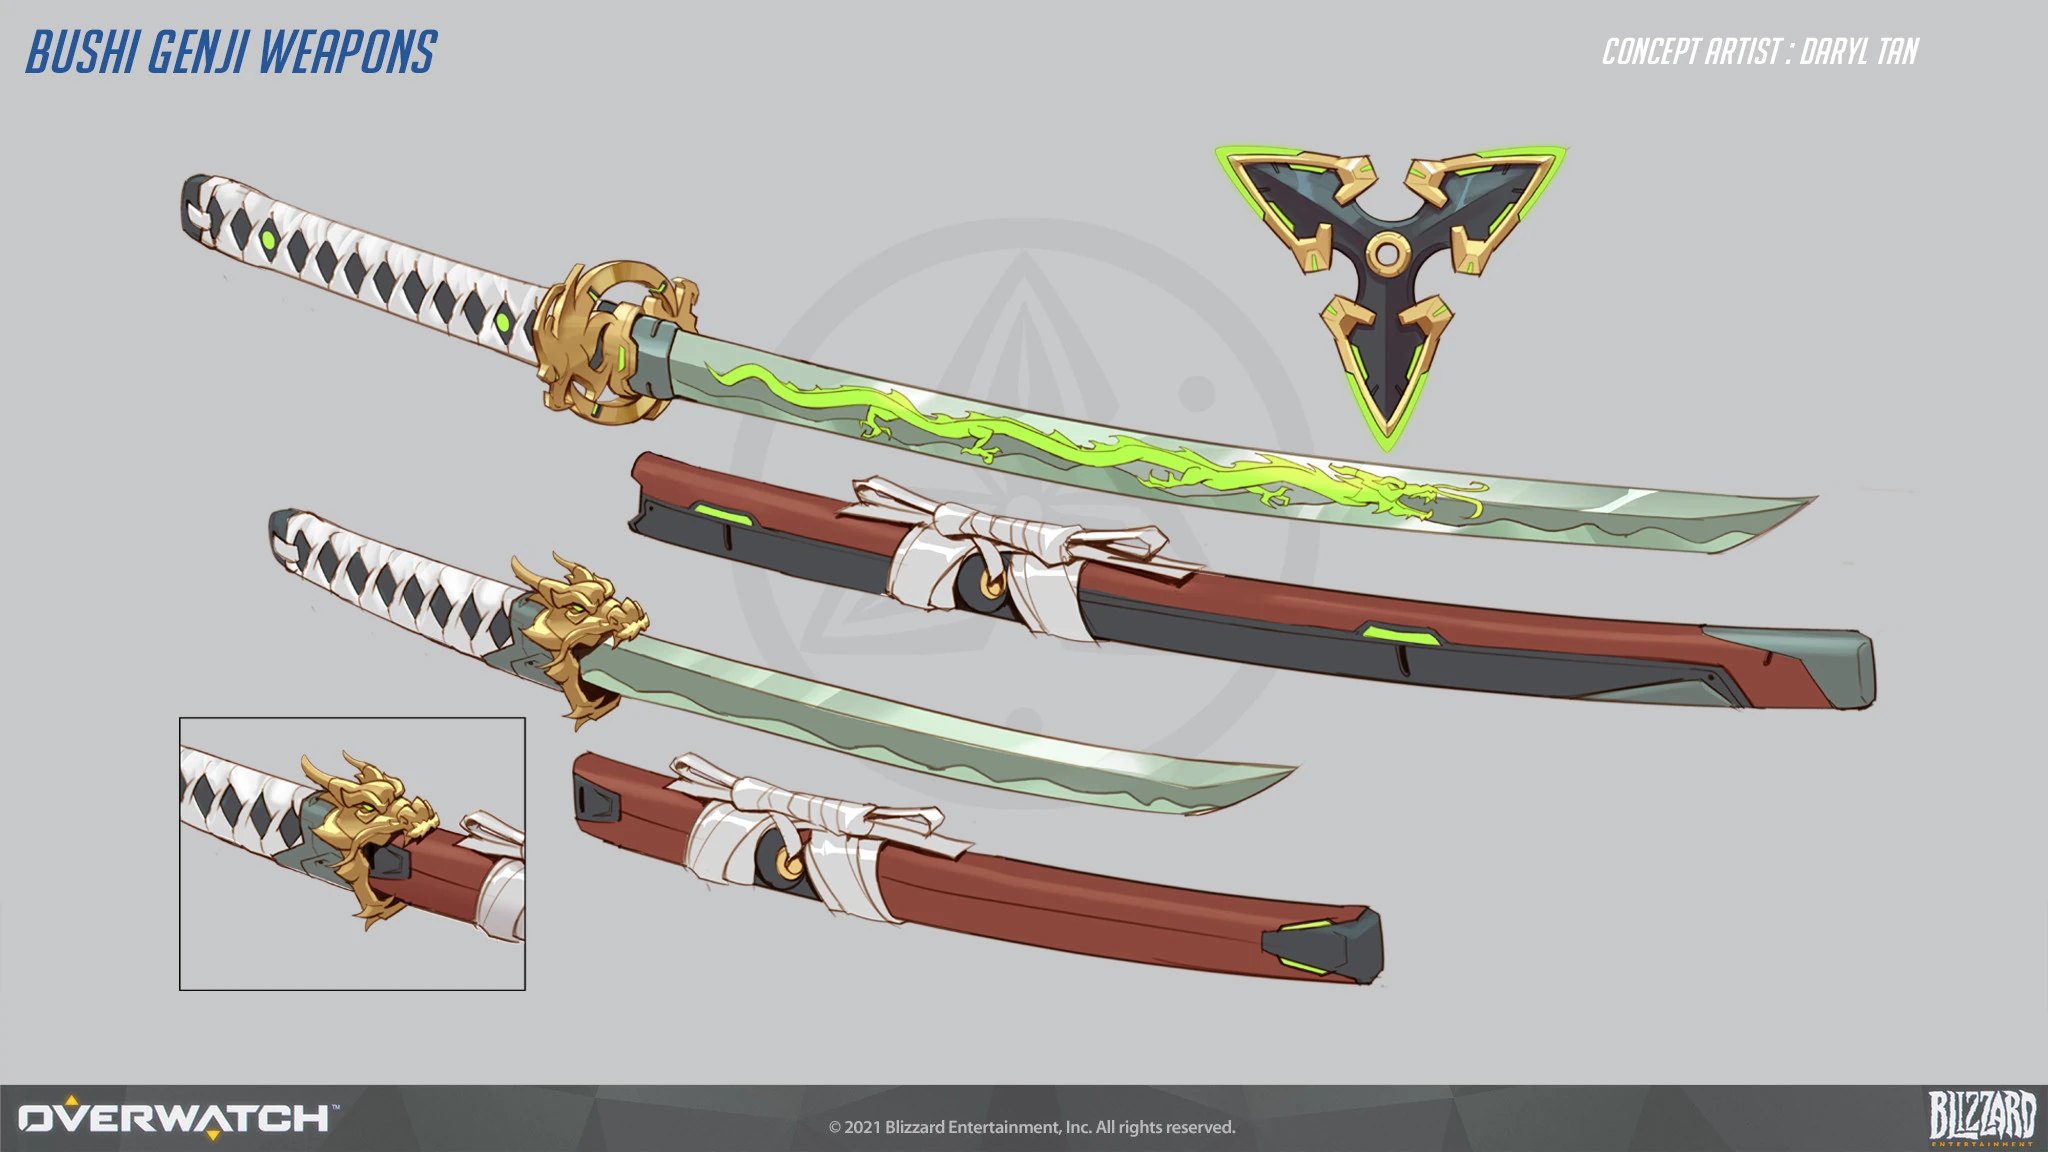
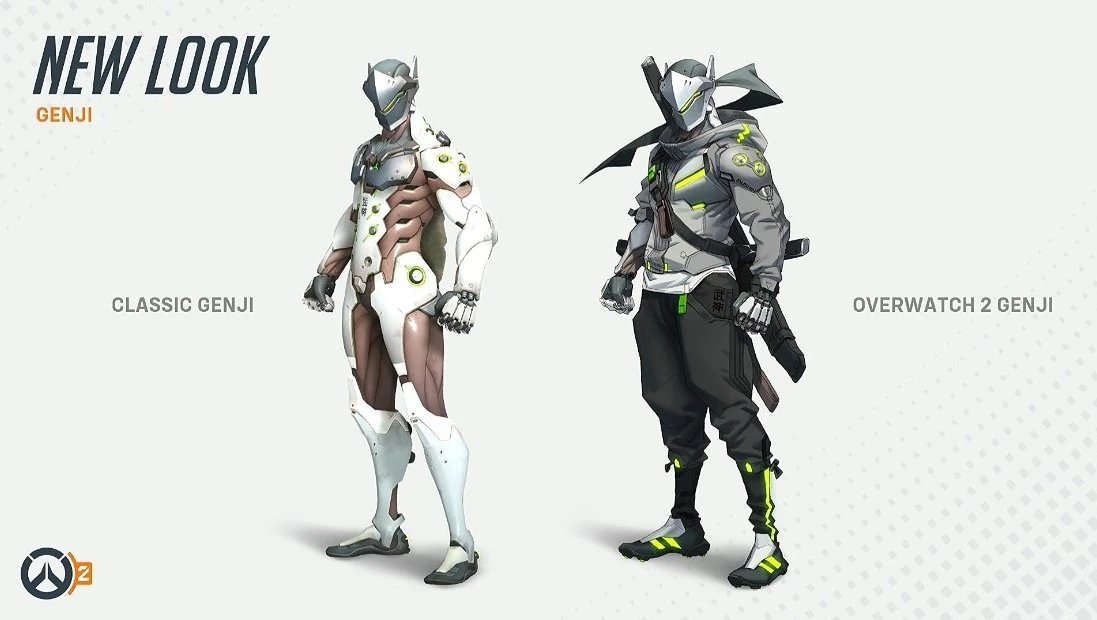
Videos
Balance Change Log
- Recovery lowered from 0.75 to 0.68
- Ultimate cost increased 15%
Developer Comment: We're increasing Genji's Shuriken fire rate to enable him to have more impact outside of his ultimate and increasing the cost of Dragonblade to account for the increased damage potential.
- Secondary fire recovery lowered from 0.75 to 0.65 seconds
- Ammo increased from 24 to 30
- Now restores ammunition after completion
- Hitbox size has been reduced
- No longer interrupted when Genji is stunned or hacked
- New sound effects and voice lines have been added, indicating when an enemy’s ultimate ability has been deflected
- Removed the attack delay from Genji’s wall climbing ability, allowing him to engage with enemies immediately after he finishes climbing
- Double jump no longer resets when wall climbing
- No longer deals damage to traps like Widowmaker's Venom Mine or Junkrat's Steel Trap
- No longer bypasses Junkrat's Steel Trap
- No longer interrupts quick melee attacks
- Duration of Genji's ultimate has been reduced from 8 seconds to 6 seconds
References
- ↑ Square Enix uses katakana "ゲンジ・シマダ".
- ↑ 2015-09-30, "It was a leak from IMDB, there were two voice actors listed as playing characters we didn't know of yet, specifically D.Va and 'Genji', with Gaku Space voice acting for Genji.". Reddit. Accessed on 2016-05-18
- ↑ 2014-11-10, Credits, listing Gaku Space in the voice over cast at 14:25. Youtube. Accessed on 2016-05-18
- ↑ 4.0 4.1 4.2 4.3 4.4 Genji, Blizzard Entertainment. Accessed on 2015-11-07
- ↑ 5.0 5.1 5.2 5.3 5.4 Overwatch, Genji Quotes
- ↑ Overwatch Visual Source Book
- ↑ 2021-01-11, CORRESPONDENCE POST FOR TOSHIRO YAMAGAMI. Blizzard Entertainment, accessed on 2021-01-13
- ↑ 2017-11-12, BlizzCon 2017 Overwatch: What’s Next Panel Transcript. Blizzplanet, accessed on 2017-11-18
- ↑ 2018-04-04, NEW SEASONAL MISSION Retribution Overwatch. YouTube, accessed on 2018-04-08
- ↑ Overwatch Retribution
- ↑ Tracer: Uprising
- ↑ 12.0 12.1 Heroes of the Storm
- ↑ 13.0 13.1 Overwatch Storm Rising
- ↑ 2019-04-25. Overwatch on Twitter: "> Accessing archived file... Decryption status: COMPLETE 📂 STORM RISING INTEL EXAMINATION – MAXIMILIEN… ", Twitter. Accessed on 2019-04-25.
- ↑ 2017-07-06, NEW HERO – COMING SOON Doomfist Origin Story | Overwatch. YouTube, accessed on 2017-07-08
- ↑ Recall
- ↑ Valkyrie
- ↑ Dragons
- ↑ Tracer: Reflections
- ↑ Zero Hour
- ↑ Blizzcon 2019 Overwatch: Evolving the Art Panel
- ↑ 22.0 22.1 2019-11-01, Overwatch 2 Gameplay Trailer. YouTube, accessed on 2019-11-08
- ↑ 2019-11-02, Overwatch 2 | Rio de Janeiro Mission Co-op PVE | Blizzcon 2019 Demo. YouTube, accessed on 2020-09-17
- ↑ 2016-05-20, Giant Overwatch action figures appear in Hollywood, Paris, Busan. Blizzard Watch, accessed on 2016-05-21
- ↑ 2016-11-29, Craftsmen Forge Genji's Glowing Sword From Overwatch. Kotaku, accessed on 2016-11-29
- ↑ [1] Tweet by Heroes of the Storm
- ↑ Figma Genji, Blizzard Entertainment. Accessed on 2017-10-10
- ↑ 2017-10-26, Genji and Hanzo are the latest adorable Nendoroid figures, and I must have them. Blizzard Watch, accessed on 2017-10-27
- ↑ 2017-11-22, Overwatch Hoodies. Blizzplanet, accessed on 2017-11-23
- ↑ 2018-09-20, Blizzard wants you to put an eye out with their new Genji sword collectible. Blizzard Watch, accessed on 2018-09-21
- ↑ 2018-10-02, Blizzard teases new Overwatch LEGO sets. Shack News, accessed on 2018-10-08
- ↑ 2018-10-22, Full lineup of LEGO Blizzard Overwatch sets revealed. The Brothers Brick, accessed on 2018-10-22.
- ↑ Blizzcon 2017, Overwatch: Archives
- ↑ 2015-12-10, How Blizzard is making up Overwatch's story as it goes. PC Gamer, accessed on 2015-12-24
- ↑ 2017-12-22, Every Overwatch Hero Explained by Blizzard’s Michael Chu | WIRED (1:13). Youtube, accessed on 2017-12-23
- ↑ 36.0 36.1 Blizzcon 2016, Overwatch - What's New
- ↑ Game Informer #105: Build 'em Up, Break 'em Down
- ↑ https://www.twitch.tv/videos/350526499
- ↑ Blizzcon 2017, Overwatch - Archives
- ↑ Overwatch Retribution
- ↑ Blizzcon 2019 Overwatch: Evolving the Art Panel
External links
| Heroes in Overwatch 2
| ||||||||||
|---|---|---|---|---|---|---|---|---|---|---|
Genji |
||||||||||